- 2 cups graham cracker crumbs
- 6 tbsp melted butter
- 2 tbsp sugar
- 16 oz full-fat cream cheese, softened
- 1 cup powdered sugar
- 1 tsp vanilla extract
- 1 tbsp lemon juice
- 1 ½ cups heavy whipping cream
- 1 ½ cups raspberries
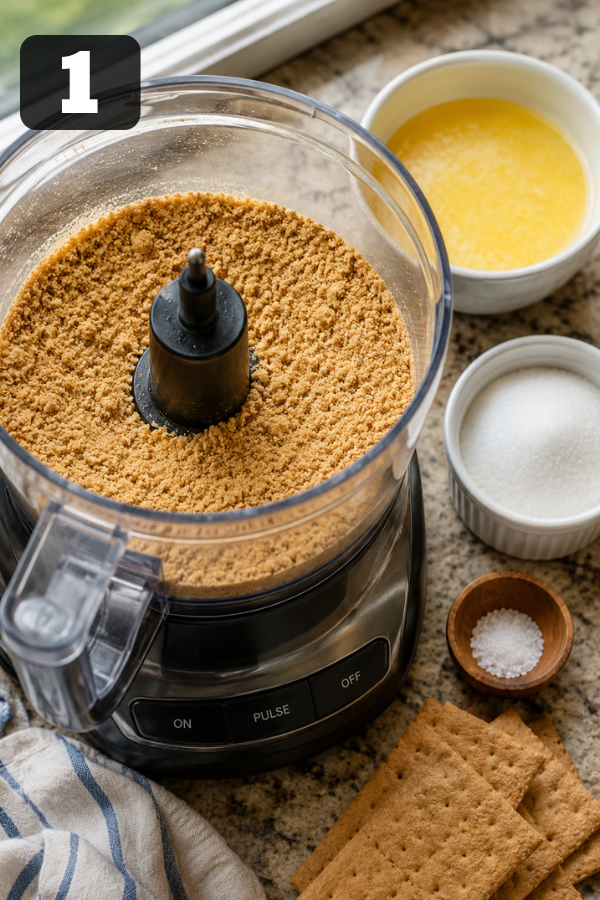
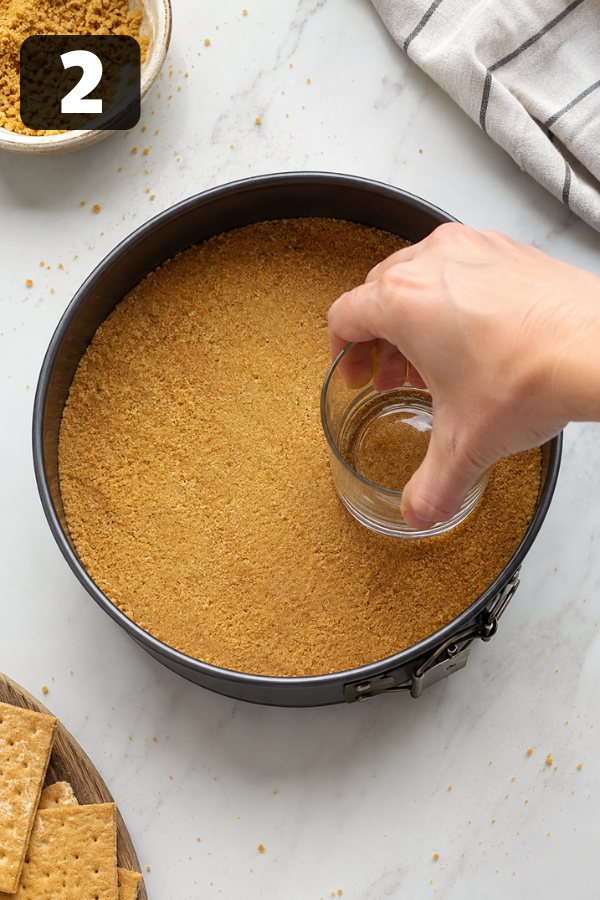
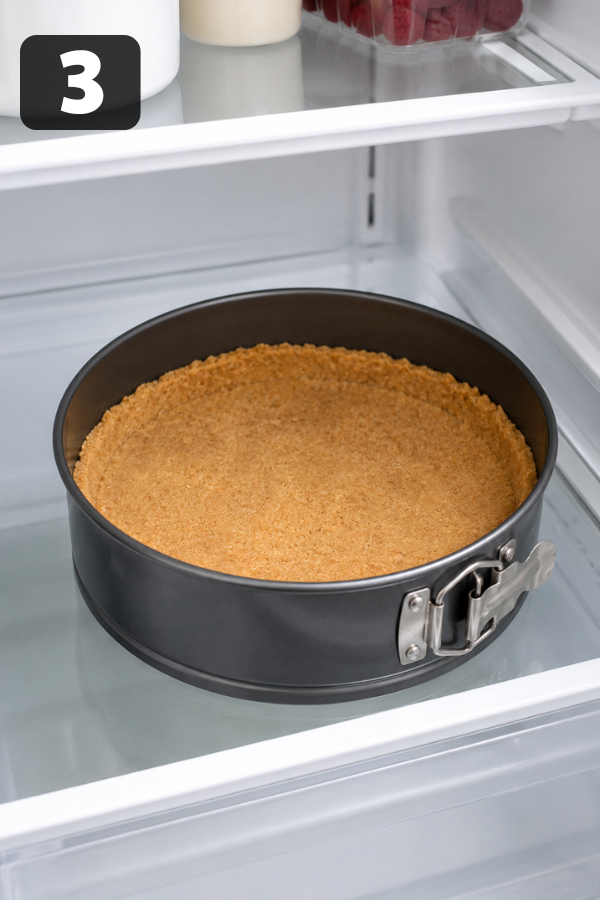
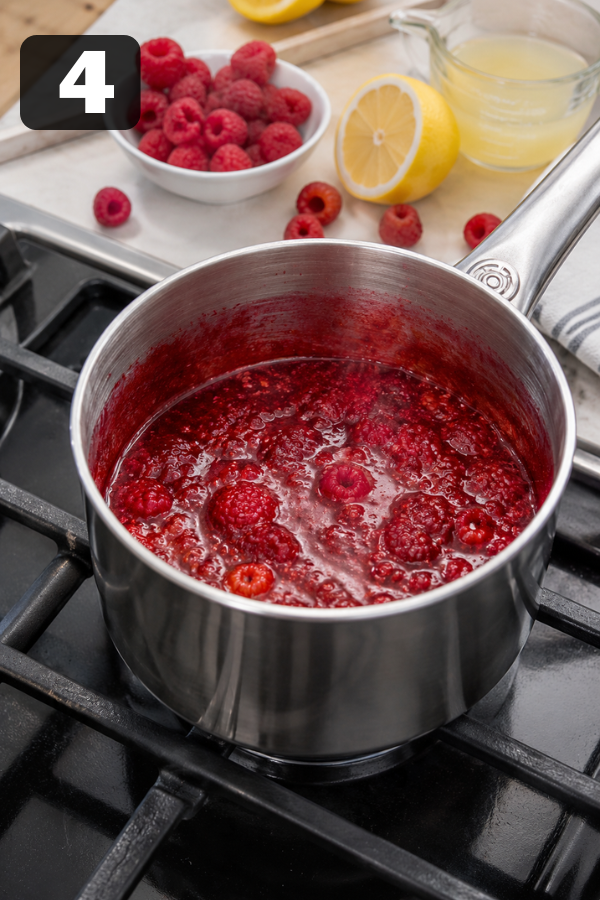
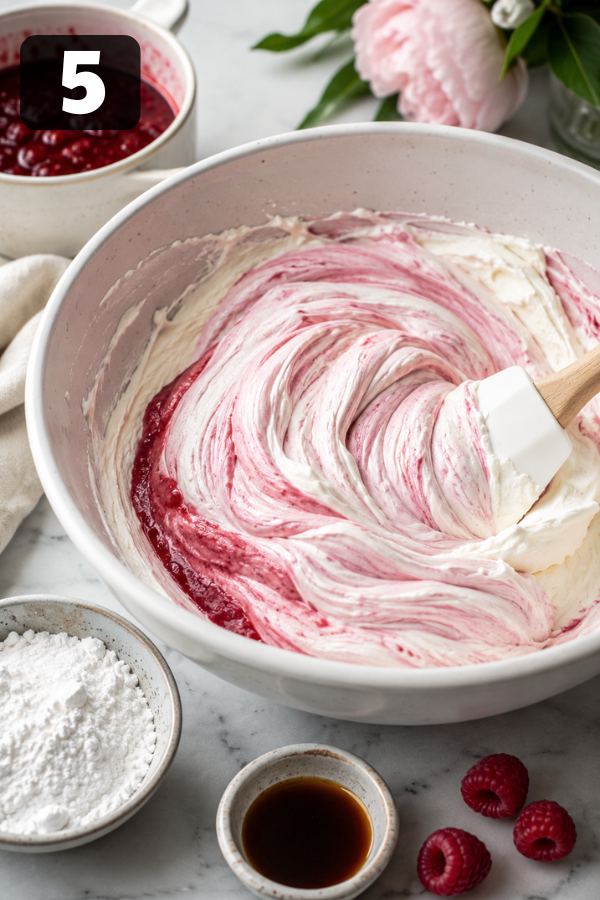
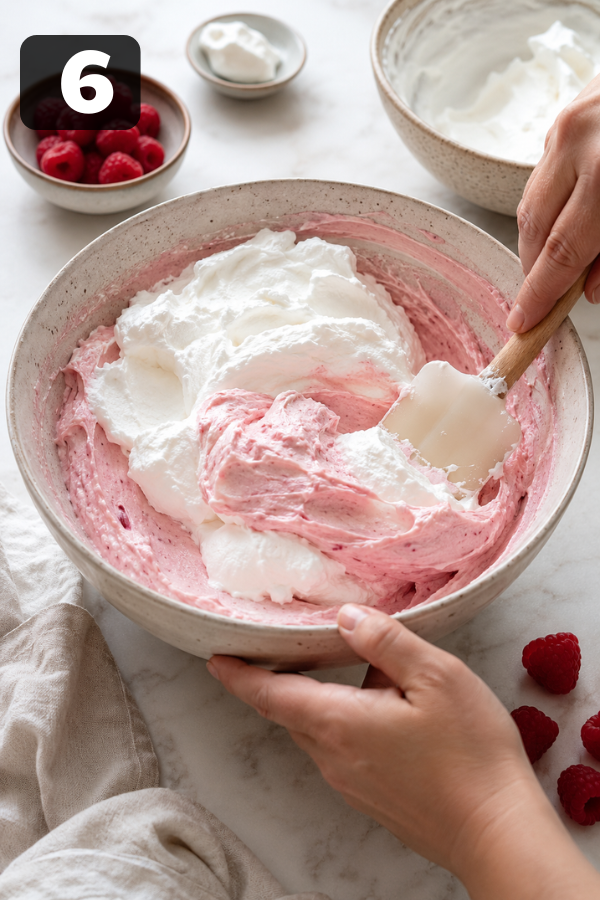
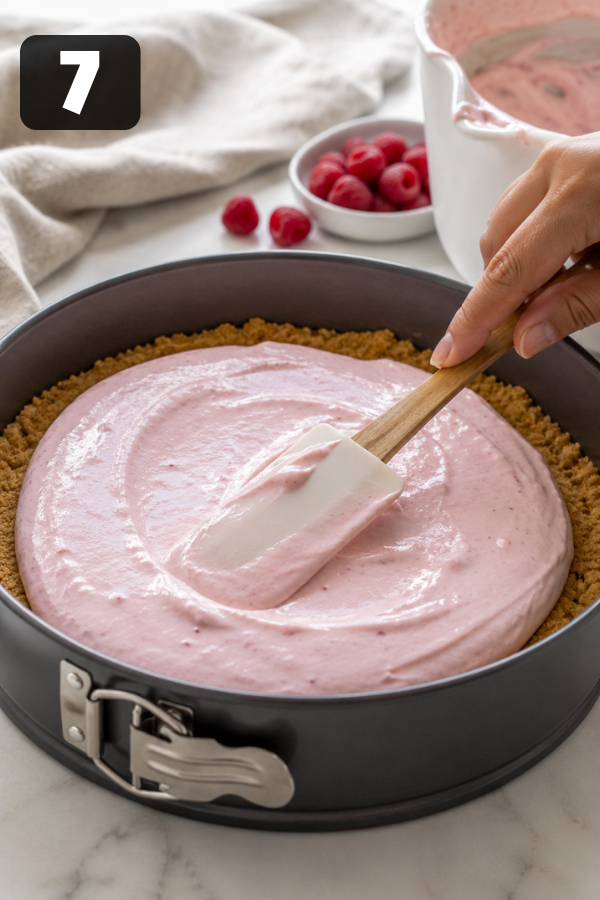
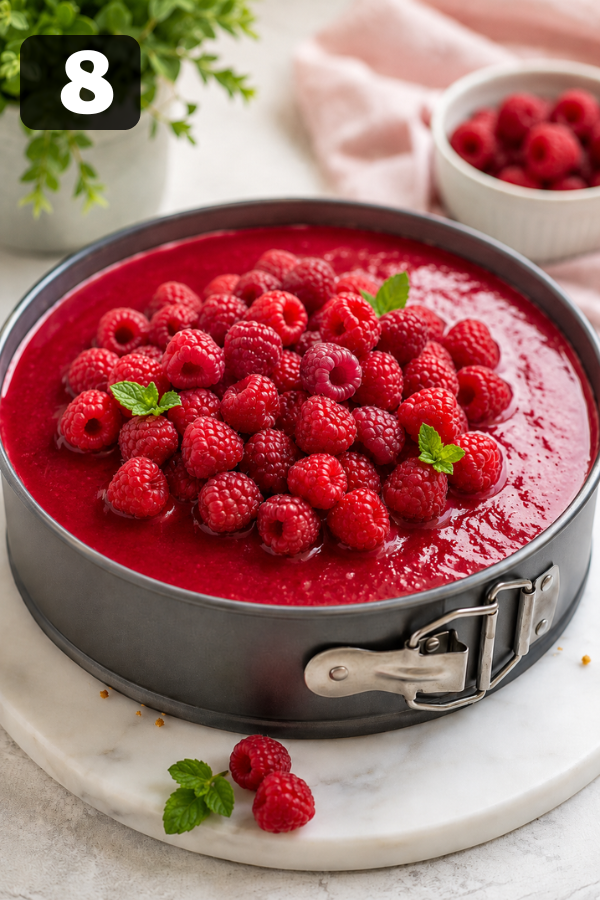
Step 1 – Crush and MixAdd graham crackers to a food processor and pulse until sandy. Mix with melted butter, sugar, and salt.The texture should resemble damp beach sand. If it looks dry and crumbly, add another spoonful of butter. Step 2 – Press Into the PanPress the mixture firmly into the bottom of a springform pan.Use the bottom of a measuring cup to flatten everything evenly. That little trick helps the crust stay together when sliced. Step 3 – Chill While You Make the FillingPlace the crust in the refrigerator for about 20 minutes.Cold crust = cleaner layers later. Small detail, big difference. Step 4 – Make the Raspberry MixtureAdd raspberries and lemon juice to a saucepan over medium heat.Cook for 5–7 minutes until the berries break down into a jammy sauce.If you dislike seeds, strain the mixture through a fine mesh sieve. Some people skip this step. Some swear by it. Honestly, either version tastes good.Let the raspberry mixture cool completely before using.Warm berries can ruin the texture of the filling. Learned that the hard way once. Step 5 – Beat the Cream CheeseIn a large bowl, beat softened cream cheese until smooth.No lumps. Seriously—take an extra minute here.Then mix in:Powdered sugarVanillaCooled raspberry mixtureThe color turns into this soft blush pink that already feels like summer. Step 6 – Whip the CreamIn a separate bowl, whip heavy cream until stiff peaks form.Don’t overmix. You want structure, not butter.Then gently fold the whipped cream into the raspberry cream cheese mixture.This is where the filling becomes airy and silky instead of dense and heavy.Kind of like folding clouds into cheesecake. Dramatic comparison? Maybe. But also accurate. Step 7 – Spread the FillingPour the filling over the chilled crust.Smooth the top with a spatula.If you want a prettier finish:Swirl extra raspberry sauce on topAdd whole berriesPipe whipped cream around the edges Step 8 – Chill Until FirmRefrigerate for at least 6 hours.Overnight is even better.You know what? This is one of those desserts that actually improves the next day. The flavors settle, the texture firms up, and slicing becomes much easier.