
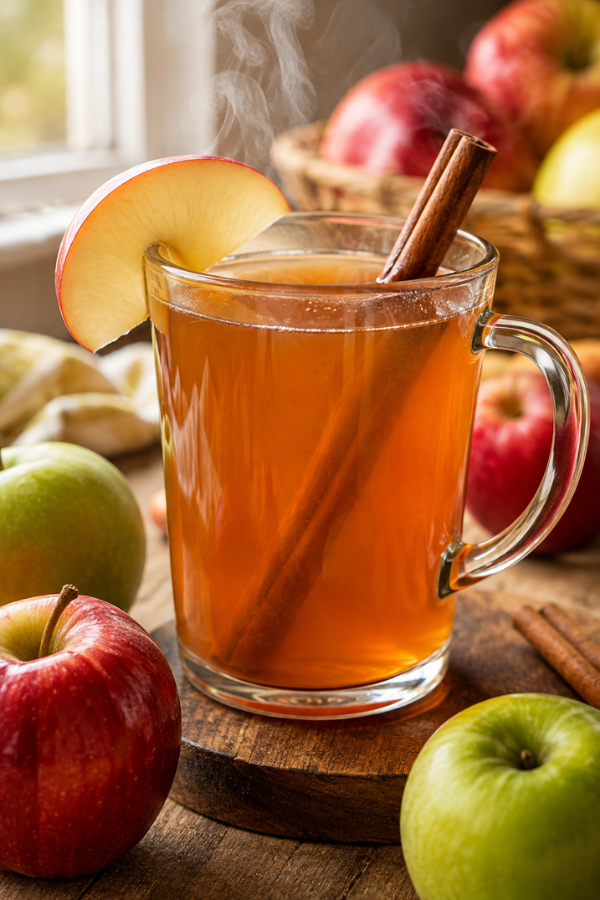
Homemade Apple Cider simmering on the stove has a way of making the whole kitchen feel warmer. Made with fresh apples, cinnamon, orange, and cozy spices, this simple fall drink fills the house with an inviting aroma long before the first mug is poured.
As the apples soften, the cider slowly changes from pale gold to a rich amber color. Meanwhile, cinnamon and warm spices drift through the kitchen, making even an ordinary afternoon feel a little more like fall.
Best of all, making apple cider from scratch is much easier than it sounds.
You don’t need any special equipment. Skip the apple press and juicer, and there’s no need to peel the apples either.
Simply simmer fresh apples with orange and warm spices until everything becomes very soft. Next, mash the fruit, strain the liquid, and sweeten it to taste. Since most of the cooking time is hands-off, this is an easy recipe for weekends, holiday prep, Thanksgiving gatherings, or any day when you want something warm and cozy.
Why You’ll Love This Homemade Apple Cider
This homemade cider is cozy enough for fall gatherings yet practical enough to make whenever you have a pile of apples on hand. Even better, most of the recipe requires very little active work.
- Sweetness is completely adjustable: Taste the cider after straining, then add only as much brown sugar or maple syrup as you need.
- A great use for extra apples: Slightly soft or imperfect apples work beautifully because they’ll be simmered and mashed.
- Mostly hands-off: Once the fruit is in the pot, you can let it simmer while you work on dinner, meal prep, or holiday cooking.
- Easy to make ahead: Refrigerate a batch and warm individual mugs throughout the week.
- Serve it hot or cold: Enjoy it warm on chilly evenings or chilled over ice when the weather is still mild.
- Family-friendly: The base recipe is completely nonalcoholic.
In addition, this recipe is naturally dairy-free and gluten-free. Use brown sugar or maple syrup, and it’s vegan too.
Ingredients You’ll Need
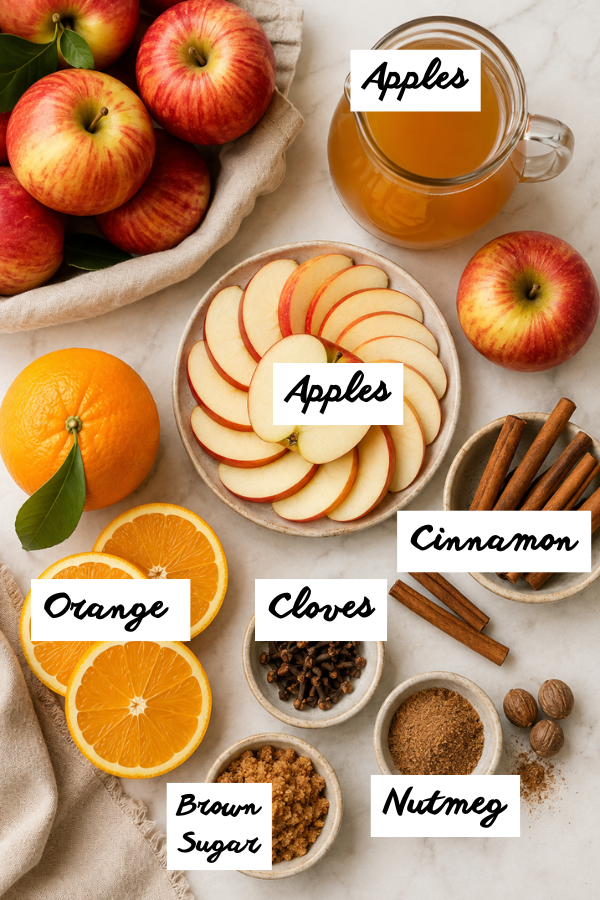
One of the best things about homemade apple cider is the short and simple ingredient list.
Apples
You’ll need about 10 medium apples, or roughly 4 pounds.
Instead of using just one variety, combine sweet and tart apples. As a result, the cider develops more depth without tasting overly sugary or too sharp.
A reliable combination is:
- 3 Honeycrisp apples
- 3 Gala or Fuji apples
- 4 Granny Smith apples
Honeycrisp and Gala bring sweetness and a fresh apple aroma. Meanwhile, Granny Smith adds acidity, which keeps the finished cider bright and balanced.
Don’t have those exact varieties? No problem. Use whatever apples are available.
The Rest of the Ingredients
You’ll also need:
- 1 medium orange, peeled and quartered
- 4 cinnamon sticks
- 1 teaspoon whole cloves
- 1 teaspoon whole allspice, optional
- ¼ teaspoon ground nutmeg
- 10–12 cups water, or enough to barely cover the fruit
- ¼–½ cup packed brown sugar or pure maple syrup
- Small pinch of salt, optional
Peeling the orange is worth the extra minute because the white pith can become bitter during a long simmer. Therefore, removing the peel gives the finished cider a smoother flavor.
Also, be careful with the amount of water you add. More water doesn’t mean more flavorful cider. Instead, pour in only enough to barely cover the apples.
Step-by-Step Instructions
Step 1: Prep the Fruit
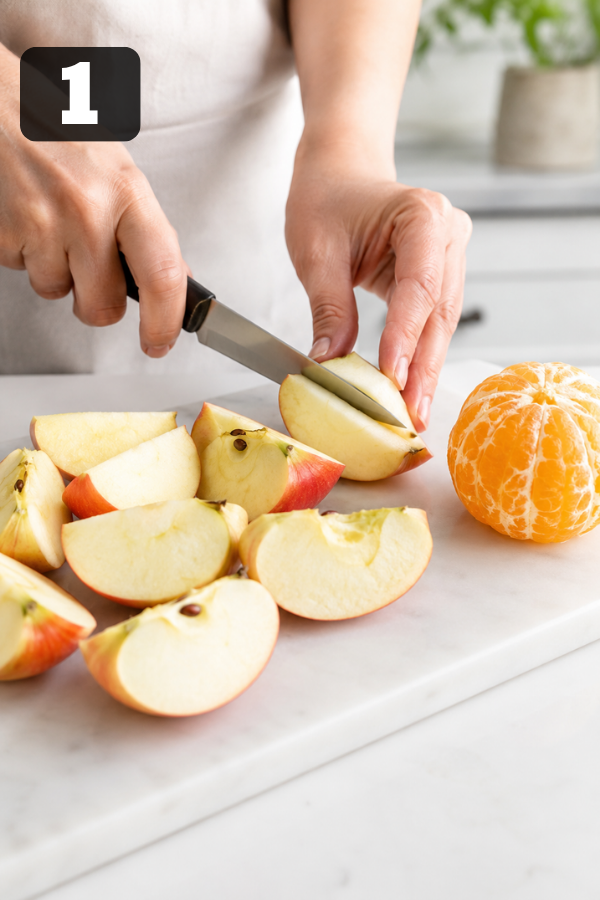
Wash the apples well and cut them into quarters.
There’s no need to peel them. In fact, the skins add color and flavor, and everything gets strained later anyway.
You can leave the cores in, although I prefer removing them. This makes the cooked fruit easier to mash and leaves less solid material behind during straining.
Finally, peel the orange and cut it into quarters.
Step 2: Fill the Pot
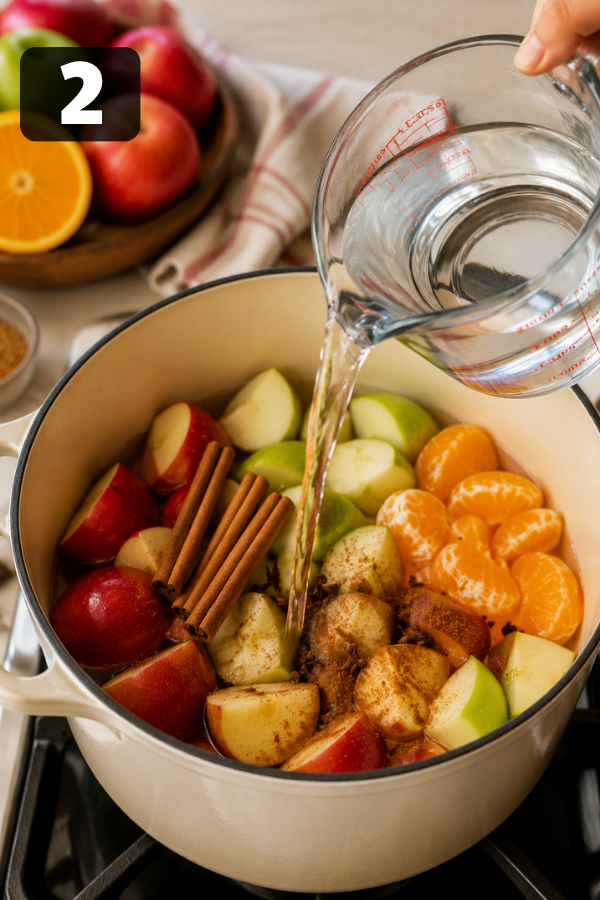
Next, place the apples and orange in a large stockpot.
Then, add the cinnamon sticks, cloves, allspice, nutmeg, and a tiny pinch of salt if using.
Pour in enough water to barely cover the fruit. Depending on your pot and the size of your apples, this will usually be around 10–12 cups.
However, leave a little room at the top of the pot so the cider has space to simmer without spilling over.
Step 3: Simmer Until the Apples Are Soft
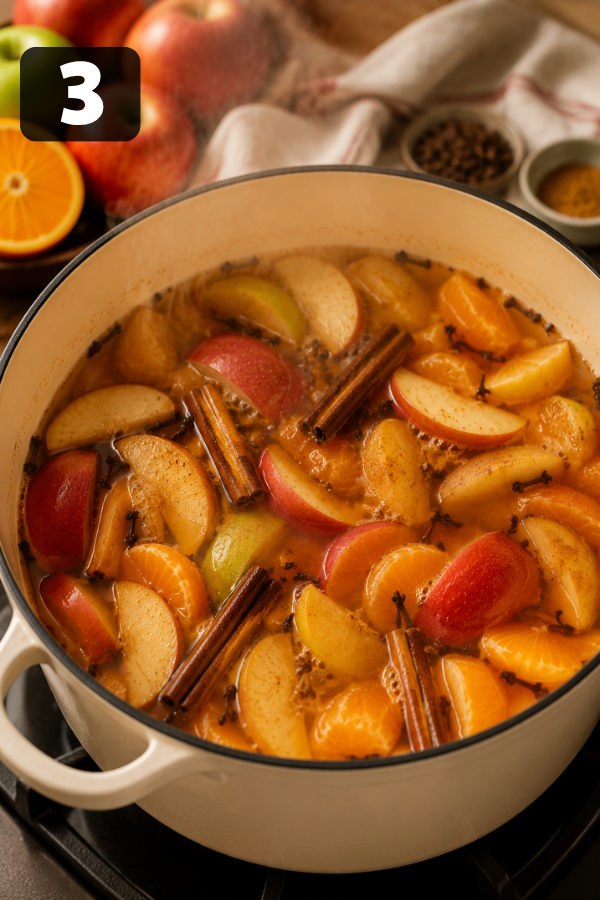
Bring the mixture to a boil over medium-high heat.
Once it starts bubbling, reduce the heat to a gentle simmer. Cover the pot and cook for about 2 hours.
After about two hours, the apples should be extremely soft. The liquid will look golden or amber, and your kitchen will smell like apples, cinnamon, and fall spices.
Try not to keep the mixture at a hard boil. Instead, maintain a gentle simmer so the fruit has time to soften and release its flavor without losing too much liquid.
Step 4: Mash the Apples
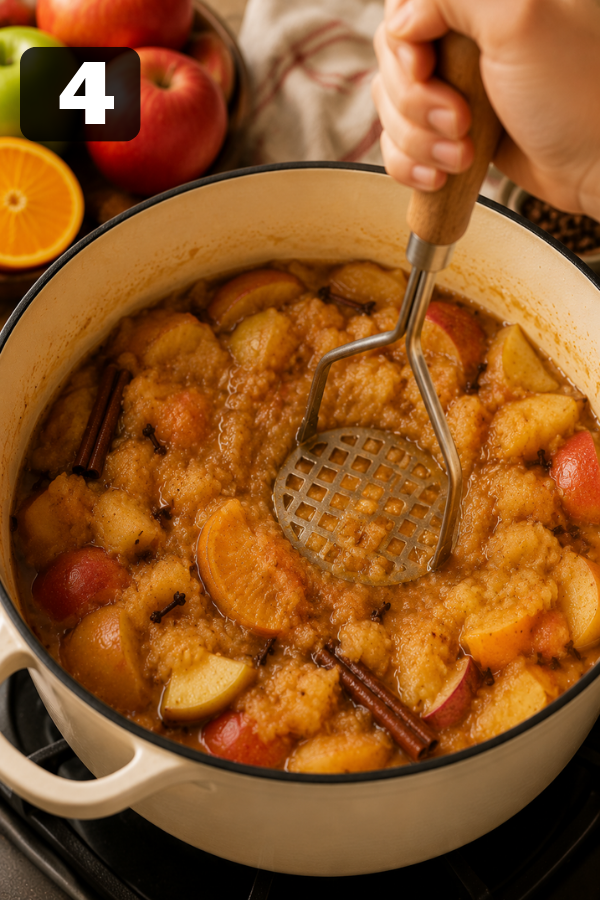
First, remove the orange pieces.
Then, use a potato masher or sturdy wooden spoon to crush the apples directly in the pot.
Mash them thoroughly until the fruit breaks down into a coarse pulp.
This step matters more than it may seem. Although the apples have already softened, mashing releases even more juice and concentrated apple flavor into the liquid.
Step 5: Simmer Again
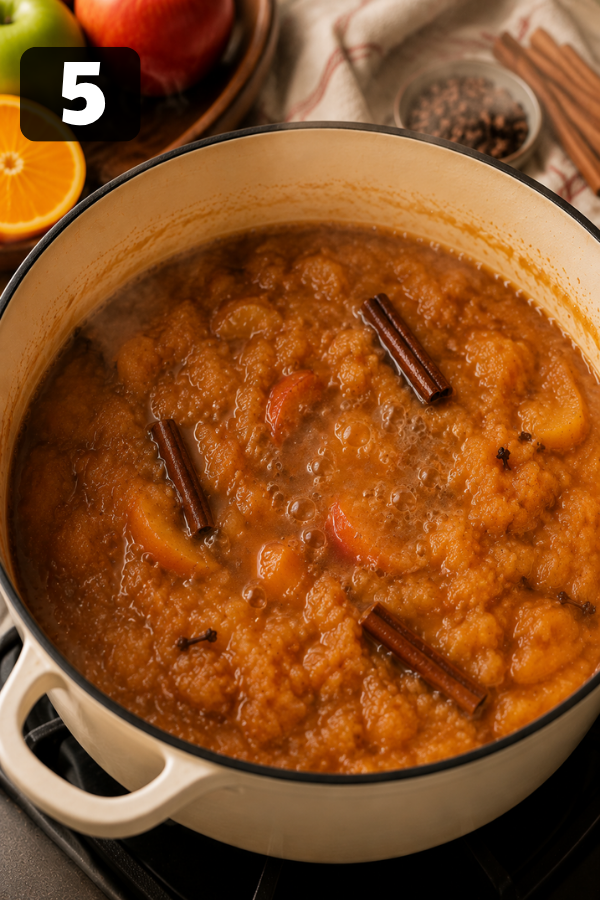
Leave the mashed apples in the pot and simmer for another 30–60 minutes.
At this point, you can leave the lid off.
If you want a stronger cider, simmer closer to one hour. As the cider cooks, some of the water evaporates and the apple flavor becomes more concentrated.
On the other hand, if the cider already tastes rich after 30 minutes, you can stop there.
Step 6: Strain the Cider
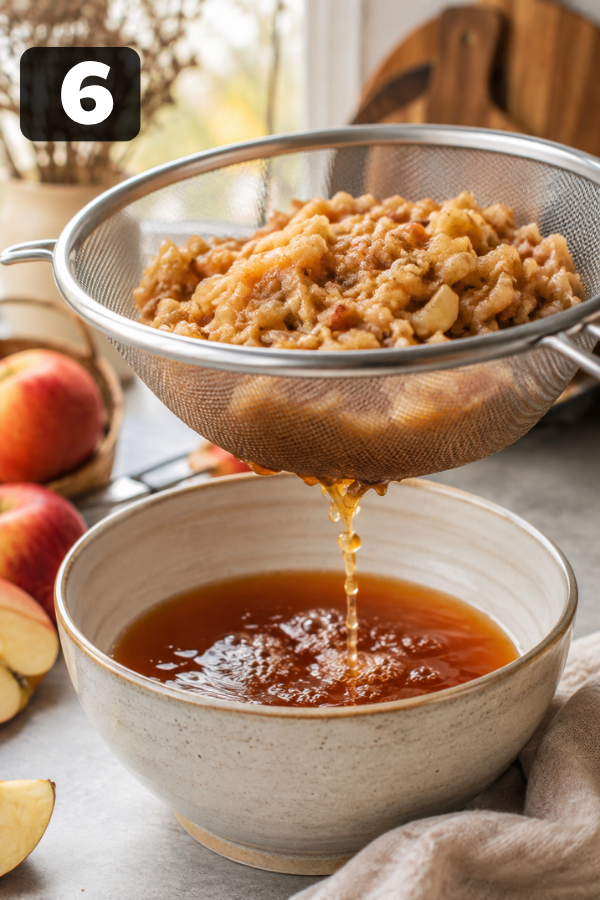
Next, place a fine-mesh strainer over a large heatproof bowl or another clean pot.
Ladle the apple pulp into the strainer a little at a time. Press it gently with the back of a spoon or ladle to squeeze out as much liquid as possible.
Afterward, pour the remaining cider through the strainer.
For an even smoother cider, strain it once more through cheesecloth.
Don’t worry if the finished cider is slightly cloudy. Homemade cider naturally contains more apple sediment than clear bottled apple juice.
Step 7: Sweeten to Taste
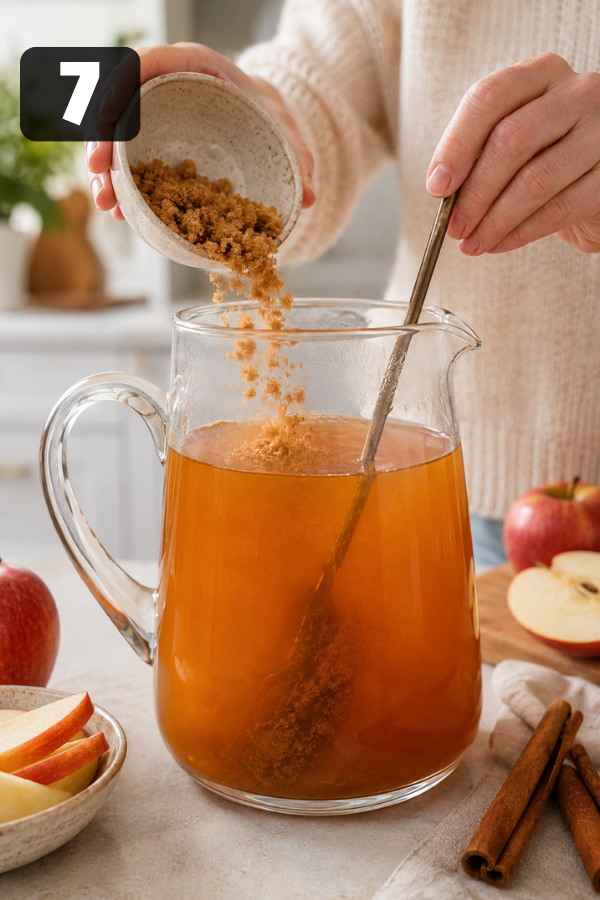
Finally, taste the cider before adding any sweetener.
Depending on your apple blend, the cider may already be naturally sweet. Therefore, start with about ¼ cup brown sugar or maple syrup.
Stir until dissolved, then taste again.
If needed, add more sweetener one tablespoon at a time, up to about ½ cup.
If the cider tastes sweet but slightly flat, add a small squeeze of fresh lemon juice. Sometimes, just a little acidity is enough to make the apple flavor taste brighter and fresher.
Tips for the Best Homemade Apple Cider
A few small choices can make a big difference.
Keep the Apple Peels On
There’s no need to peel the apples.
The skins save prep time, add color, and disappear when you strain the cider.
Use Whole Spices When Possible
Cinnamon sticks and whole cloves are easier to remove and leave less grit behind.
Ground spices work, but they tend to settle at the bottom of the mug.
Don’t Add Too Much Water
This is probably the most common reason homemade cider tastes weak.
Cover the fruit, but don’t drown it.
If the finished cider still tastes thin, simmer it uncovered for another 20–30 minutes.
Mash Thoroughly
If the cider smells fantastic but tastes strangely mild, the apples may not have released enough juice.
Mash them well before the second simmer.
Sweeten at the End
Apple sweetness changes from one batch to another.
A cider made mostly from Fuji apples may need very little sugar. A batch with lots of Granny Smith may need more.
It’s much easier to add sweetness than remove it.
Go Easy on the Cloves
Cloves are powerful.
A little gives you that familiar warm-spice flavor. Too much can take over the whole pot and make the cider taste harsh.
Slow Cooker Homemade Apple Cider
Want the easiest hands-off version?
Use your slow cooker.
Add the apples, peeled orange, spices, and water to a large slow cooker.
Cook on:
- LOW for 6–8 hours, or
- HIGH for 3–4 hours
Once the apples are very soft, mash them directly in the slow cooker.
Cook for another hour, then strain and sweeten the cider to taste.
This method is especially useful for Thanksgiving or fall parties because you can pour the strained cider back into the slow cooker and keep it warm for serving.
Instant Pot Homemade Apple Cider
If you’re short on time, the Instant Pot makes cider much faster.
Add the apples, orange, spices, and water to the pressure cooker. Never fill past the manufacturer’s maximum fill line.
Cook on High Pressure for 15 minutes.
Allow the pressure to release naturally for about 15–20 minutes.
Open the lid, mash the softened apples, then leave the cider on the Warm setting for another 20–30 minutes if you want stronger flavor.
Strain, sweeten, and serve.
It’s not quite the slow, cozy stovetop ritual—but on a busy Tuesday night, speed has its charms.
Easy Homemade Apple Cider Variations
Once you have the base recipe down, it’s easy to play with the flavors.
Maple Apple Cider
Use pure maple syrup instead of brown sugar.
It gives the cider a warm, slightly caramel-like finish.
Ginger Apple Cider
Add 1–2 inches of sliced fresh ginger while the cider cooks.
The ginger gives the drink a brighter, peppery warmth.
Cranberry Apple Cider
Add about 1 cup fresh or frozen cranberries with the apples.
This makes the cider more tart and gives it a lovely reddish color—perfect for Christmas gatherings.
Vanilla Apple Cider
Stir in about 1 teaspoon vanilla extract after straining.
Vanilla makes the cider softer and almost dessert-like.
Sparkling Apple Cider
Chill the cider completely.
Mix about:
- 2 parts cider
- 1 part sparkling water or club soda
Serve over ice with thin apple slices.
Spiked Apple Cider
Keep the main batch nonalcoholic.
For adults, add bourbon, dark rum, brandy, or whiskey to individual mugs.
That way, everyone can enjoy the same cider.
Storage & Leftover Notes
Let the cider cool before transferring it to airtight containers.
Refrigerator
Store Homemade Apple Cider in the refrigerator for about 5 days for the best flavor.
Reheat only what you need.
Freezer
Cider freezes very well.
Pour it into freezer-safe containers, leaving some space at the top for expansion.
For best quality, use it within about 3 months.
You can also freeze cider in ice cube trays. Toss a few cubes into sparkling water or thaw them later for single servings.
Reheating
Warm cider gently on the stove over low to medium heat.
For one serving, the microwave works fine. Heat in short intervals and stir between each one.
Avoid boiling the cider over and over because the flavor can become too concentrated.
What to Serve With Homemade Apple Cider
Warm cider works with everything from breakfast to dessert.
For brunch, serve it with:
- Cinnamon rolls
- French toast
- Pancakes
- Pumpkin bread
- Apple muffins
- Apple cider donuts
For a cozy afternoon snack, pair it with sharp cheddar, baked Brie, roasted nuts, or a simple charcuterie board.
The salty cheese balances the sweetness of the cider surprisingly well.
For dessert, try:
- Apple crisp
- Pumpkin pie
- Pecan pie
- Oatmeal cookies
- Vanilla ice cream
Honestly, even a warm mug of cider and a simple cookie feels like enough on a chilly evening.
Common Apple Cider Problems and How to Fix Them
My Cider Tastes Watery
Too much water or not enough mashing can weaken the flavor. Simmer uncovered for 20–30 minutes to concentrate it.
My Cider Is Bitter
Orange pith or too many cloves may be the cause. Dilute with apple juice and add a little sweetener if needed.
My Cider Is Too Sweet
Add a splash of hot water or a little lemon juice to balance the sweetness.
My Cider Tastes Bland
Add a squeeze of lemon juice or simmer a little longer. Next time, include more tart apples like Granny Smith.
My Cider Is Cloudy
That’s normal for homemade cider. For a clearer drink, strain it again through cheesecloth.
My Cider Is Too Thick
Strain it again and add a little hot water until it reaches your preferred consistency.
FAQs
1. Can I Make Homemade Apple Cider Without an Apple Press?
Yes. Simmer, mash, and strain the apples to make flavorful cider without special equipment.
2. Do I Have to Peel the Apples?
No. Leave the skins on—they save prep time and add color and flavor.
3. Can I Use Ground Cinnamon Instead of Cinnamon Sticks?
Yes. Use about 1 tablespoon, but expect the cider to look a little cloudier.
4. Can I Make Homemade Apple Cider Without Sugar?
Yes. Sweet apples like Fuji, Gala, or Honeycrisp may provide enough natural sweetness.
5. Is Homemade Apple Cider Alcoholic?
No. This recipe is nonalcoholic. Hard cider only becomes alcoholic through fermentation.
6. Can I Make Apple Cider Ahead of Time?
Yes. Make it 1–2 days ahead, refrigerate, and gently reheat before serving.
Nutrition Info
Approximate nutrition per 1-cup serving:
- Calories: 110
- Carbohydrates: 28g
- Sugar: 23g
- Fiber: 1g
- Protein: 0.5g
- Fat: 0g
- Sodium: 10mg
Nutrition will vary depending on the apples used, final yield, and how much brown sugar or maple syrup you add.
Final Thoughts
Homemade Apple Cider takes a little time, but very little of that time requires your attention.
You chop the apples, let them simmer, mash them, strain them, and suddenly there’s a pitcher of warm, spiced cider sitting on the counter.
Use whatever apples you have. Keep the water under control. Sweeten only as much as the cider actually needs.
Once you make it from scratch, it’s easy to see why this recipe becomes a fall tradition.
Don’t Miss: Maple Glazed Apple Blondies Recipe
Don’t Miss: Chocolate Covered Caramel Apple Slices
Also Try: Mini Pumpkin Pies
Ingredients
Method
- Prep the FruitWash and quarter the apples. Leave the skins on, remove the cores if desired, then peel and quarter the orange.

- Fill the PotAdd the apples, orange, cinnamon, cloves, allspice, nutmeg, and salt to a large pot. Pour in enough water to barely cover the fruit.
- SimmerBring to a boil, then reduce to a gentle simmer. Cover and cook for about 2 hours, until the apples are very soft.
- Mash the ApplesRemove the orange pieces, then mash the softened apples with a potato masher or wooden spoon until pulpy.
- Simmer AgainSimmer uncovered for another 30–60 minutes, depending on how strong you want the cider.
- StrainStrain through a fine-mesh sieve, pressing the apple pulp to extract as much liquid as possible. Strain again through cheesecloth for a smoother cider.
- Sweeten to TasteStir in ¼ cup brown sugar or maple syrup, taste, and add more as needed. Add a small squeeze of lemon juice if the cider needs more brightness.
