
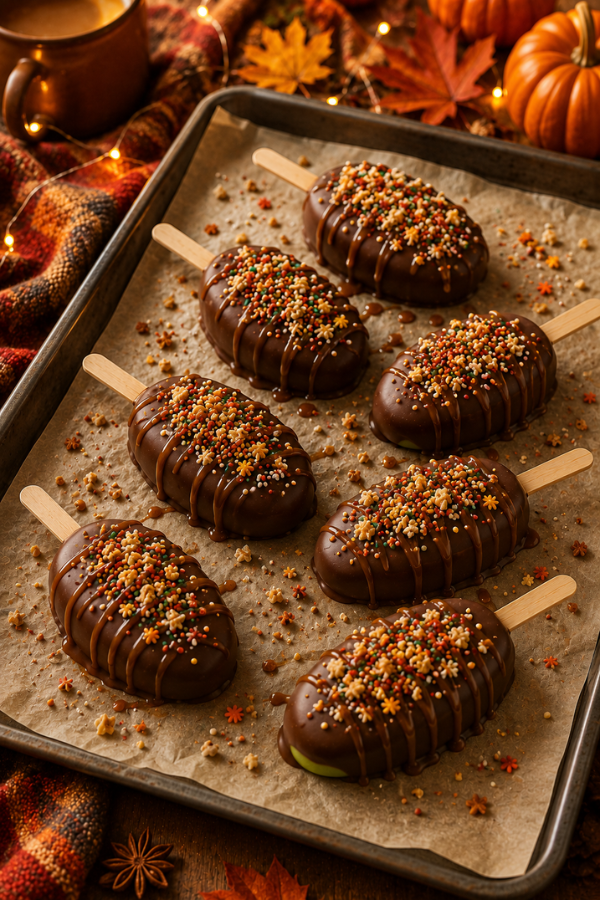
Chocolate Covered Caramel Apple Slices are the fun, easy version of classic caramel apples. You still get the crisp apple, sweet caramel, smooth chocolate, and crunchy toppings, but in neat little slices that are much easier to eat.
They’re perfect for fall parties, Halloween trays, Thanksgiving dessert boards, after-school snacks, or a cozy weekend treat. Best of all, there’s no baking, no fancy equipment, and no complicated technique involved. Instead, all you need are fresh apples, melted chocolate, caramel, and whatever toppings make your kitchen feel a little more festive.
Plus, they’re a lot less messy than whole caramel apples. That alone makes them worth making.
Why You’ll Love This Recipe
These apple slices are simple, quick, and fun. They feel special without asking too much from you, which is exactly the kind of dessert busy home cooks need.
You’ll love this recipe because:
- It’s no-bake and easy to prep.
- It uses simple ingredients you can find at most grocery stores.
- It’s easier to eat than a whole caramel apple.
- It’s great for kids, parties, snack boards, and fall gatherings.
- It can be customized with different chocolates, toppings, and dietary swaps.
Even better, each slice can be decorated differently. One might have chopped peanuts, while another can be finished with sprinkles or dark chocolate and sea salt. As a result, decorating these slices feels like a tiny dessert craft project that you get to eat afterward.
Plus, they’re a fun option when you want something playful that still starts with fresh fruit. They’re somewhere between a snack and a candy-inspired dessert, and that’s exactly what makes them so fun.
Ingredients
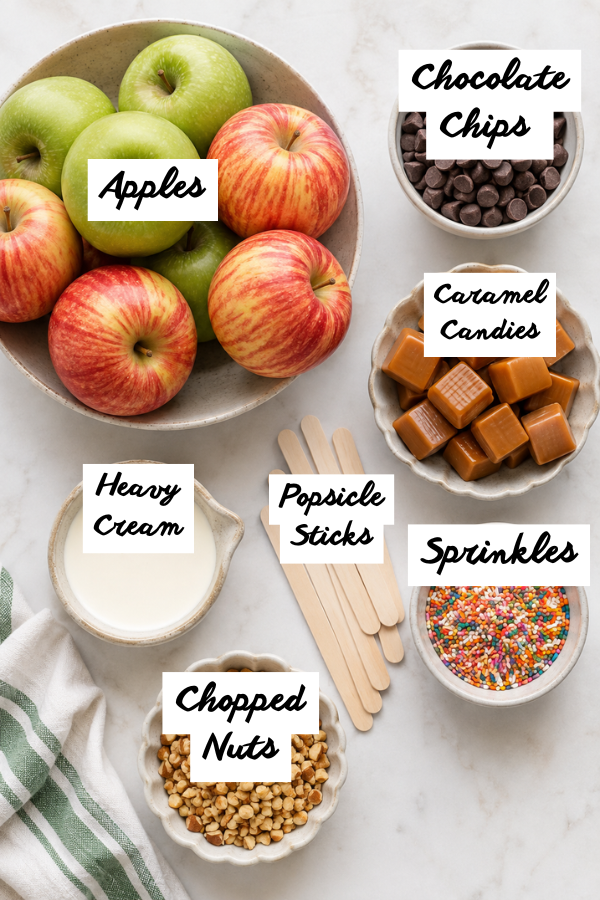
Apples
You’ll need 2 to 3 large apples.
The best apples for Chocolate Covered Caramel Apple Slices are firm and crisp. Soft apples can become mushy, and they don’t hold sticks as well.
Good choices include:
- Granny Smith apples
- Honeycrisp apples
- Pink Lady apples
- Fuji apples
- Gala apples
Granny Smith apples are a classic choice because their tart flavor balances the sweet chocolate and caramel. On the other hand, Honeycrisp apples are a great choice if you prefer something naturally sweeter while still keeping plenty of crunch.
Slice the apples about ½ inch to ¾ inch thick. Thinner slices are easier to bite, while thicker slices hold sticks better. If you want these to look like apple pops, go closer to ¾ inch.
Chocolate
You’ll need about 8 to 10 ounces of chocolate.
You can use:
- Dark chocolate melting wafers
- Milk chocolate melting wafers
- Semi-sweet chocolate chips
- White chocolate chips
- Vegan chocolate chips
Melting wafers are usually the easiest option because they melt smoothly and set nicely. However, chocolate chips work well too, although the melted chocolate may be slightly thicker.
If your chocolate feels too thick, stir in ½ teaspoon of coconut oil at a time until it becomes smooth enough to dip or drizzle.
Caramel
For the classic version, use:
- 8 ounces soft caramel candies
- 2 tablespoons heavy cream or milk
Soft caramel candies melt into a smooth, easy-to-control drizzle. However, avoid hard caramel candies because they don’t melt the same way and may become sticky or uneven.
You can also use:
- Store-bought caramel sauce
- Homemade caramel
- Dairy-free caramel
- Vegan caramel
- Date syrup for a lighter caramel-style drizzle
If you’re using caramel sauce from a jar, choose a thicker variety. Otherwise, a thin sauce may run off the apple slices before it has time to set.
Toppings
This is where the recipe gets fun.
Try:
- Chopped peanuts
- Chopped pecans
- Chopped walnuts
- Mini chocolate chips
- Sprinkles
- Crushed pretzels
- Crushed Oreos
- Graham cracker crumbs
- Shredded coconut
- Mini M&M’s
- Peanut butter chips
- Flaky sea salt
- Dried cranberries
Smaller toppings stick better than large chunks. If toppings are too heavy, they may slide off before the chocolate and caramel set.
Equipment
You’ll need:
- Sharp knife
- Cutting board
- Paper towels
- Baking sheet
- Parchment paper
- Microwave-safe bowls
- Spoon or fork for drizzling
- Popsicle sticks or lollipop sticks
A small paring knife also helps when inserting sticks into the apple slices.
Step-by-Step Instructions
Step 1: Prep the Baking Sheet and Toppings
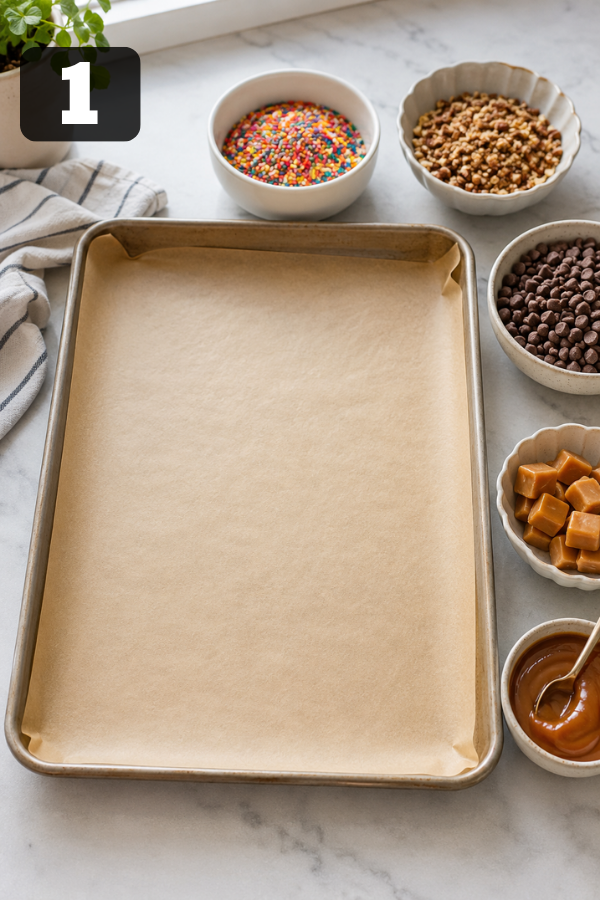
Line a baking sheet with parchment paper. Then, set your toppings nearby in small bowls so everything is ready once the chocolate and caramel are melted.
This keeps the apple slices from sticking and makes cleanup easier. In addition, it helps the decorating step move smoothly, especially if kids are helping.
Step 2: Slice and Dry the Apples
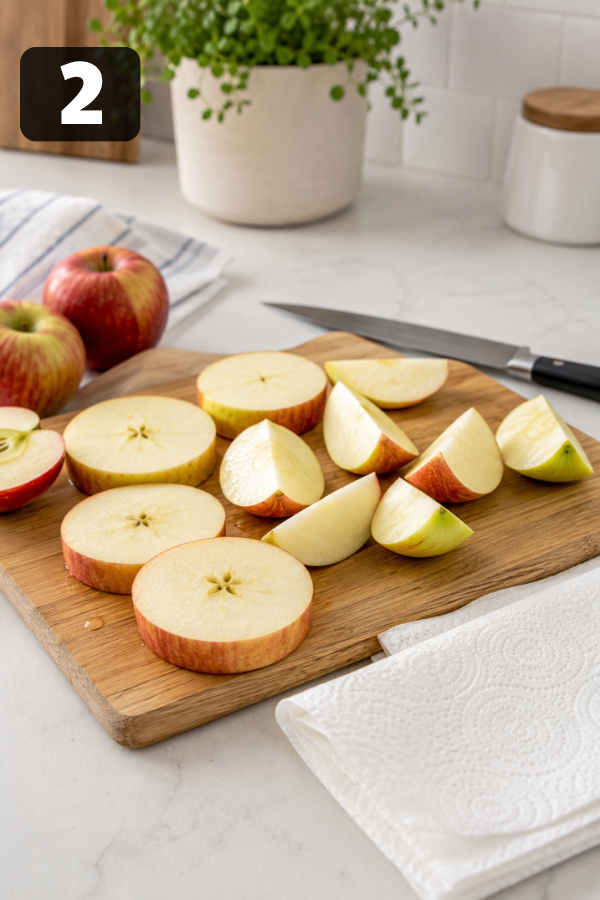
Wash and dry the apples, then slice them vertically into ½-inch to ¾-inch slices. Next, remove any seeds, stems, or tough core pieces with a small knife.
Most importantly, pat both sides and the edges of each apple slice very dry with paper towels. Moisture can prevent the chocolate from sticking properly. Therefore, if the slices begin to look wet again after sitting for a few minutes, pat them dry once more before dipping.
Step 3: Add the Sticks
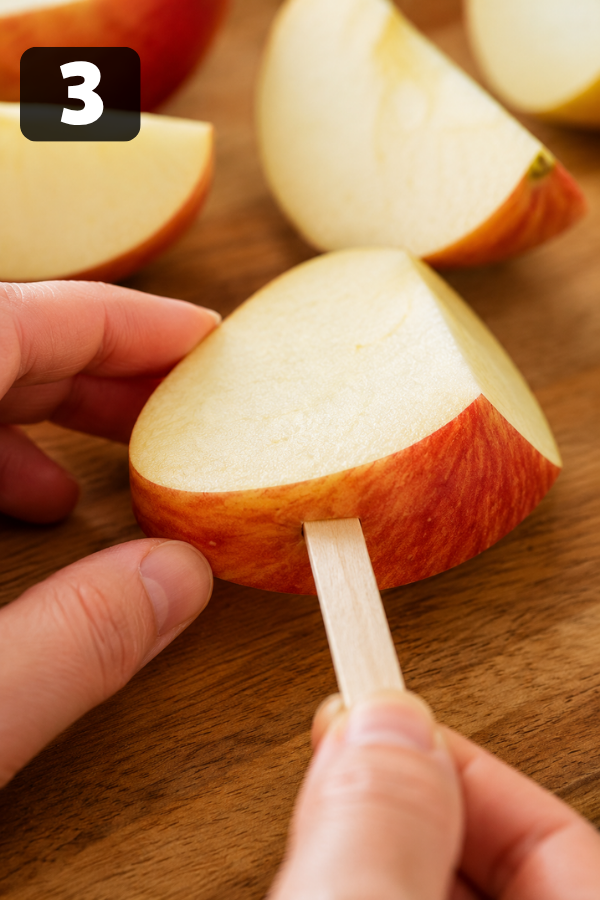
Push a popsicle stick into the bottom of each apple slice, about halfway into the fruit. Be careful not to push it all the way through, or the apple may split.
If necessary, make a tiny slit with a paring knife first, then gently slide the stick inside. Flat popsicle sticks usually provide better support than round sticks.
Step 4: Melt the Chocolate and Dip the Apple Slices
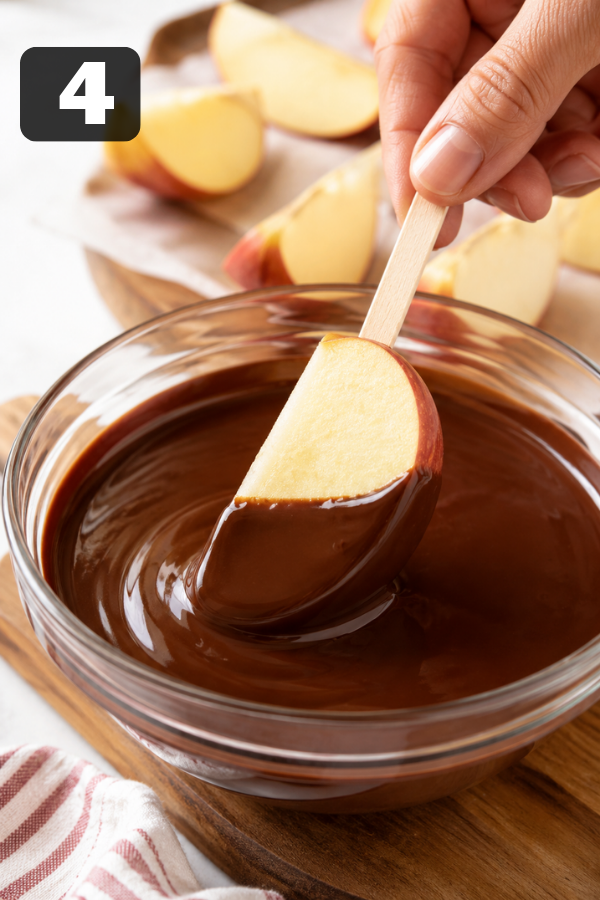
Place the chocolate in a microwave-safe bowl. Microwave it in 20- to 30-second intervals, stirring well after each round, until smooth.
If needed, stir in a small amount of coconut oil, starting with ½ teaspoon, to thin the chocolate.
Next, dip each apple slice into the melted chocolate. You can fully coat the slice or drizzle chocolate over the top. However, a full coating usually gives the cleanest result and creates a better base for the caramel.
Let the extra chocolate drip back into the bowl, then place the slices on the parchment-lined baking sheet.
Step 5: Chill the Chocolate
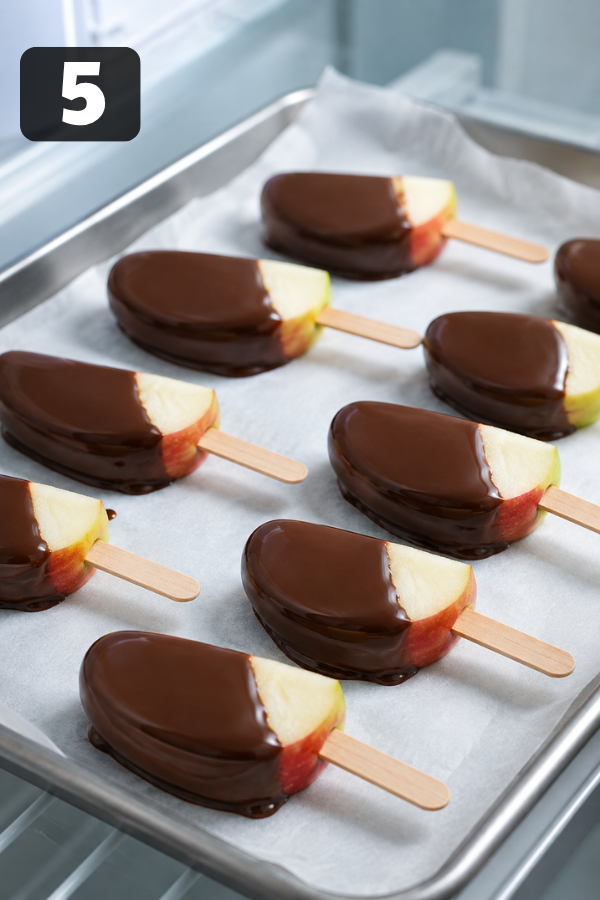
Place the baking sheet in the refrigerator for 5 to 10 minutes, or until the chocolate feels firm.
This way, the chocolate has time to set before you add the caramel. Otherwise, warm caramel can melt into soft chocolate and make the layers look messy.
Step 6: Melt the Caramel, Cool Slightly, and Drizzle
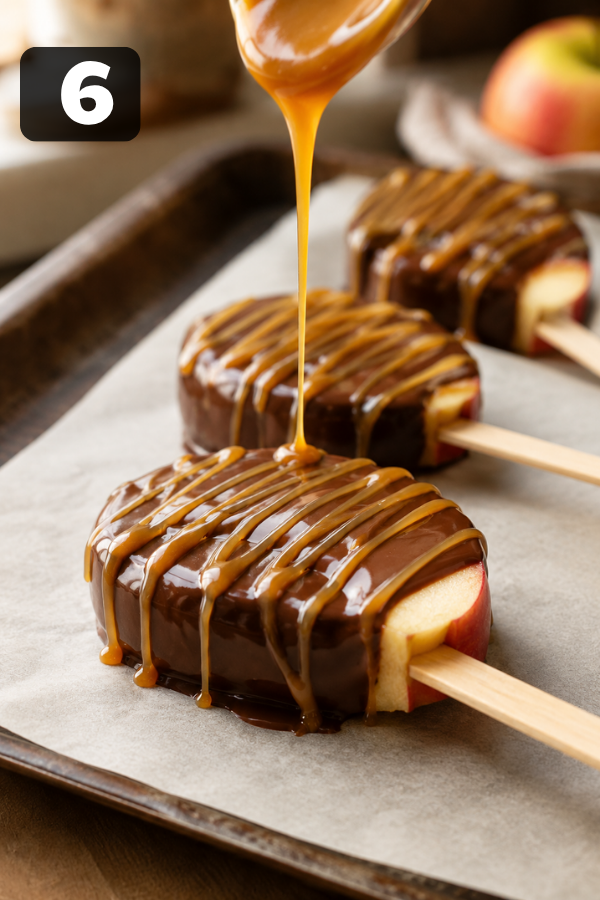
Place the soft caramel candies and cream or milk in a microwave-safe bowl. Microwave in 20- to 30-second intervals, stirring after each round, until smooth.
Afterward, let the caramel rest for about 5 minutes. It should still be warm and glossy, but it shouldn’t be steaming hot.
Finally, drizzle the caramel over the chocolate-coated apple slices using a spoon, fork, piping bag, or zip-top bag with a tiny corner cut off.
Step 7: Decorate, Chill, and Serve
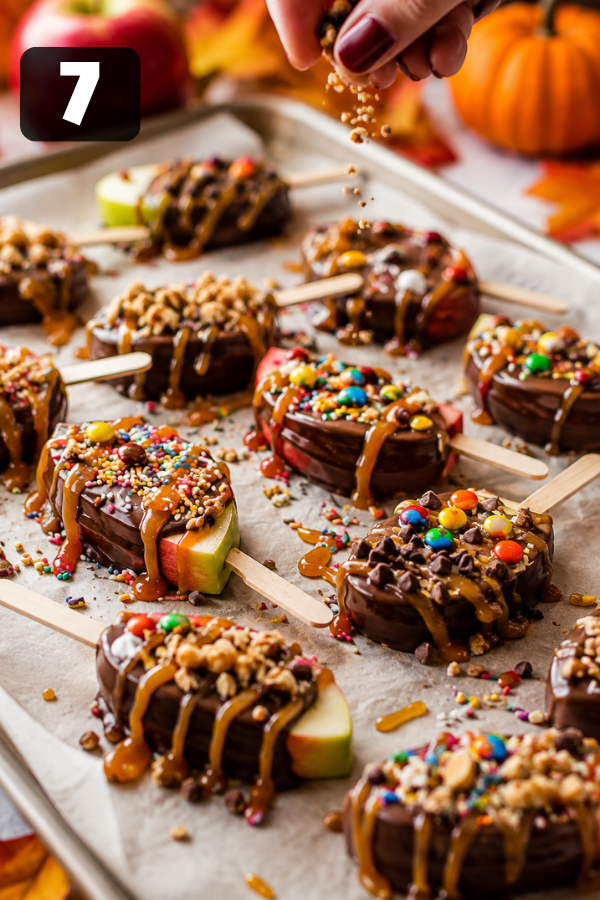
Add toppings right away while the caramel is still sticky.
Try:
- Dark chocolate + caramel + flaky sea salt
- Milk chocolate + caramel + chopped peanuts
- White chocolate drizzle + sprinkles
- Semi-sweet chocolate + crushed pretzels
- Chocolate + caramel + mini M&M’s
- Caramel + graham cracker crumbs + cinnamon
Once decorated, chill the finished apple slices for 10 to 15 minutes, or until the chocolate and caramel are set. Serve them cold or slightly chilled, ideally the same day for the freshest texture.
Tips for Success
The biggest secret to successful Chocolate Covered Caramel Apple Slices is simple: keep the apple slices dry.
Chocolate and caramel don’t stick well to wet fruit. For that reason, pat the apples dry immediately after slicing. Then, check them again before dipping and remove any moisture that has appeared on the surface.
In addition, keep these tips in mind:
- Use firm apples, not soft ones.
- Slice apples thick enough to hold sticks.
- Chill the chocolate before adding caramel.
- Let caramel cool slightly before drizzling.
- Add toppings while the caramel is still sticky.
- Use small toppings so they stay in place.
- Serve the same day for the best texture.
For beginners, chocolate melting wafers and store-bought soft caramels are the easiest and most reliable choices. Meanwhile, more experienced cooks can experiment with homemade caramel, multiple types of chocolate, or themed topping combinations.
If you want a lighter option, use dark chocolate, reduce the amount of caramel, and choose toppings such as coconut, chopped nuts, cacao nibs, or flaky sea salt.
Storage and Leftover Notes
Chocolate Covered Caramel Apple Slices taste best the day they’re made.
You can store leftovers in an airtight container in the refrigerator for 1 to 3 days, but the texture will soften over time. The apples may release juice, and the chocolate may loosen a little.
To store them:
- Place slices in a single layer if possible.
- Use parchment paper between layers if stacking.
- Keep them chilled.
- Don’t leave them out for long periods.
These are not the best dessert to make far ahead for a party. If you want to save time, prep the toppings, unwrap the caramels, line the baking sheet, and set out the sticks ahead of time. Slice and decorate the apples closer to serving.
Freezing is not recommended for the best texture. A quick freezer chill can help set the chocolate, but frozen and thawed apples can turn soft and watery.
What to Serve With Chocolate Covered Caramel Apple Slices
These apple slices work well with fall drinks, simple snacks, and dessert boards.
Serve them with:
- Hot apple cider
- Hot chocolate
- Chai tea
- Coffee
- Cold milk
- Sparkling apple juice
For a party tray, pair them with:
- Pretzels
- Marshmallows
- Strawberries
- Popcorn
- Graham crackers
- Mini cookies
- Brownie bites
- Roasted nuts
For Halloween, use candy eyes, orange sprinkles, crushed cookies, and white chocolate drizzle.
For Thanksgiving, try pecans, cinnamon sugar, caramel, and flaky sea salt.
For a cozy movie night, serve them with popcorn and warm cider. It’s simple, but it feels special. And sometimes that’s exactly what everyone needs.
Variations
Vegan Chocolate Covered Caramel Apple Slices
Use vegan chocolate, vegan caramel, and dairy-free milk. Top with coconut flakes, chopped nuts, vegan sprinkles, or crushed gluten-free cookies.
Gluten-Free Chocolate Caramel Apple Slices
Use gluten-free chocolate, gluten-free caramel, and gluten-free toppings. Avoid regular cookies, pretzels, and candy bars unless the label says gluten-free.
Nut-Free Apple Slices
Skip the nuts and use sprinkles, mini chocolate chips, crushed cookies, coconut, or candy pieces. If allergies are a concern, check every label carefully.
Salted Dark Chocolate Apple Slices
Use Granny Smith apples, dark chocolate, caramel drizzle, and flaky sea salt. This version is rich, sharp, sweet, and a little more grown-up.
Candy Bar Apple Slices
Top the slices with chopped peanut butter cups, mini M&M’s, crushed Oreos, or chopped chocolate bars. This is a smart way to use leftover Halloween candy.
Apple Pie Style Slices
Use caramel, white chocolate drizzle, crushed graham crackers, and a tiny sprinkle of cinnamon. It tastes like apple pie met a candy apple and decided to become a snack.
Apple Nachos
Skip the sticks and slice the apples into wedges. Arrange them on a platter and drizzle with chocolate, caramel, nut butter, and toppings.
This is a good choice when you don’t want to fuss with dipping individual slices.
Common Issues and Their Solutions
Chocolate Won’t Stick to the Apple
The apple slices are probably too wet. Pat both sides and the edges very dry with paper towels before dipping. If they release more juice, let them sit on paper towels for a few minutes and dry them again.
Caramel Slides Off
Caramel can slide if it is too hot, too thin, or added directly to wet apple. For the best result, coat the apple slices with chocolate first, chill until firm, then drizzle the caramel on top.
Caramel Melts the Chocolate
The caramel was likely too hot. Let it cool for about 5 minutes before drizzling. It should be warm and smooth, but not steaming.
Apples Turn Brown
Cut apples naturally brown when exposed to air. To slow this down, dip slices briefly in lemon water using 1 tablespoon lemon juice mixed with 1 cup water, then pat them very dry before coating.
Toppings Fall Off
The chocolate or caramel may have set before the toppings were added. Add toppings right after drizzling, while the surface is still sticky, and use smaller toppings so they hold better.
FAQs
1. Can I make Chocolate Covered Caramel Apple Slices ahead of time?
You can prep the toppings, sticks, and baking sheet ahead, but it’s best to slice and decorate the apples close to serving time. They taste best the same day.
2. What apples are best for this recipe?
Granny Smith and Honeycrisp are the best choices. Granny Smith is tart and firm, while Honeycrisp is sweet, crisp, and juicy.
3. Can I use chocolate chips instead of melting wafers?
Yes. Chocolate chips work well, but they may melt thicker than wafers. Add a little coconut oil if you need a smoother texture.
4. Can I use caramel sauce instead of caramel candies?
Yes, but choose a thick caramel sauce. Thin caramel sauce can run off the apple slices and make them messy.
5. How do I keep apple slices from turning brown?
Use a quick lemon-water dip, then pat the slices very dry. Fully coating the apple slices in chocolate also helps reduce air exposure.
6. How thick should the apple slices be?
Aim for ½ inch to ¾ inch thick. Thicker slices hold sticks better, while thinner slices are easier to bite.
Nutrition Info
Nutrition depends on the size of the apple slices, the amount of chocolate and caramel, and the toppings you choose.
A typical slice may have around 150 to 300 calories.
To make them lighter:
- Use dark chocolate.
- Use less caramel.
- Choose nuts, coconut, or sea salt instead of candy.
- Make smaller slices.
- Serve one slice per person.
They’re still a treat, of course. But they’re a treat with a crisp apple center, and that makes them feel a little fresher than a plate of straight candy.
Final Thoughts
Chocolate Covered Caramel Apple Slices are simple, fun, and just messy enough to feel homemade. They give you all the flavor of a classic caramel apple in an easier, party-friendly form. Keep the apple slices dry, chill the chocolate before adding caramel, and serve them the same day for the best crunch and texture.
Don’t Miss: Maple Glazed Apple Blondies Recipe
Don’t Miss: Salted Caramel Cheesecake
Also Try: Watermelon Fries
Ingredients
Method
- Prep the baking sheet: Line a baking sheet with parchment paper. Set toppings in small bowls so they’re ready for decorating.

- Slice and dry the apples: Wash, dry, and slice apples into ½-inch to ¾-inch slices. Remove seeds and core pieces, then pat each slice very dry with paper towels.
- Add the sticks: Push a popsicle stick halfway into the bottom of each apple slice. If needed, make a small slit first to prevent splitting.
- Melt and dip: Melt chocolate in 20- to 30-second intervals, stirring until smooth. Dip each apple slice in chocolate, let excess drip off, then place on the lined baking sheet.
- Chill the chocolate: Refrigerate for 5 to 10 minutes, or until the chocolate feels firm.
- Melt and drizzle caramel: Melt soft caramels with cream or milk in short intervals, stirring until smooth. Let cool for about 5 minutes, then drizzle over the chocolate-coated apples.
- Decorate and serve: Add toppings while the caramel is sticky. Chill for 10 to 15 minutes, then serve cold or slightly chilled the same day.
