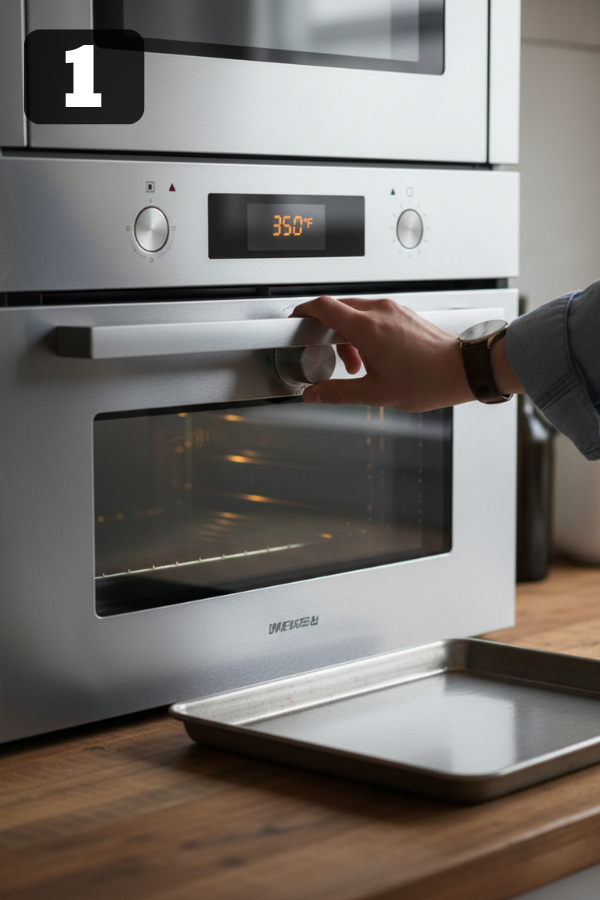
Preheat The Oven To 350°F
Why 350°F matters: It’s hot enough to cook chicken and help liquid absorb into rice without scorching the sauce.
Pan choice: Use a 9×13-inch baking dish with enough depth to hold liquid and allow stirring without spilling.
Quick setup: Lightly grease the dish (spray or a thin swipe of oil) so rice and sauce don’t stick at the corners.
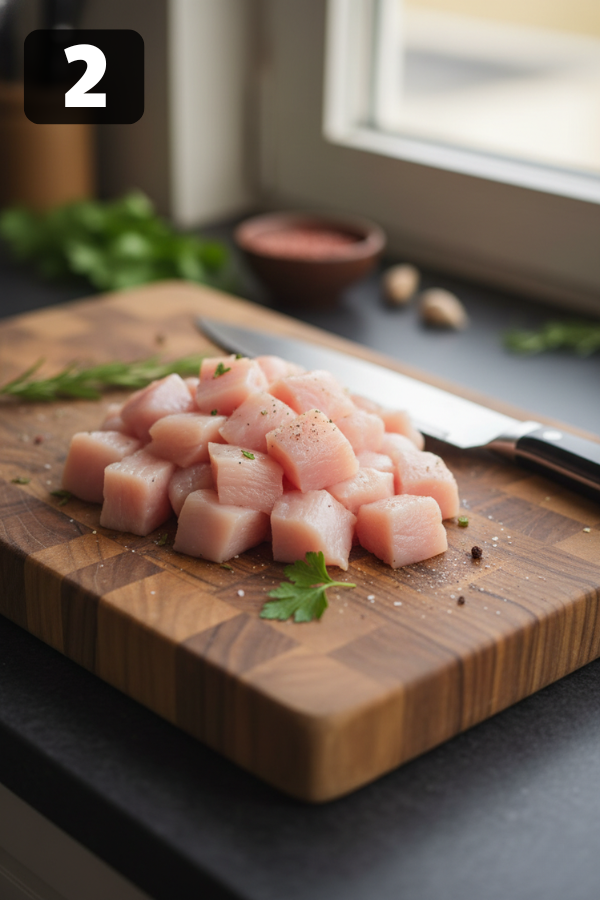
Cut The Chicken Into Even Bites (½ To 1 Inch)
Target size: Aim for uniform cubes—this is what keeps the chicken from drying out while the rice finishes.
Practical rule:
Too small → chicken cooks early and can turn dry.
Too big → chicken may lag behind the rice.
Speed tip (still “clean”): If the chicken is slightly firm (not frozen), it’s easier to cut evenly.
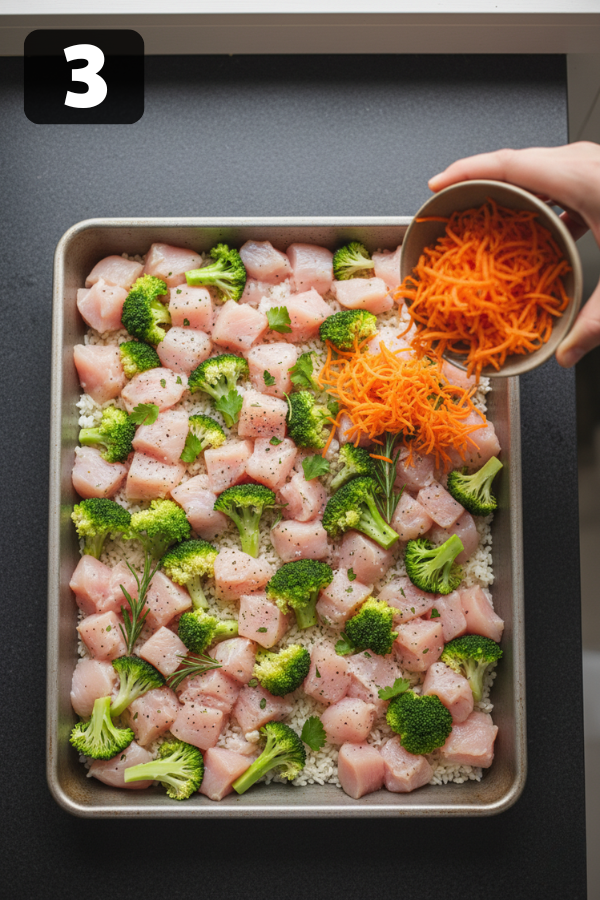
Add To A 9×13 Dish: Chicken + Broccoli + Instant Rice, Then Shredded Carrots
Order helps mixing: Put rice in early so it gets coated evenly once sauces go in.
Broccoli note:
Fresh broccoli holds texture better.
Frozen broccoli works, but can add extra moisture—expect slightly softer veggies.
Carrots: Shredded carrots soften quickly and spread sweetness through the dish without extra chopping.
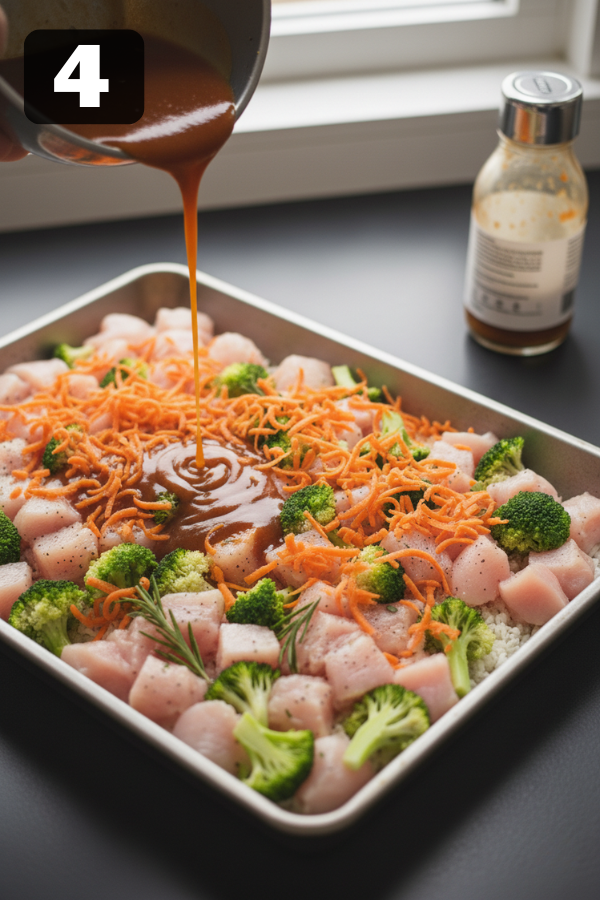
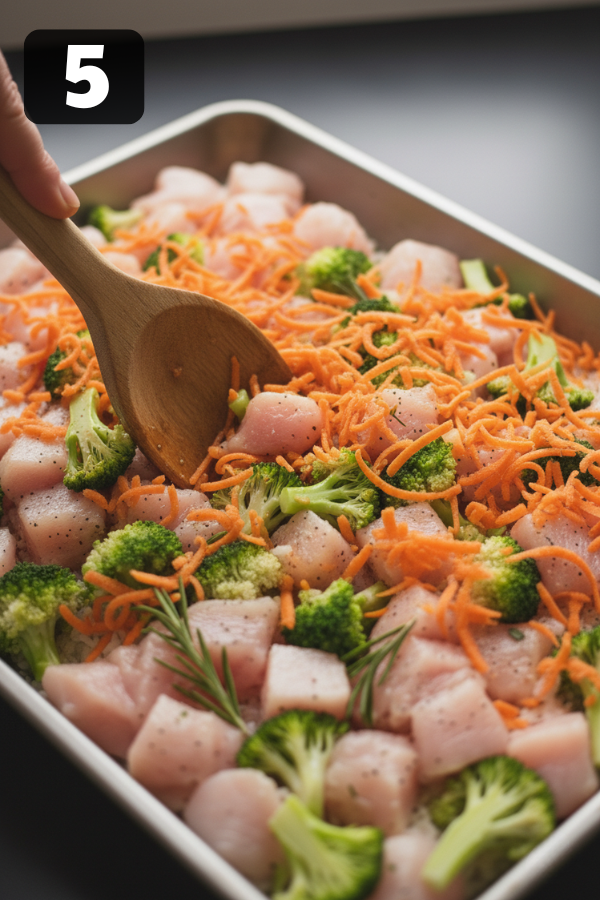
Pour In The Sauces (Teriyaki + A Little Hoisin) And Stir Well
Goal: Coat every grain of rice with sauce so the rice “cooks in flavor,” not just broth.
Why add hoisin: It adds deeper sweetness and a richer “glossy” feel to the sauce—small amount, big impact.
Mixing checkpoint: After stirring, you should see sauce on most rice grains and chicken pieces—not just pooling in one corner.
Add Chicken Broth And Mix Again
What broth does: It’s the cooking liquid for instant rice and keeps the casserole from drying out.
Mixing checkpoint: Broth should be distributed evenly—if it’s sitting mostly at the edges, stir again so the center cooks evenly too.
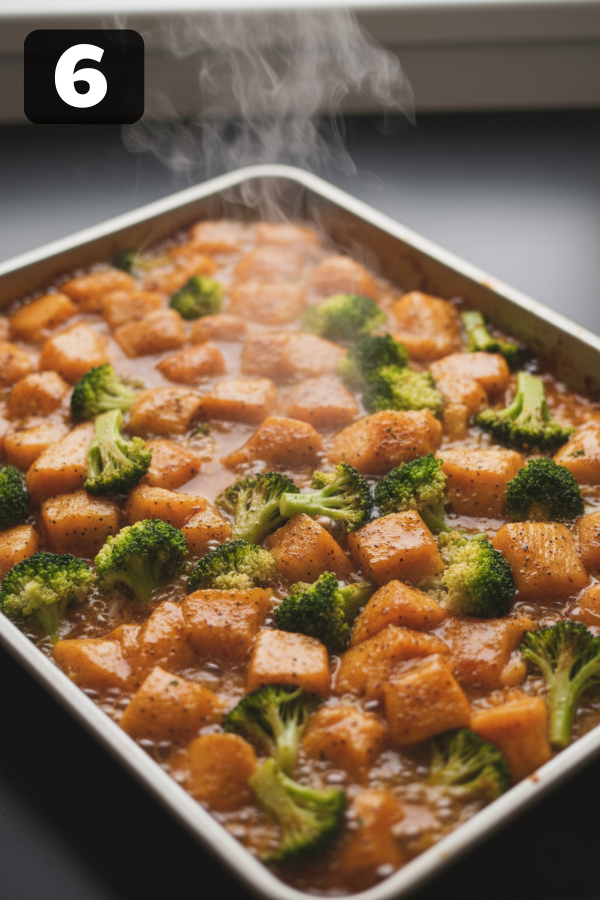
Bake Until The Rice Is Cooked And Chicken Is Done
Timing expectation: The method is built around ~45 minutes cook time / ~55 minutes total, but your oven can shift this.
What to look for (visual doneness):
Rice looks plump and tender, not chalky.
Liquid is mostly absorbed (a little saucy is fine, “soupy” is not).
Edges may bubble slightly—good sign it’s hot through.
Food safety checkpoint: Chicken should reach 165°F at the thickest piece.
If it’s not ready yet (quick fixes):
Rice not tender → bake a bit longer; if it looks dry, add a small splash of broth and stir.
Too wet → continue baking uncovered a little longer so excess moisture cooks off.
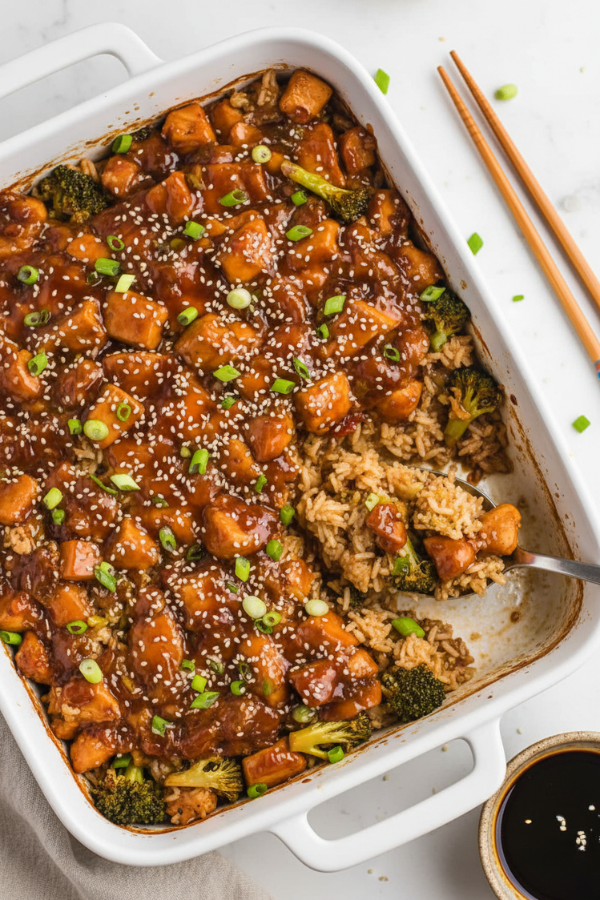
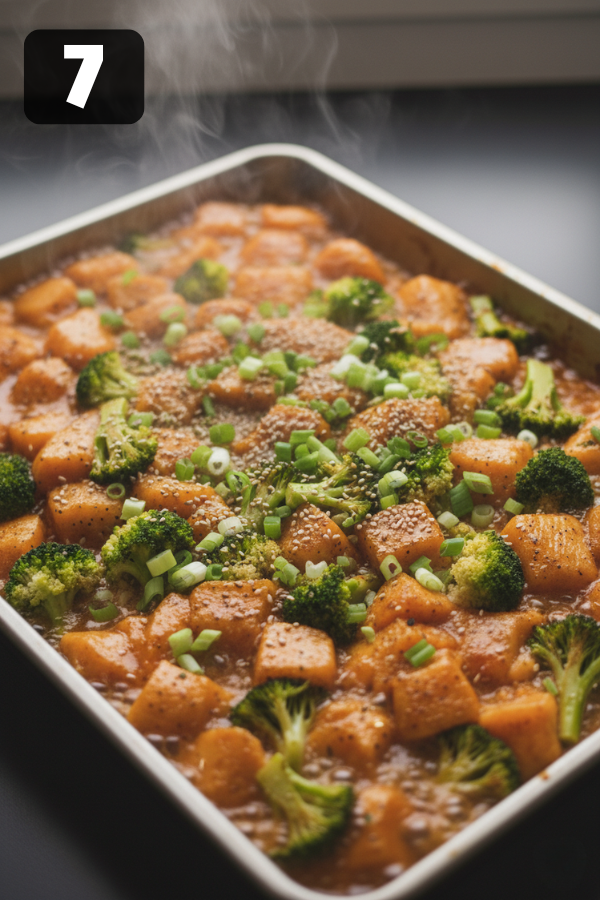
Rest For 10 Minutes, Then Serve
Why resting matters: It lets the casserole set so the sauce thickens slightly and leftover liquid finishes absorbing.
Serving moment: After resting, fluff gently with a spoon so rice doesn’t compact at the bottom.
Optional finish (still simple): Add sliced green onions or sesame seeds if you want a fresher bite without extra work.