
A microwave mug cookie is the easiest way to satisfy a chocolate chip cookie craving without baking a whole batch. Made with a few pantry staples, this single-serving dessert turns soft, buttery, and loaded with melted chocolate after about a minute in the microwave—no oven, mixer, or pile of dishes required.
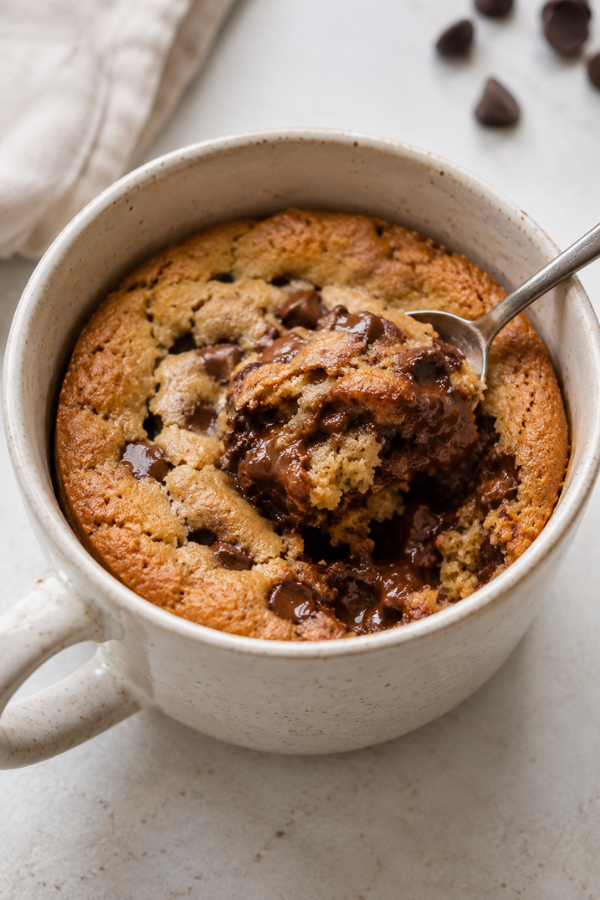
It has a warm, soft, spoonable center rather than the crisp edges of an oven-baked cookie, which is part of what makes it so comforting. Think of it as a cross between a gooey chocolate chip cookie and a warm cookie bar, made entirely in one mug and ready in just a few minutes.
Why You’ll Love This Microwave Mug Cookie
There’s a reason mug desserts stick around. They’re ridiculously useful when a cookie craving shows up after dinner and baking a whole batch feels like a project.
- Fast: The actual microwave time is usually under a minute.
- One serving: You get dessert without a container of leftover cookies staring at you tomorrow.
- Minimal cleanup: One mug, one spoon, and a few measuring spoons are about all you need.
- Pantry-friendly: Butter, sugar, flour, vanilla, and chocolate chips do most of the work.
- Easy to customize: Dark chocolate, peanut butter chips, nuts, or even sprinkles can change the whole mood.
One little warning, though: microwave timing isn’t universal. Popular mug-cookie recipes use times ranging from about 40 seconds to 1 minute, and microwave wattage can make a noticeable difference.
Ingredients
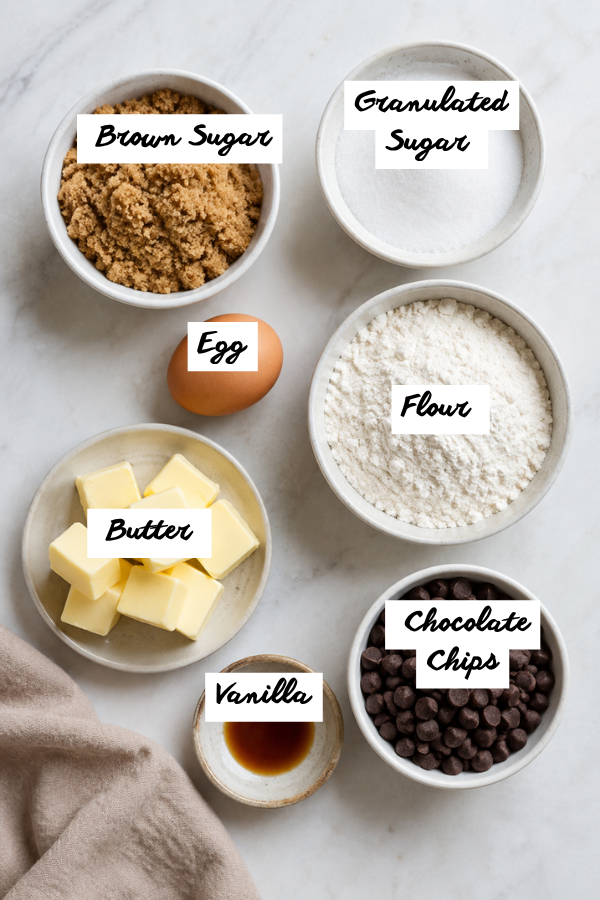
You only need a handful of ingredients for one generous mug cookie.
- 1 tablespoon unsalted butter
- 1 tablespoon packed light brown sugar
- 1 tablespoon granulated sugar
- ¼ teaspoon vanilla extract
- Pinch of salt
- 1 large egg yolk
- 3 tablespoons all-purpose flour
- 2 tablespoons semisweet chocolate chips
Why These Ingredients Work
Butter gives the cookie its rich flavor and keeps the center tender. Unsalted butter makes it easier to control the salt, but salted butter works too—just skip the extra pinch.
Brown sugar brings moisture and that familiar caramel-like cookie flavor. Granulated sugar adds sweetness and a little more structure. Using both gives you a better balance than relying on either one alone.
Then there’s the egg yolk. It may seem fussy to separate one egg for such a tiny dessert, but it’s worth it. A whole egg is simply too much for this amount of flour and can make a mug cookie spongy or cake-like.
Save the egg white for scrambled eggs the next morning. Nothing wasted.
Easy Substitutions
- Swap semisweet chips for dark, milk, or white chocolate.
- Use chopped chocolate for bigger melted pockets.
- Replace butter with coconut oil for a slightly different flavor.
- For gluten-free cookies, use a good 1:1 gluten-free all-purpose baking blend.
- For a dairy-free version, use plant-based butter and dairy-free chocolate chips.
Step-by-Step Instructions
Step 1: Melt the Butter
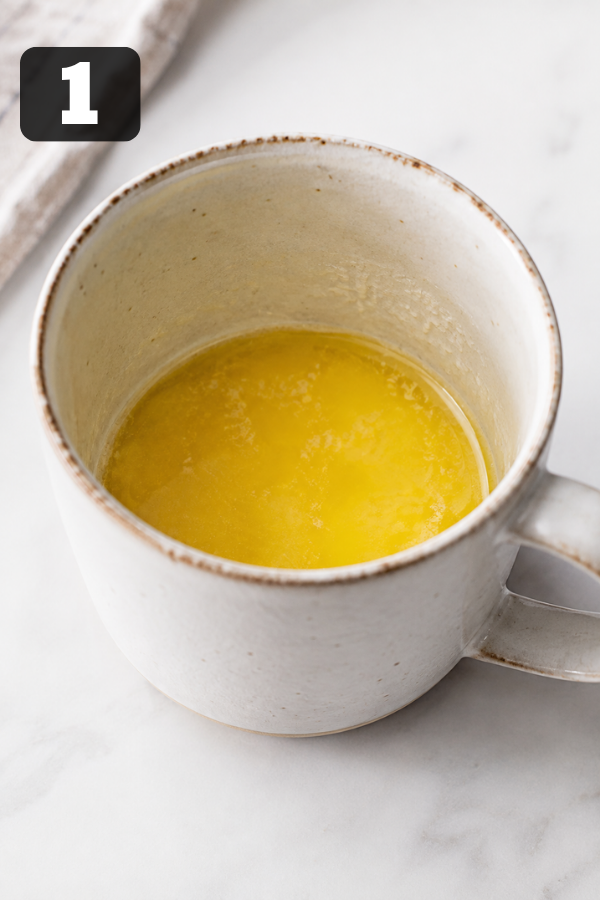
Place the butter in a 10- to 12-ounce microwave-safe mug.
Microwave for about 20 to 30 seconds, just until melted. It doesn’t need to be bubbling hot.
A wider mug works especially well because the dough sits in a shallower layer, helping it cook more evenly.
Step 2: Stir in the Sugars
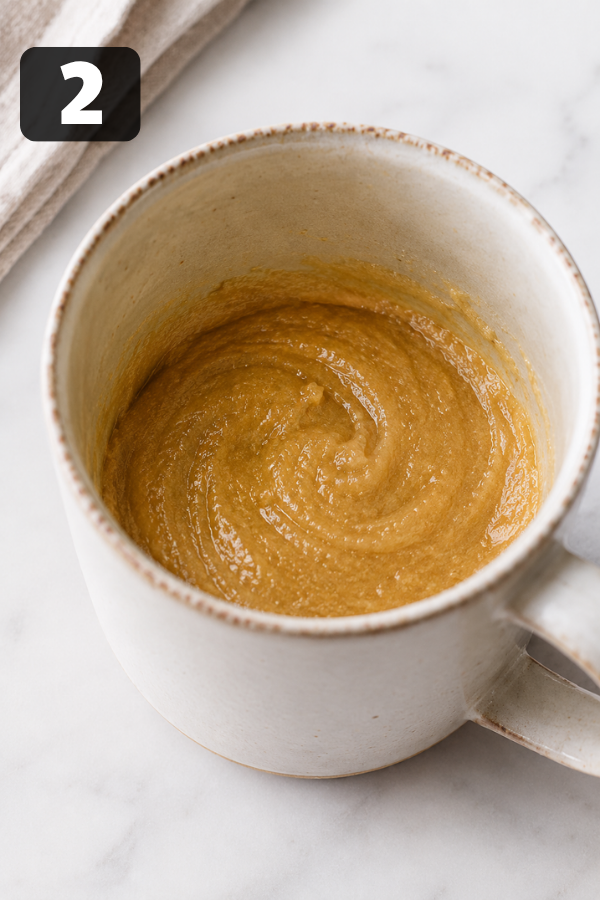
Add the brown sugar, granulated sugar, vanilla, and salt.
Stir with a spoon until everything looks glossy and evenly combined.
No mixer. No creaming butter for five minutes. This is dessert on easy mode.
Step 3: Add the Egg Yolk
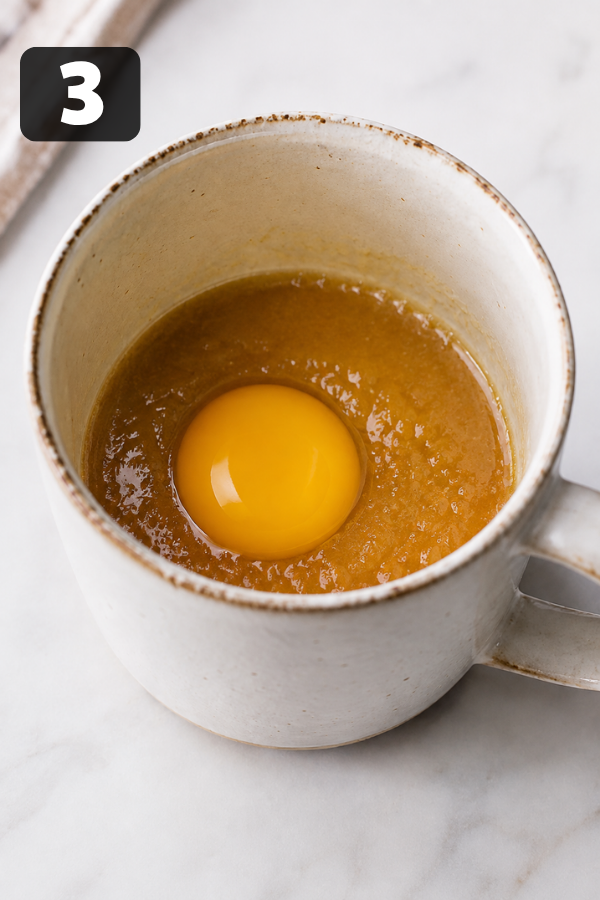
Stir in the egg yolk until you no longer see yellow streaks.
Make sure the butter isn’t scorching hot before adding it. Warm is fine; piping hot butter can start cooking the yolk before you’re ready.
Step 4: Add the Flour
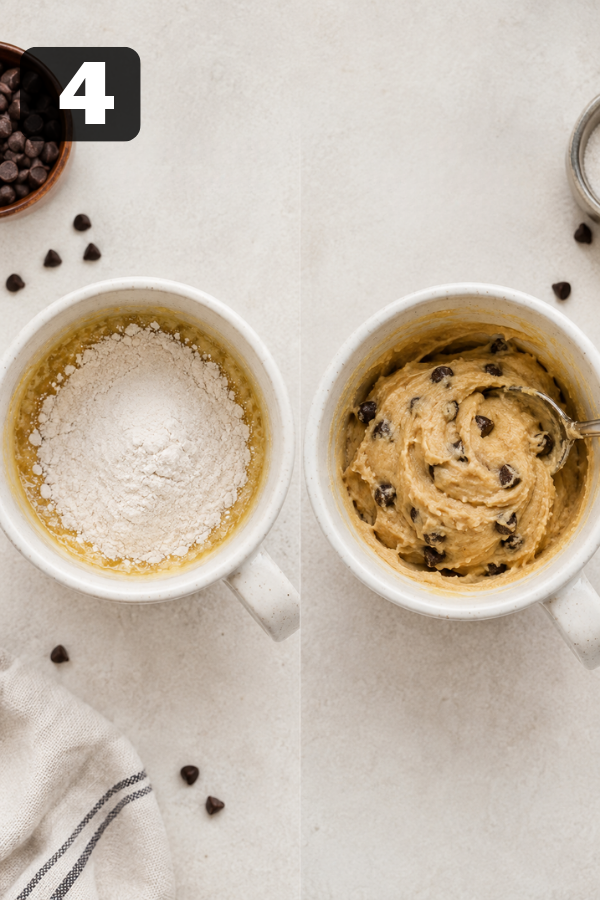
Add the flour and gently stir until you no longer see dry patches.
Here’s the thing: don’t pack flour into the tablespoon.
Fluff the flour, spoon it into your measuring spoon, then level it. Too much flour is one of the quickest ways to turn a soft mug cookie into a dry little brick. Both Preppy Kitchen and Mel’s Kitchen Cafe specifically flag excess flour as a common cause of dry, crumbly mug cookies.
The dough should look thick and moist rather than powdery.
Step 5: Add the Chocolate Chips
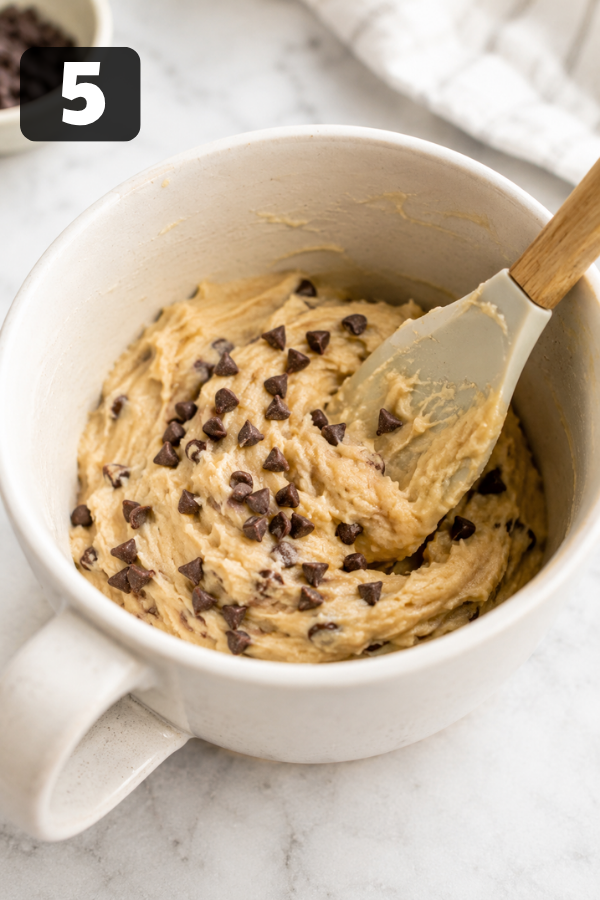
Fold in about three-quarters of the chocolate chips.
Scatter the rest over the top.
It’s a tiny detail, but those visible chocolate chips make the finished cookie look far more tempting—and give you a few molten bites right on the surface.
Step 6: Microwave Carefully
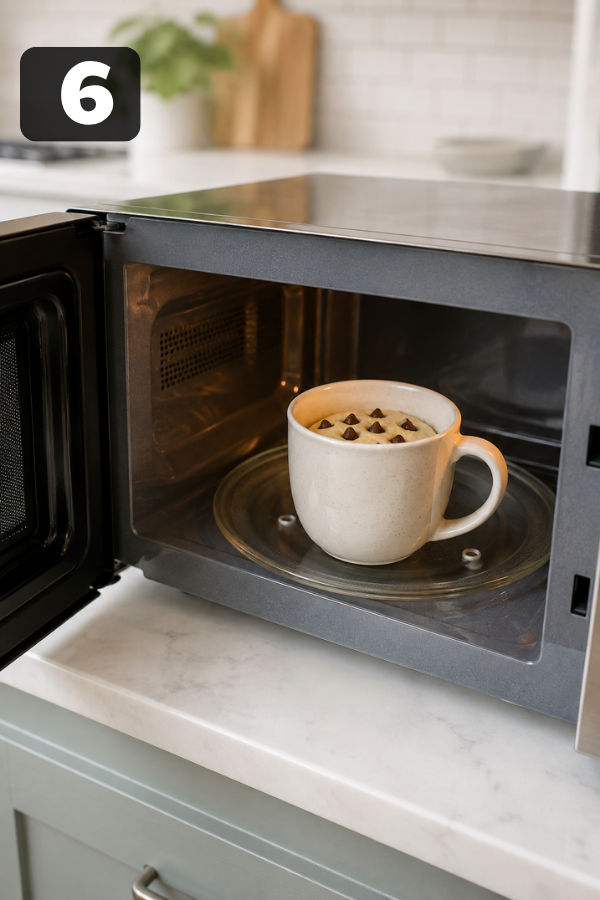
Microwave the cookie for 40 seconds to start.
Check it. If the center still looks clearly wet, continue in 5- to 10-second bursts until the top looks set.
For many microwaves, the final time will land around 45 to 60 seconds.
Higher-powered microwaves may need less time. Mel’s Kitchen Cafe, for example, recommends different power levels and timings for 1,000-watt versus 1,200–1,500-watt microwaves.
That’s why watching your cookie beats blindly trusting the timer.
Step 7: Let It Rest
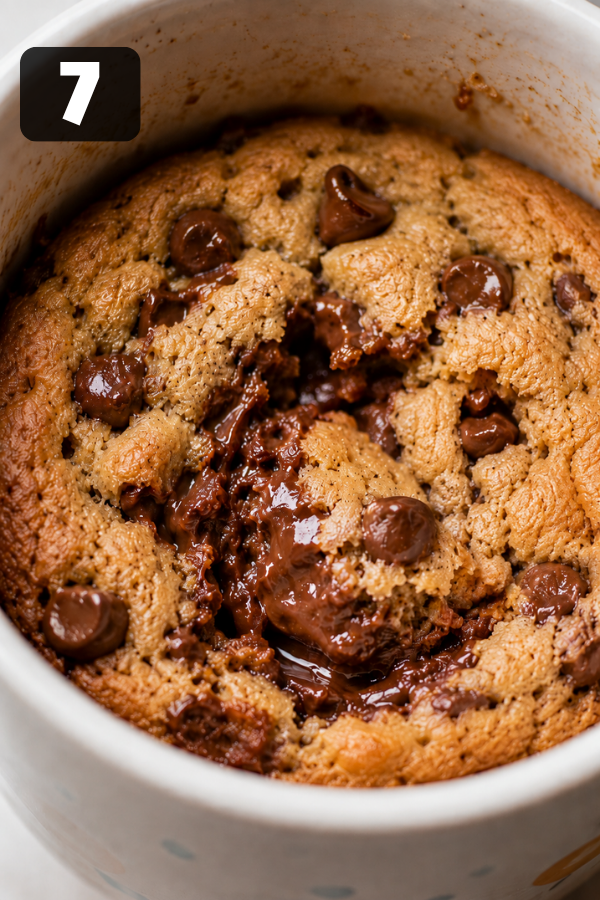
Leave the mug alone for 1 to 2 minutes.
Yes, this is the hardest step.
The center continues to set from residual heat, so a cookie that looks slightly soft when it leaves the microwave can become just right after a short rest. The finished surface should look set rather than wet and shiny, while the middle can stay soft.
Then grab a spoon and eat it warm.
Tips for the Best Mug Cookie
Measure the Flour Lightly
This tiny recipe doesn’t leave much room for measurement errors. An extra spoonful of packed flour matters far more here than it would in a large batch of cookies.
If you own a kitchen scale, weighing your flour is even more consistent.
Don’t Overmix
Once the flour goes in, stir only until everything comes together.
Aggressive mixing isn’t helping anything here. It can make the cookie firmer and tougher.
Underdo It Slightly Rather Than Overdo It
A soft mug cookie can rest for another minute.
A rubbery mug cookie can’t go backward in time.
If you’re unsure, stop the microwave and check before adding more time.
Learn Your Microwave
Once you discover that your microwave makes the perfect cookie in, say, 47 seconds, remember it.
The Comfort of Cooking recommends around 40–50 seconds for its formula, while other recipes run closer to a full minute. That’s a good reminder that the microwave itself is part of the recipe.
Fun Ways to Change It Up
Once you’ve made the basic version, things can get interesting.
Double Chocolate
Mix 1 teaspoon cocoa powder into the flour and add a splash of milk if the dough becomes too stiff. Use chocolate chunks for maximum chocolate puddles.
Peanut Butter Chocolate Chip
Swirl a teaspoon of creamy peanut butter into the finished dough before microwaving.
Don’t fully mix it in. Those little peanut butter pockets are the good part.
Salted Chocolate Chunk
Replace the chips with chopped dark chocolate and add a tiny pinch of flaky sea salt after cooking.
Birthday Cookie
Use white chocolate chips and a teaspoon of rainbow sprinkles. This one is especially fun when you want dessert without making an entire birthday cake for no particular reason.
Nutty Mug Cookie
Add a tablespoon of chopped walnuts or pecans.
Just keep the total amount of add-ins reasonable so the mug doesn’t become more toppings than cookie.
Storage & Make-Ahead Notes
This is one recipe that genuinely tastes best straight from the microwave.
As a mug cookie cools, it loses that soft, gooey texture and becomes firmer. Several established mug-cookie recipes also recommend eating it immediately rather than storing and reheating it.
That said, you can make future cravings even easier.
Make Your Own Mug Cookie Mix
Pre-measure the dry ingredients into small airtight containers:
- flour
- brown sugar
- granulated sugar
- salt
- chocolate chips
When dessert time hits, add butter, vanilla, and egg yolk, then microwave.
It’s basically homemade instant dessert—without buying a boxed mix.
What to Serve With It
Warm chocolate chip cookies plus cold vanilla ice cream is hard to beat.
The cold ice cream melts into the warm center and turns the whole mug into something closer to a mini skillet-cookie sundae.
Other easy toppings include:
- whipped cream
- sliced strawberries
- raspberries
- caramel sauce
- hot fudge
- chopped pecans
- extra chocolate chips
- flaky sea salt
For drinks, try cold milk, coffee, decaf coffee, or unsweetened tea.
Common Problems—and How to Fix Them
My Mug Cookie Is Dry
The two biggest suspects are too much flour and too much microwave time.
Measure the flour lightly and cut your cook time by 5 to 10 seconds next time.
The Dough Is Crumbly Before Cooking
First, check whether you packed the flour.
If the measurement is correct but the dough still feels unusually dry, stir in about 1 teaspoon of milk. Mel’s Kitchen Cafe also suggests adding a small splash of milk when mug-cookie batter is dry and crumbly.
My Cookie Is Rubbery
You probably cooked it too long.
Microwave desserts change quickly—sometimes a few extra seconds are enough to move from tender to tough. Start short and add time slowly.
It Tastes More Like Cake Than a Cookie
Make sure you used one egg yolk, not one whole egg.
Also remember that microwave cookies naturally have a softer, more cookie-bar-like texture than oven-baked cookies. Even longtime mug-cookie recipes warn readers not to expect the exact crisp-edged texture of a freshly baked traditional cookie.
FAQs
1. Can I make a microwave mug cookie without an egg?
Yes. Use about 1½ to 2 tablespoons of milk or half-and-half in place of the yolk, but expect a softer, more blondie-like texture. Milk-based mug cookies tend to be more plush and spoonable, while yolk versions have more structure.
2. Can I use a whole egg?
I wouldn’t. A whole egg adds too much liquid and egg white for such a small amount of flour and can create a spongy texture.
3. What size mug should I use?
A 10- to 12-ounce microwave-safe mug gives the cookie enough space to cook without crowding the top. Avoid mugs with metallic paint or trim.
4. How do I know when my mug cookie is cooked?
Look at the surface, not just the clock. It should look mostly set and no longer have obvious wet batter on top. The center can remain soft because it continues cooking as it rests.
5. Can I double the recipe?
Yes, but make two separate mugs and microwave them individually. Doubling everything into one deep mug changes the cooking time and makes even heating harder. Preppy Kitchen also recommends separate mugs when doubling.
6. Can I make it gluten-free?
Yes. A 1:1 gluten-free all-purpose flour blend is the simplest substitute. Different flours such as coconut or almond flour absorb moisture very differently, so they shouldn’t automatically be substituted tablespoon for tablespoon.
7. Can I make it ahead?
Don’t cook it ahead. Instead, pre-measure the dry ingredients and add the wet ingredients when you’re ready to eat. A dry mug-cookie mix works far better than trying to reheat yesterday’s cookie.
Nutrition Info
For one mug cookie made with the ingredients above, expect roughly 450–480 calories, depending on the chocolate chips and brands used.
This is still dessert—not a health food—but the built-in single serving can be useful when you want something sweet without baking an entire batch.
Final Thoughts
This microwave mug cookie is one of those recipes that’s worth keeping in your back pocket. It’s quick, cozy, easy to customize, and gives you a warm chocolate chip dessert without making a full batch.
For the best texture, measure the flour carefully and stop microwaving while the center is still slightly soft. Add a scoop of vanilla ice cream, grab a spoon, and enjoy it while it’s warm.
Don’t Miss: Chocolate Chip Cookie Fries
Don’t Miss: Fudgy Chocolate Brownie Cookies
Also Try: 2-Ingredient Banana Donut Holes
Ingredients
Method
- Melt the ButterPlace the butter in a 10- to 12-ounce microwave-safe mug and microwave for 20–30 seconds, until just melted.

- Mix in the SugarsStir in the brown sugar, granulated sugar, vanilla, and salt until smooth and glossy.
- Add the Egg YolkMix in the egg yolk until fully combined. Make sure the butter is warm, not piping hot.
- Stir in the FlourAdd the flour and stir just until no dry patches remain. Spoon and level the flour rather than packing it to keep the cookie soft.
- Add the Chocolate ChipsFold in most of the chocolate chips, then sprinkle the rest over the top.
- MicrowaveMicrowave for 40 seconds, then check the center. Continue in 5–10 second bursts as needed, usually 45–60 seconds total, until the top is set but the center is still soft.
- Rest and ServeLet the cookie rest for 1–2 minutes so the center can finish setting. Serve warm straight from the mug.
