
These Easy Cheesy Beef Nachos are crispy, loaded, cheesy, and ready in about 30 minutes. Seasoned ground beef, melty cheddar, sturdy tortilla chips, and fresh toppings come together on one sheet pan for an easy dinner, game-day snack, or family movie-night meal.
Best of all, a simple two-layer trick helps spread the beef and cheese across more chips. As a result, you won’t end up digging through a pile of plain chips at the bottom.
Why You’ll Love These Easy Cheesy Beef Nachos
Some dinners need a plan. Nachos, however, really don’t.
This recipe is made for those nights when you want something warm and filling without spending an hour at the stove. First, you’ll brown the beef. Next, you’ll layer everything on a sheet pan and bake it until the cheese melts. Finally, add the fresh toppings and serve.
That’s it.
- Ready in about 30 minutes: Fast enough for a busy weeknight.
- Minimal cleanup: You only need one skillet for the beef and one sheet pan for the nachos.
- Easy to customize: Make them mild, spicy, veggie-packed, or extra cheesy.
- Great for sharing: Serve the whole pan for game day, parties, or movie night.
- Meal-prep friendly: The seasoned beef can be made up to a day ahead.
Good nachos aren’t about piling on every topping you can find. Instead, they’re about balance. You want sturdy chips, flavorful beef, plenty of melted cheese, and just enough fresh toppings to keep each bite interesting.
Ingredients

For the Seasoned Beef
- 1 pound lean ground beef
- 1/2 small yellow onion, finely diced
- 2 garlic cloves, minced
- 2 tablespoons taco seasoning
- 1/3 cup water
- 1 tablespoon tomato paste, optional
- 1 tablespoon fresh lime juice, optional
Ground beef around 90–93% lean works well here because it gives you plenty of beef flavor without leaving a large amount of grease on the sheet pan. However, if you use a higher-fat blend, simply drain the excess fat after browning.
For food safety, cook ground beef to 160°F. A food thermometer is more reliable than color alone because ground beef can look brown before it reaches a safe internal temperature.
For the Nachos
- 10–12 ounces sturdy tortilla chips
- 8 ounces shredded cheddar cheese
- 4 ounces shredded Monterey Jack cheese
- 1 cup refried beans or drained black beans
Sturdy chips matter more than you might think. Because thin chips can break under the weight of beef, beans, and cheese, thicker tortilla chips are usually the better choice.
Freshly shredded cheese gives you a particularly nice melt. However, pre-shredded Mexican-blend cheese is perfectly fine when speed matters.
Fresh Toppings
Use a mix of your favorites:
- 1/2 cup pico de gallo or diced tomatoes
- 1 avocado, diced
- 2 green onions, sliced
- 1/4 cup chopped fresh cilantro
- Pickled or fresh jalapeños
- Sour cream
- Salsa
- Lime wedges
You don’t need to use all of them. In fact, two or three fresh toppings are often plenty.
Step-by-Step Instructions
1. Brown the Beef

First, heat a large skillet over medium-high heat. Add the ground beef and diced onion.
Cook for about 6–8 minutes while breaking the beef into small crumbles. Instead of stirring constantly, let some of the beef sit against the hot pan for a short time. This extra contact helps it develop better color and flavor.
During the last 30 seconds, stir in the garlic.
Once the beef is cooked through, check that it has reached 160°F. Then, drain any excess grease if needed.
Quick tip: Don’t constantly stir the beef. Give it a little time to brown.
2. Season the Beef
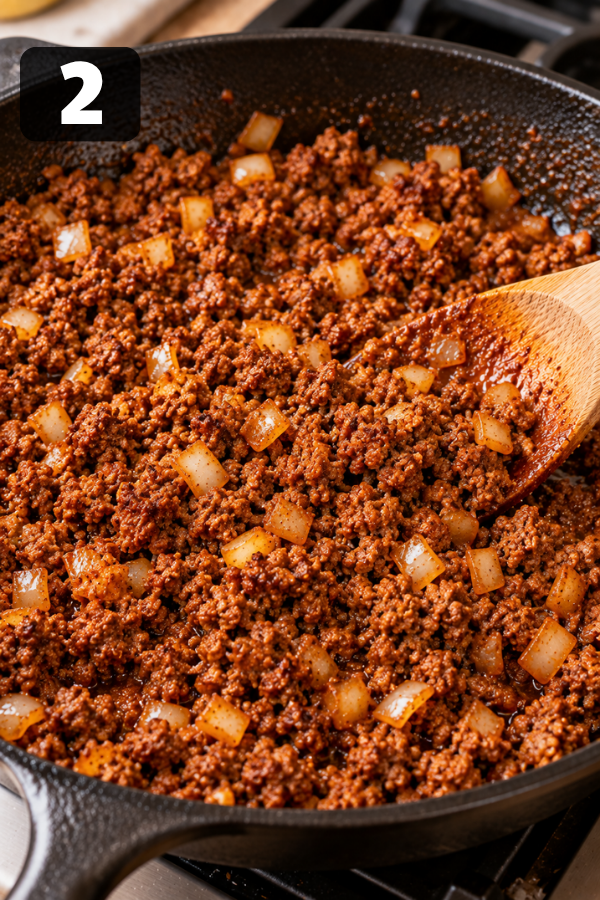
Next, lower the heat to medium. Stir in the taco seasoning, water, and tomato paste if you’re using it.
Let the mixture simmer for 2–3 minutes until it looks moist but not watery.
Ideally, the beef should hold together on the chips. However, if it still looks too wet, continue cooking for another minute.
Finally, stir in fresh lime juice if you’d like a little extra brightness.
3. Prepare the Sheet Pan
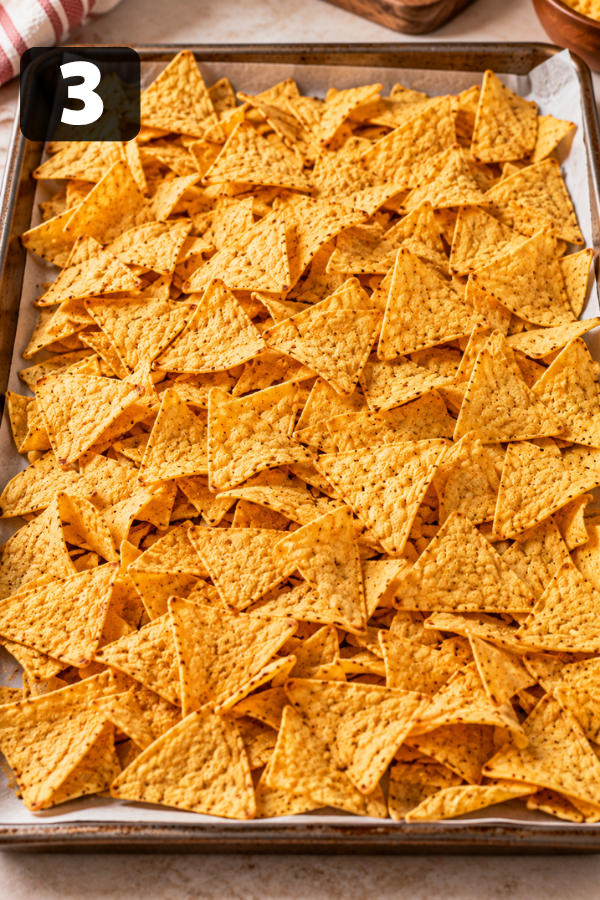
Meanwhile, heat the oven to 400°F.
Line a large rimmed sheet pan with foil or parchment paper for easier cleanup.
Then, spread about half of the tortilla chips across the pan. Keep them mostly in one layer, with only a little overlap.
This small detail can make a noticeable difference. Sturdy chips combined with layered construction help distribute the toppings across more of the nachos.
4. Add the First Layer
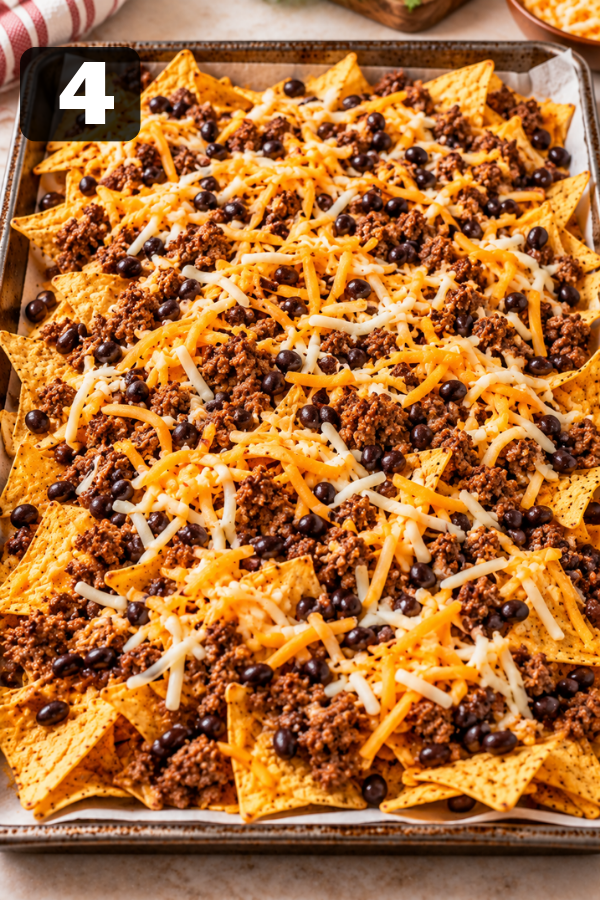
Scatter half of the seasoned beef evenly over the chips.
Next, spoon half of the beans across the pan. After that, sprinkle half of the shredded cheese over the top.
Try to distribute everything evenly rather than creating large piles. Otherwise, the chips underneath can become difficult to eat.
5. Build the Second Layer
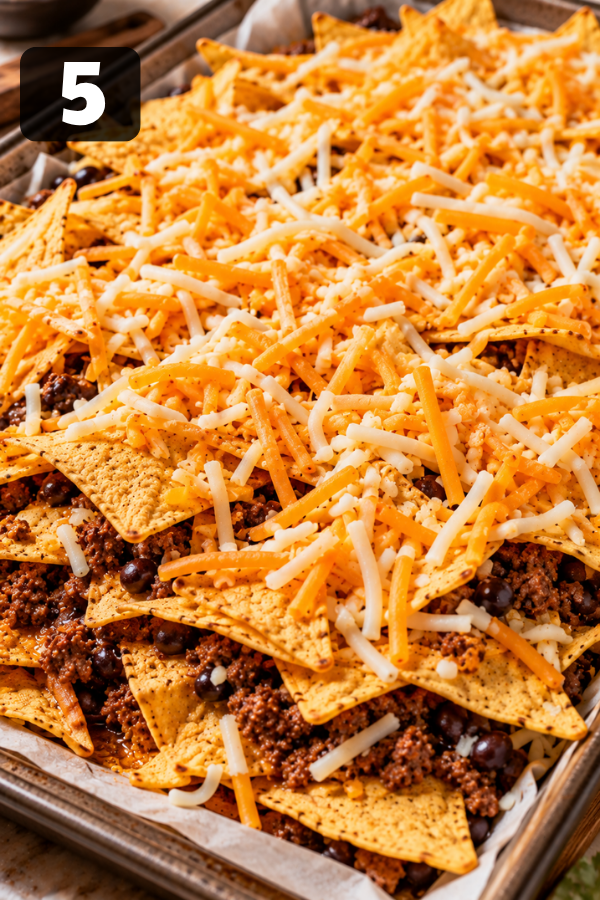
Now, arrange the remaining tortilla chips over the first layer.
Then, distribute the rest of the seasoned beef and beans across the chips. Finish by sprinkling the remaining cheese evenly over the top.
This second layer is the secret to better bites throughout the pan. Instead of having all the toppings sitting only on top, you distribute them between the chips.
As a result, more chips get beef, beans, and melted cheese.
6. Bake Until the Cheese Melts
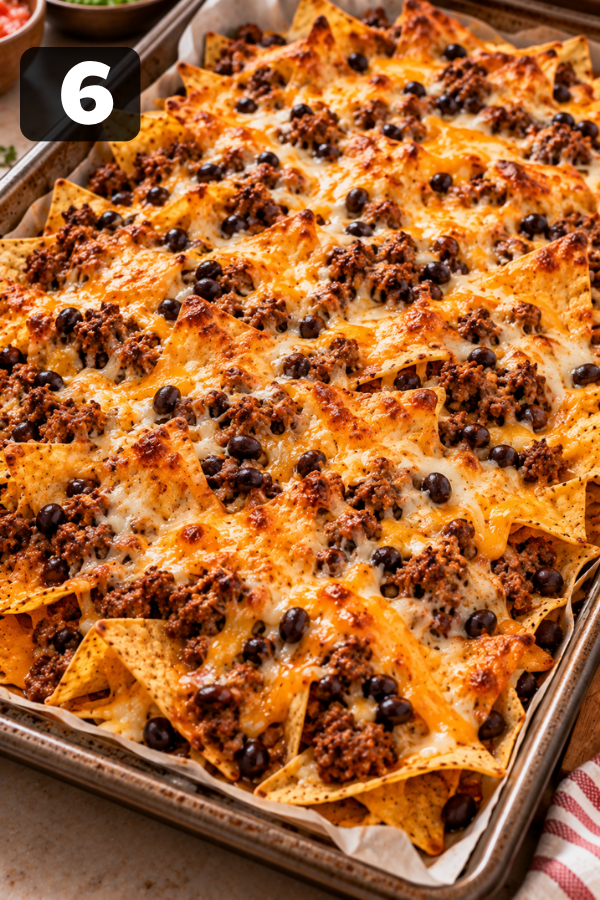
Place the sheet pan in the oven and bake for about 7–9 minutes.
Start checking early because nachos don’t need a long bake. The goal is to melt the cheese and warm the toppings without burning the chips.
Once the cheese is fully melted and the chips are hot, remove the pan from the oven.
7. Add the Fresh Toppings

Once the nachos come out of the oven, immediately add your favorite fresh toppings.
For example, try:
- Pico de gallo
- Avocado
- Green onions
- Cilantro
- Pickled jalapeños
However, keep salsa, sour cream, and guacamole on the side or add them just before serving.
Why? These toppings contain extra moisture and can soften the chips if added too early. In addition, keeping the hot and cold components separate helps the cheese stay pleasantly melted.
8. Serve Right Away
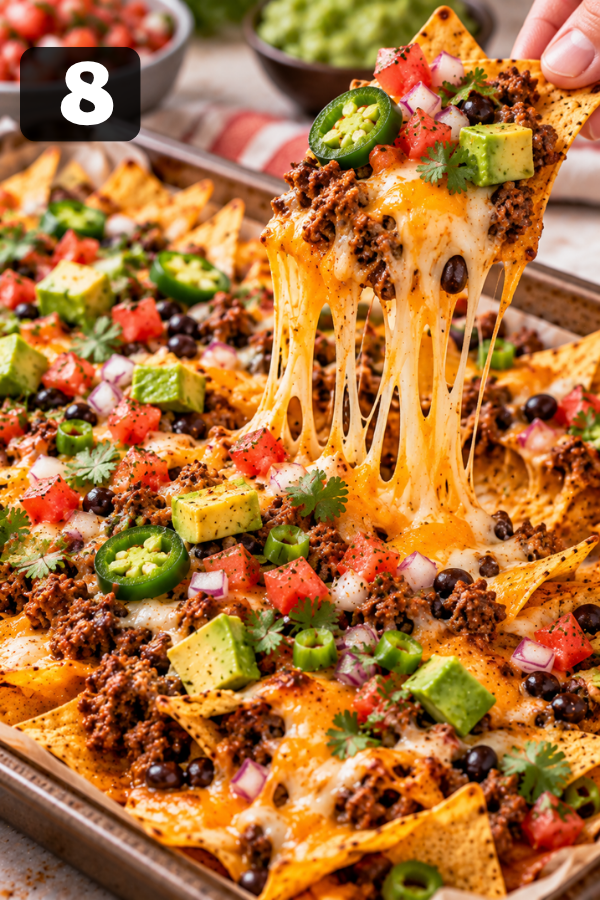
Finally, bring the sheet pan straight to the table.
Set out small bowls of salsa, sour cream, and guacamole so everyone can customize their own portion.
Best of all, this is one of those meals that somehow tastes even better when everyone reaches for the same pan.
Tips for Better Nachos Every Time
Use Sturdy Tortilla Chips
This is not the place for the thinnest chips in the bag.
Instead, choose thick, sturdy corn tortilla chips that can hold beef, beans, and melted cheese without snapping.
Don’t Skip the Two Layers
A single layer can work well for a light snack. However, a loaded sheet pan benefits from two layers.
Before you start assembling, divide the beef, beans, and cheese into two portions. That way, building each layer becomes much easier.
Keep Wet Toppings Until the End
Salsa, sour cream, guacamole, and juicy tomatoes are delicious. Unfortunately, they can also make the chips soft.
Therefore, bake the nachos first and add fresh toppings afterward.
It’s a small change, but it can make the difference between crisp nachos and a soggy pile.
Don’t Overbake
Watch the cheese rather than relying only on the clock.
As soon as it has melted and the chips are hot, pull the pan from the oven. Otherwise, the chips can burn before the toppings improve.
Make Them Mild or Spicy
For mild nachos:
- Use mild taco seasoning.
- Skip fresh jalapeños.
- Choose mild salsa.
For spicy nachos:
- Add jalapeños.
- Use Pepper Jack cheese.
- Add a pinch of cayenne to the beef.
- Serve with hot salsa.
That way, you can easily adjust the heat level for everyone at the table.
Storage & Make-Ahead Notes
Fully assembled nachos are best eaten immediately because refrigerated tortilla chips quickly lose their crisp texture.
Fortunately, the beef is easy to make ahead.
Cook the seasoned beef, let it cool, and then store it in an airtight container in the refrigerator for up to 1 day before assembling the nachos.
When you’re ready to serve, reheat the beef before building the nachos.
You can also freeze cooked beef for a later batch. For the best results, store it separately from the chips and fresh toppings.
If you have leftovers, keep the components separate whenever possible. Then, re-crisp the chips and hot toppings in the oven or air fryer instead of relying on the microwave.
For food safety, refrigerate cooked leftovers within 2 hours. In addition, use refrigerated leftovers within 3–4 days.
What to Serve With Beef Nachos
Nachos can easily stand alone. However, a fresh side dish can make the meal feel more complete.
For a Quick Family Dinner
Try serving them with:
- Simple green salad
- Black bean and corn salad
- Mexican-style slaw
- Fresh fruit
- Cucumber and lime salad
These lighter sides balance the rich beef and melted cheese nicely.
For Game Day
For a game-day spread, add:
- Guacamole
- Pico de gallo
- Salsa verde
- Extra jalapeños
- Corn salad
- Cold sparkling lime water
This gives everyone plenty of dipping and topping options.
For a Nacho Bar
For parties, set out the baked nachos with small bowls of:
- Salsa
- Sour cream
- Guacamole
- Jalapeños
- Diced tomatoes
- Green onions
- Cilantro
This setup works especially well for gatherings because everyone can build their own bite. Plus, serving toppings separately helps keep the chips crisp longer.
FAQs
1. Can I make Easy Cheesy Beef Nachos ahead of time?
Yes. However, it’s better to prepare the components ahead rather than assembling the finished nachos.
Make the beef up to a day in advance, refrigerate it, and then reheat it before assembling the nachos.
2. How do I keep nachos from getting soggy?
First, use sturdy tortilla chips. Next, drain excess liquid from the beef and avoid watery toppings during baking.
Most importantly, add salsa, sour cream, guacamole, and other wet toppings after baking or serve them on the side.
3. What cheese is best for beef nachos?
Cheddar gives the nachos a stronger flavor, while Monterey Jack melts especially smoothly.
Therefore, using a combination of both gives you a nice balance between flavor and texture.
Alternatively, Mexican-blend cheese is an easy shortcut.
4. Can I use ground turkey instead of beef?
Absolutely. Ground turkey works well with the same basic method.
However, remember that ground poultry should reach 165°F internally before serving.
5. Can I make these nachos without beans?
Yes. Simply leave them out and add a little more beef, cheese, or vegetables instead.
On the other hand, if you want extra fiber, black beans or refried beans are easy additions.
6. Are these nachos gluten-free?
They can be.
First, choose certified gluten-free tortilla chips. In addition, check the labels on taco seasoning, beans, salsa, and other packaged ingredients.
7. Can I reheat leftover nachos?
Yes, although freshly assembled nachos will always have the best texture.
For better results, reheat small portions in a 400°F oven or air fryer until the chips are warm and crisp.
Meanwhile, keep fresh toppings separate and add them afterward.
Common Problems and Easy Fixes
The Chips Turned Soggy
If your nachos become soggy:
- Drain excess liquid from the beef.
- Use sturdy chips.
- Don’t add salsa or sour cream before baking.
- Avoid overloading the pan.
- Serve immediately.
In most cases, excess moisture is the main problem.
The Bottom Chips Have No Toppings
If the bottom layer is mostly plain chips:
- Build two layers.
- Divide the beef and cheese before assembly.
- Spread toppings instead of creating large piles.
By layering the ingredients, you give more chips a chance to get toppings.
The Nachos Are Too Greasy
If your nachos feel overly greasy:
- Use leaner ground beef.
- Drain excess fat after browning.
- Don’t add extra oil unless the skillet actually needs it.
As a result, the finished nachos will feel lighter and stay crisper.
The Beef Tastes Bland
If the beef needs more flavor:
- Add enough taco seasoning.
- Let the beef brown before adding liquid.
- Add lime juice at the end.
- Taste the beef before assembling the nachos.
Most importantly, seasoning the beef before it goes onto the chips is much easier than trying to fix bland nachos afterward.
The Cheese Burned
If the cheese starts browning too quickly:
- Check the pan early.
- Remove it as soon as the cheese melts.
- Remember that the oven’s job is to heat the toppings and melt the cheese, not deeply brown everything.
Therefore, a short baking time usually works best.
Nutrition Info
Approximate nutrition per serving, based on 6 servings:
- Calories: ~525 kcal
- Protein: ~33 g
- Carbohydrates: ~22 g
- Fat: ~34 g
- Fiber: ~4 g
Keep in mind that nutrition will vary depending on the brands of tortilla chips, cheese, beef, beans, and toppings you use.
Final Thoughts
These Easy Cheesy Beef Nachos are proof that a quick dinner doesn’t have to feel boring. With seasoned beef, crispy chips, melty cheese, and fresh toppings, you get a satisfying meal with minimal effort and cleanup. Keep the layers simple, add wet toppings at the end, and serve them hot for the best crunch.
Don’t Miss: The Best Guacamole Recipe
Don’t Miss: Creamy Garlic Lime Cilantro Sauce
Also Try: Baked Cream Cheese Chicken Taquitos
Ingredients
Method
- Brown the BeefHeat a large skillet over medium-high heat. Add beef and onion; cook for 6–8 minutes, breaking it into small crumbles. Add garlic during the last 30 seconds. Cook to 160°F, then drain excess grease.

- Season the BeefReduce heat to medium. Stir in taco seasoning, water, and tomato paste if using. Simmer for 2–3 minutes until thickened. Add lime juice if desired.
- Prepare the Sheet PanHeat oven to 400°F. Line a rimmed sheet pan with foil or parchment. Spread half the tortilla chips across the pan.
- Add the First LayerTop with half the seasoned beef, beans, and shredded cheese. Spread evenly so more chips get toppings.
- Build the Second LayerAdd the remaining chips, followed by the remaining beef, beans, and cheese. Layering helps distribute the toppings throughout the pan.
- BakeBake at 400°F for 7–9 minutes, until the cheese is melted and the chips are hot. Avoid overbaking.
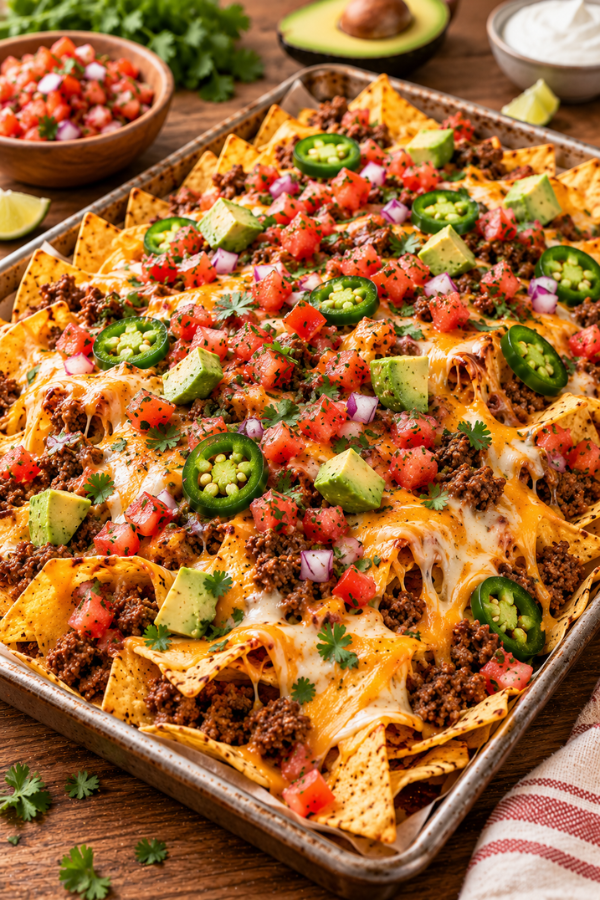
- Add Fresh ToppingsTop with pico de gallo, avocado, green onions, cilantro, and jalapeños. Serve salsa, sour cream, and guacamole on the side to help keep the chips crisp.
- ServeServe the nachos immediately while the chips are crisp and the cheese is warm. Add extra toppings at the table as desired.


