
Craving a refreshing dessert that tastes like summer without turning on the oven? This No Bake Orange Creamsicle Cheesecake combines bright orange flavor, creamy vanilla cheesecake filling, and a buttery cookie crust for a dessert that’s smooth, light, and easy to enjoy.
Inspired by the classic orange creamsicle popsicle, this no-bake cheesecake is perfect for busy home cooks who want a simple yet impressive treat. With minimal preparation and plenty of chill time, it’s a great choice for summer gatherings, family dinners, or a make-ahead dessert waiting in the fridge.
Why You’ll Love This No Bake Orange Creamsicle Cheesecake
No Oven, No Complicated Steps
Traditional cheesecake can require careful baking and cooling, but this version keeps things simple.
- No oven needed
- No water bath required
- No worrying about cracks or overbaking
- Easy preparation with basic mixing and chilling
It’s a great option when you want homemade cheesecake without the extra work.
A Fresh Twist on a Classic Flavor
The combination of orange and vanilla creates the familiar creamsicle taste with a creamy cheesecake upgrade.
- Orange adds a bright citrus flavor and freshness
- Vanilla cheesecake brings richness and smooth texture
- The balance keeps the dessert sweet but not too heavy
Simple Ingredients, Easy to Customize
This recipe uses everyday ingredients that are easy to find at most grocery stores.
- Cream cheese
- Whipping cream
- Orange gelatin
- Vanilla cookies
- Fresh oranges
You can also switch up the crust or toppings to match your preferences.
Perfect for Make-Ahead Desserts
This cheesecake is designed for planning ahead.
- Prepare it the night before serving
- Let the fridge create the perfect texture
- Slice easily when guests arrive
The extra chilling time helps the filling become creamy, firm, and full of flavor.
Ingredients for No Bake Orange Creamsicle Cheesecake
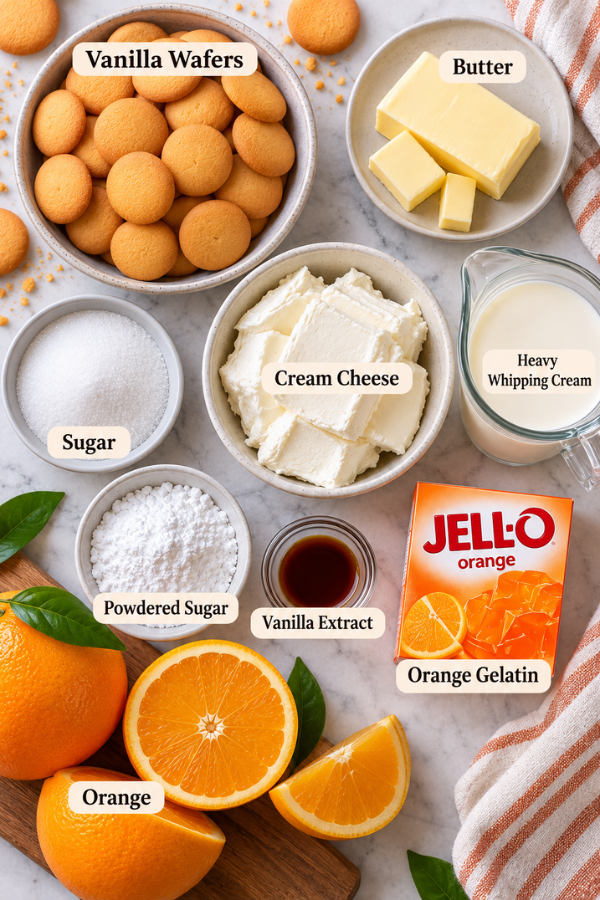
For the Cookie Crust
A buttery cookie crust gives this cheesecake the perfect crunchy base.
Ingredients:
- 2 cups vanilla wafer crumbs
- 5 tablespoons melted unsalted butter
- ¼ cup granulated sugar
Substitutions:
- Graham crackers:
- Creates a classic cheesecake-style crust.
- Golden Oreo cookies:
- Adds extra vanilla flavor and sweetness.
- Store-bought graham cracker crust:
- A quick shortcut for busy days.
Tip:
Press the crust firmly into the pan so it holds together when sliced while keeping a pleasant crunch.
For the Creamy Cheesecake Filling
The filling creates the smooth, fluffy texture that makes this dessert special.
Ingredients:
- 16 ounces cream cheese, softened
- 1 cup powdered sugar
- 1 teaspoon vanilla extract
- 2 cups heavy whipping cream
- 1 package orange gelatin (3 ounces)
- 1 cup boiling water
Ingredient tips:
- Use full-fat block cream cheese for the creamiest texture.
- Avoid whipped or reduced-fat cream cheese, as they can make the filling too soft.
- Whipped heavy cream keeps the cheesecake light while still rich and smooth.
For the Orange Creamsicle Flavor
This layer gives the cheesecake its signature citrus taste.
Ingredients:
- Orange gelatin
- Fresh orange zest
- Orange slices (optional for topping)
Why it works:
- Orange gelatin adds flavor and helps the cheesecake set.
- Fresh orange zest provides a brighter, natural citrus aroma.
- Orange slices add a fresh finishing touch.
Step-by-Step Instructions
Step 1: Prepare the Cookie Crust
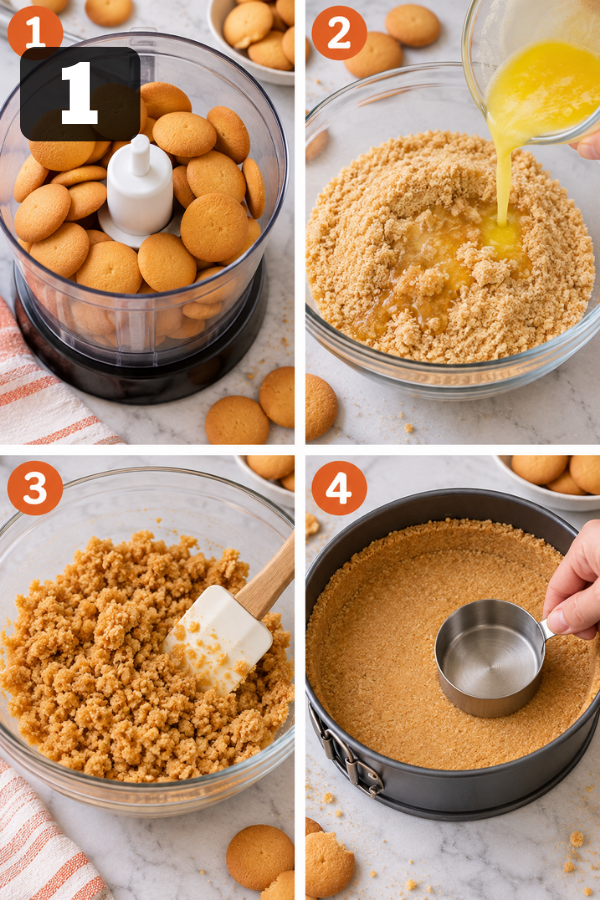
Start by creating the base of your cheesecake.
Instructions:
- Crush vanilla wafers into fine crumbs.
- Use a food processor for the fastest method.
- A sealed bag and rolling pin also work.
- Mix cookie crumbs with melted butter and sugar.
- Press the mixture firmly into a springform pan.
- Refrigerate for at least 30 minutes.
Helpful tip:
Press the crust firmly using the bottom of a measuring cup.
A loose crust may crumble when sliced.
Step 2: Prepare the Orange Gelatin Mixture
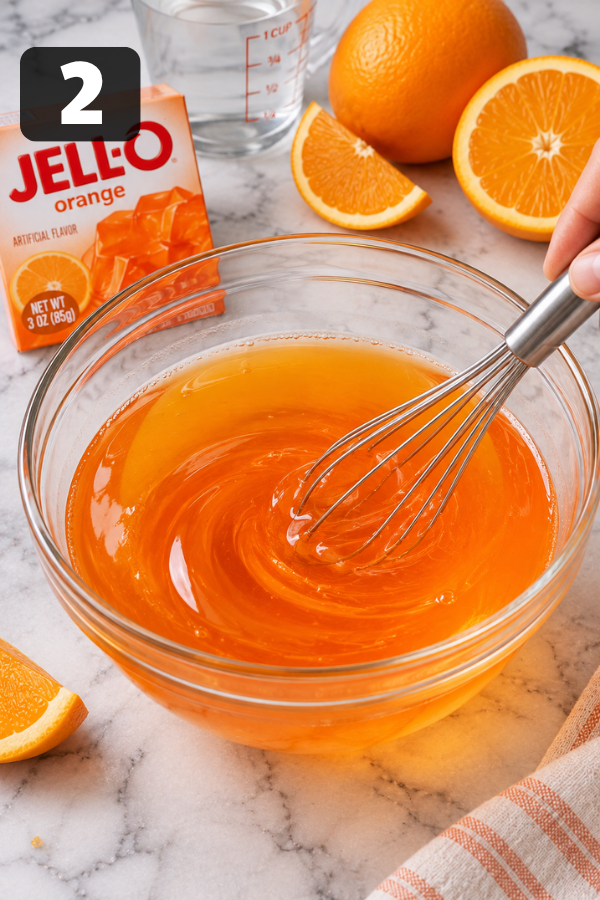
The orange layer needs time to cool before mixing.
Instructions:
- Add orange gelatin powder to boiling water.
- Stir until completely dissolved.
- Let the mixture cool to room temperature.
Important:
Do not add hot gelatin directly into the cheesecake filling.
Warm gelatin can melt the whipped cream and prevent the cheesecake from setting properly.
Step 3: Make the Creamy Cheesecake Filling
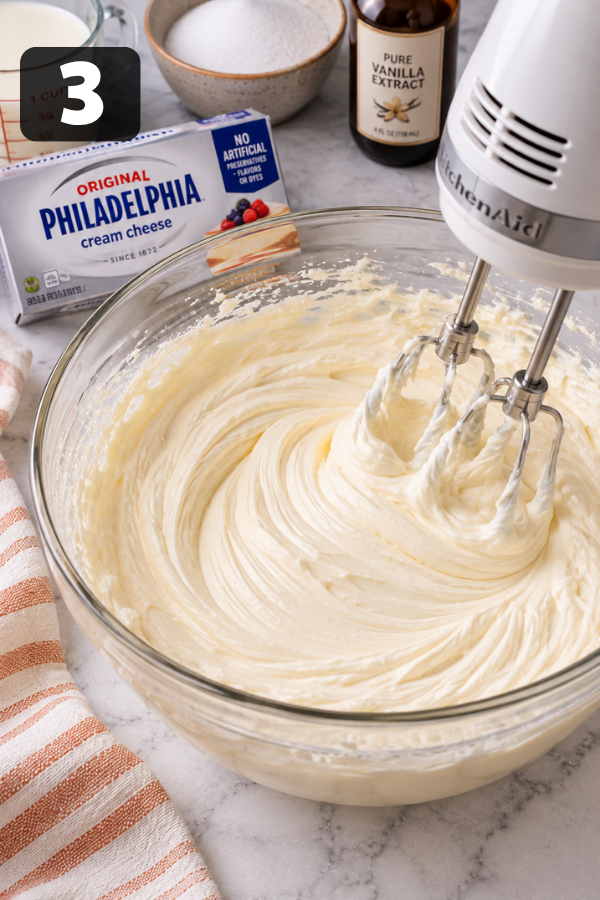
Now it’s time to create that smooth cheesecake texture.
Instructions:
- Beat softened cream cheese until smooth.
- Add powdered sugar and vanilla extract.
- Whip heavy cream separately until stiff peaks form.
- Gently fold whipped cream into the cream cheese mixture.
Why fold instead of mix?
Folding keeps the filling light and airy.
Overmixing can remove the fluffy texture you want in a no-bake cheesecake.
Step 4: Create the Orange Creamsicle Layers
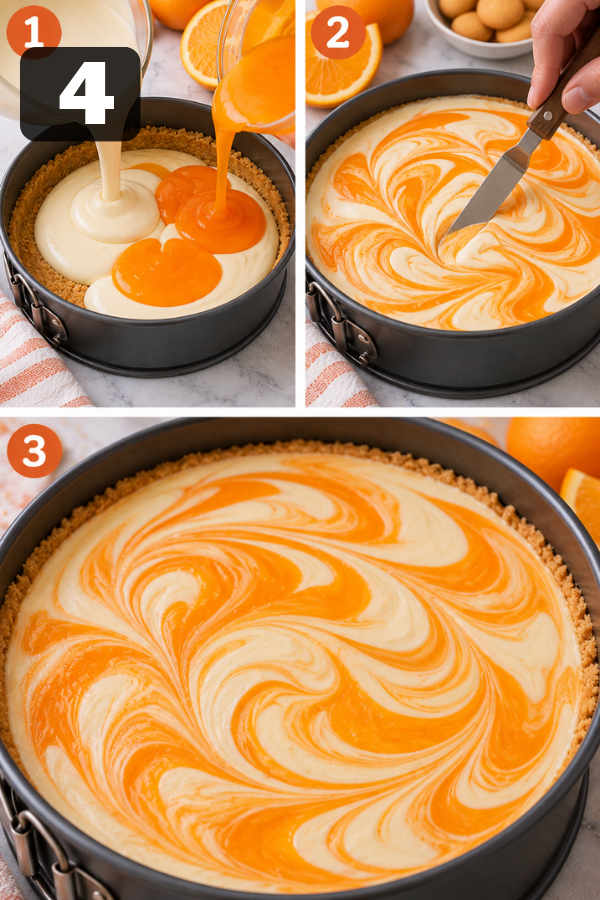
This is the fun part — creating the signature orange and vanilla look.
Instructions:
- Divide cheesecake filling into two portions.
- Leave one portion plain vanilla.
- Mix cooled orange gelatin into the second portion.
- Add layers of white and orange filling into the crust.
- Use a knife to gently swirl the layers together.
Visual goal:
You want a soft orange-and-white marble effect that resembles a creamsicle.
Avoid mixing too much, or the colors will blend completely.
Step 5: Chill Until Firm
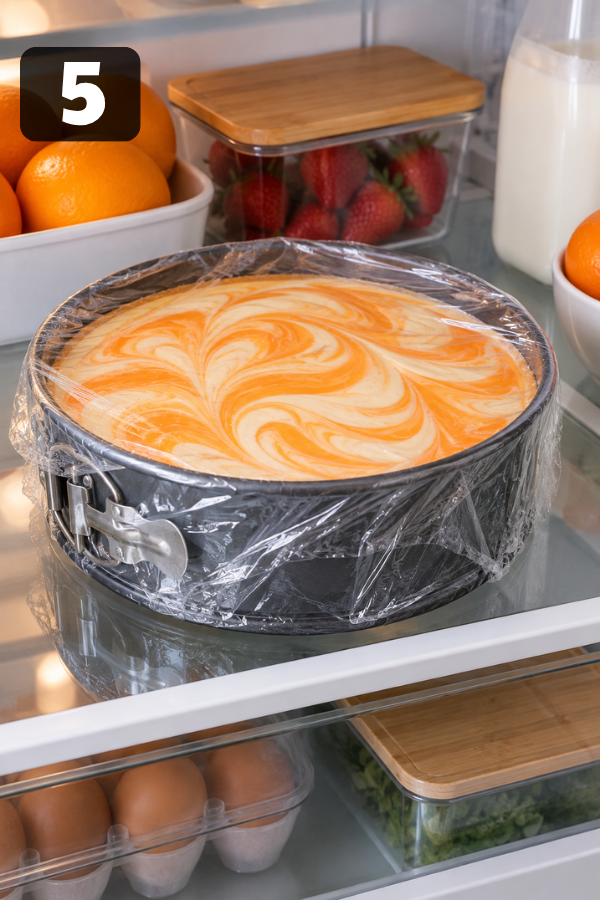
Patience makes the difference here.
Chill time:
- Minimum:
- 4–6 hours
- Best texture:
- Overnight
During chilling:
- The filling becomes firm.
- The flavors develop.
- The cheesecake becomes easier to slice.
A rushed cheesecake may taste good, but it won’t have that beautiful bakery-style texture.
Step 6: Decorate and Serve
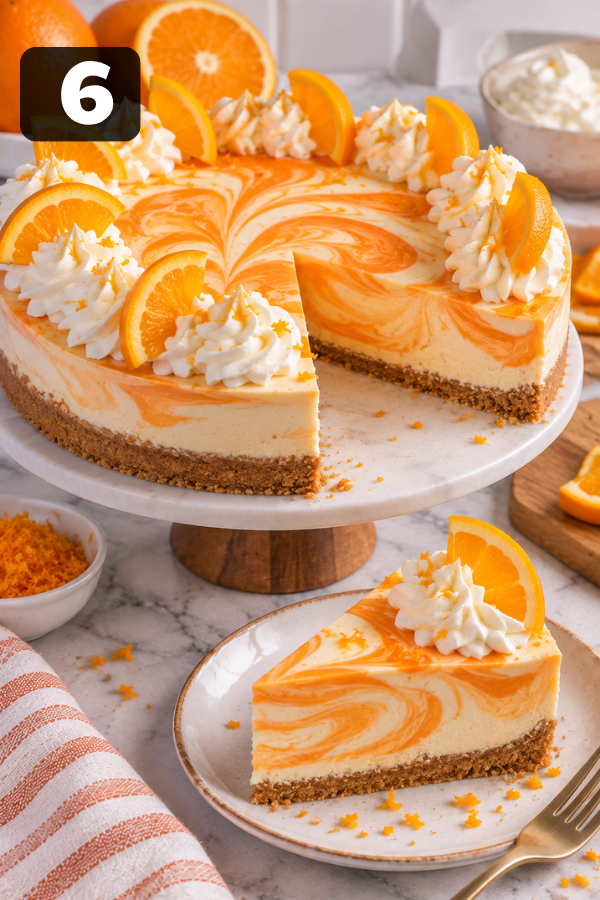
Before serving:
- Remove the springform ring.
- Add whipped cream around the edges.
- Sprinkle orange zest on top.
- Add thin orange slices if desired.
For cleaner slices:
- Dip your knife into hot water.
- Dry it.
- Slice through the cheesecake.
Repeat between slices for a neat presentation.
Tips for Making the Perfect No Bake Orange Creamsicle Cheesecake
Use Room Temperature Cream Cheese
Cold cream cheese is one of the most common causes of lumps.
Before mixing:
- Remove cream cheese from the refrigerator.
- Let it soften for about 30–60 minutes.
Smooth cream cheese creates a silky filling.
Don’t Skip the Chilling Time
It can be tempting to check your cheesecake early.
But the fridge needs time to work.
If you cut too soon:
- The filling may slide.
- The slices won’t hold their shape.
Overnight chilling gives the best result.
Keep the Orange Flavor Balanced
Orange flavor should brighten the cheesecake, not overpower it.
For a fresher taste:
- Add orange zest.
- Use real orange slices for decoration.
- Avoid adding too much extra juice.
Too much liquid can affect the texture.
Make It Party-Friendly
For gatherings:
- Prepare it one day ahead.
- Slice before guests arrive.
- Store covered in the refrigerator.
You’ll have one less thing to worry about when preparing the rest of your meal.
Storage & Leftover Notes
How to Store in the Refrigerator
For the best texture:
- Cover the cheesecake tightly with:
- Plastic wrap
- Aluminum foil
- An airtight cake container
- Store in the refrigerator for:
- Up to 5 days
- Keep away from:
- Strong-smelling foods like onions or garlic
- Open containers that can transfer odors
Helpful tip:
If you are preparing this cheesecake for a party, make it the day before.
The overnight chill creates:
- Cleaner slices
- Stronger flavor
- A firmer cheesecake texture
Can You Freeze No Bake Orange Creamsicle Cheesecake?
Yes, this cheesecake freezes very well.
Freezing instructions:
- Allow cheesecake to fully set in the refrigerator.
- Remove any fresh orange toppings.
- Wrap tightly with plastic wrap.
- Add a layer of foil for extra protection.
- Freeze for up to 1 month.
To serve after freezing:
- Transfer cheesecake to the refrigerator.
- Thaw overnight.
- Add fresh toppings before serving.
Avoid thawing at room temperature because the filling may soften too quickly.
What to Serve With No Bake Orange Creamsicle Cheesecake
This cheesecake is already a complete dessert, but the right pairing can make it feel even more special.
Fresh Fruit Pairings
The creamy texture pairs beautifully with fresh fruit.
Try serving with:
- Fresh strawberries:
- Adds a sweet berry contrast.
- Blueberries:
- Adds color and a slightly tart flavor.
- Fresh orange slices:
- Enhances the creamsicle theme.
- Mixed berry salad:
- Creates a lighter summer dessert plate.
Drinks That Pair Well
For a casual family dinner:
- Fresh lemonade
- Iced tea
- Sparkling water with citrus
- Orange-infused water
For celebrations:
- Moscato wine
- Prosecco
- Light sparkling wine
The citrus notes in the cheesecake work especially well with refreshing drinks.
Dessert Table Ideas
If you’re serving this for a gathering, pair it with:
- Chocolate chip cookies
- Lemon bars
- Fruit salad
- Mini cupcakes
- Brownies
A mix of creamy, fruity, and chocolate desserts gives guests plenty of choices.
FAQs
- Can I make No Bake Orange Creamsicle Cheesecake ahead of time?
Yes. This cheesecake is perfect for making ahead and should be chilled for at least 4–6 hours, but overnight refrigeration gives the best texture and allows the flavors to fully develop.
- Can I use Cool Whip instead of homemade whipped cream?
Yes. Cool Whip is a convenient shortcut that saves time and creates a stable filling, making it a great option for busy cooks or potluck desserts. Homemade whipped cream will give the cheesecake a fresher flavor and slightly lighter texture.
- Can I use fresh orange juice instead of orange gelatin?
Fresh orange juice adds citrus flavor, but it cannot replace orange gelatin because gelatin helps the cheesecake set properly. If you skip gelatin, you’ll need another setting ingredient to achieve a firm texture.
- Can I make this cheesecake gluten-free?
Yes. Simply replace the cookie crust with gluten-free cookies or crackers and check that all packaged ingredients are gluten-free. The cheesecake filling itself can be gluten-free when using suitable ingredients.
- Why is my no-bake cheesecake not firm?
A soft cheesecake is usually caused by insufficient chilling time, warm gelatin, too much liquid, or using soft cream cheese instead of block cream cheese. Chill it longer and follow the ingredient measurements carefully for a firmer texture.
- Can I make this recipe without a springform pan?
Yes. You can use a pie dish, cake pan, or square baking dish instead. A springform pan only makes removing slices easier, while other dishes work well if you plan to serve the cheesecake directly from the container.
Common Issues and Their Solutions
Problem: The Cheesecake Filling Is Too Soft
Possible causes:
- Cheesecake was chilled for too little time.
- Cream cheese mixture was too warm.
- Whipped cream was not whipped enough.
Fix:
- Refrigerate several more hours.
- Allow overnight chilling.
- Make sure whipped cream reaches stiff peaks.
Problem: The Orange Layer Does Not Set
Possible causes:
- Gelatin was not fully dissolved.
- Hot gelatin melted the filling.
- Incorrect gelatin amount.
Fix:
- Stir gelatin completely before cooling.
- Wait until gelatin reaches room temperature.
- Measure ingredients accurately.
Problem: The Crust Falls Apart When Sliced
Possible causes:
- Too few cookie crumbs.
- Not enough butter.
- Crust was not chilled.
Fix:
- Press crust firmly into the pan.
- Refrigerate longer before adding filling.
- Use the correct butter-to-cookie ratio.
Problem: The Cheesecake Has Lumps
Cause:
Cold cream cheese does not blend smoothly.
Solution:
- Let cream cheese soften before mixing.
- Beat cream cheese alone first until smooth.
- Add other ingredients gradually.
Nutrition Info
Nutrition will vary depending on the crust, toppings, and ingredient brands used.
Estimated per slice:
- Calories:
- 400–600 calories
- Fat:
- 30–45g
- Carbohydrates:
- 35–55g
- Protein:
- 5–8g
Dietary notes:
- Vegetarian-friendly:
- Yes, when using vegetarian-friendly gelatin alternatives.
- Gluten-free:
- Possible with a gluten-free crust.
- Make lower sugar:
- Reduce added sugar slightly.
- Use lighter toppings.
Final Thoughts
This No Bake Orange Creamsicle Cheesecake is proof that an impressive dessert doesn’t have to be complicated. With simple ingredients, no oven, and a little chilling time, you can create a creamy, refreshing treat that’s perfect for summer gatherings, family dinners, or any day you’re craving something sweet.
Make it ahead, keep it chilled, and enjoy a dessert that brings a little nostalgic orange creamsicle magic to your table.
Don’t Miss: No Baked Raspberry Cheesecake
Don’t Miss: No Bake Fireworks Oreo Cheesecake
Also Try: Key Lime Pound Cake
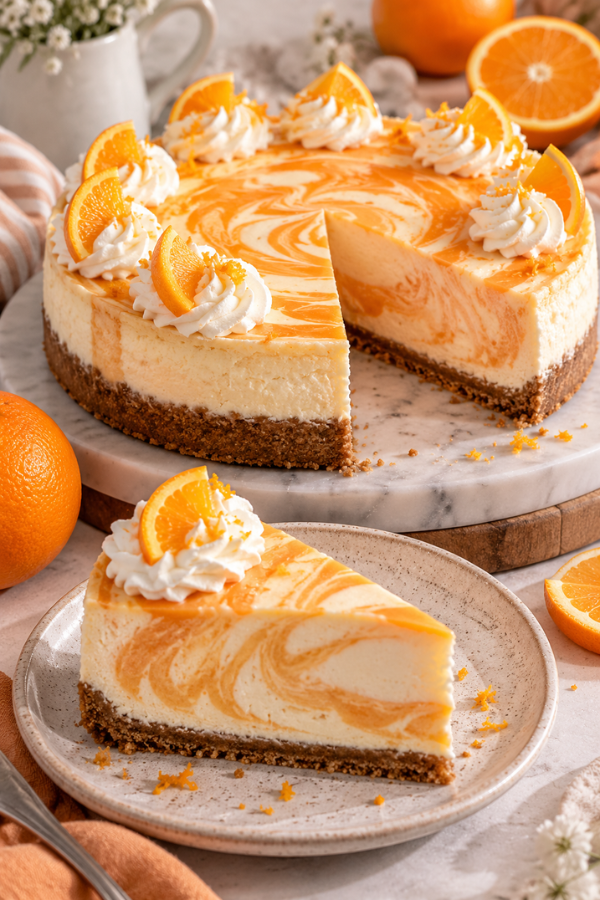
Ingredients
Method
- Prepare the Cookie CrustCrush vanilla wafers into crumbs, then mix with melted butter and sugar. Press firmly into a springform pan and chill for 30 minutes until set.

- Make the Orange Gelatin MixtureDissolve orange gelatin in boiling water, stir until smooth, and let it cool completely before adding to the filling to maintain the right texture.
- Prepare the Cheesecake FillingBeat cream cheese until smooth, then add powdered sugar and vanilla. Fold in whipped cream gently to create a light and creamy filling.
- Create the Orange Creamsicle LayersDivide the filling into two portions. Keep one vanilla and mix the other with orange gelatin. Layer both fillings over the crust and gently swirl for an orange-and-white effect.
- Chill Until FirmRefrigerate the cheesecake for at least 4–6 hours or overnight until fully set. Chilling helps create a creamy texture and clean slices.
- Decorate and ServeRemove from the pan and top with whipped cream, orange zest, or orange slices. Use a warm knife for smooth, neat slices before serving.
