
Back to school cookies are a cute, colorful way to make the first week of school feel a little sweeter. They’re easy to tuck into lunchboxes, bring to a classroom party, or wrap up as a small teacher gift. Think buttery sugar cookies shaped like apples, pencils, notebook paper, rulers, and gold stars—fun enough for kids, but simple enough for busy parents.
The idea is simple: use a sturdy cut-out sugar cookie, smooth royal icing, and a few school-themed designs that look special without needing bakery-level skills. You can decorate with piped icing and edible markers, or take a shortcut with wafer pencil cookies and candy melts. A batch of 20–24 cookies is usually enough for gifting, sharing, or making a small first-day treat box.
Why You’ll Love These Back to School Cookies
These cookies are fun without being fussy, which is exactly what busy back-to-school weeks need. Best of all, you don’t need fancy tools or advanced decorating skills—just a few basic shapes, some icing colors, and a little drying time.
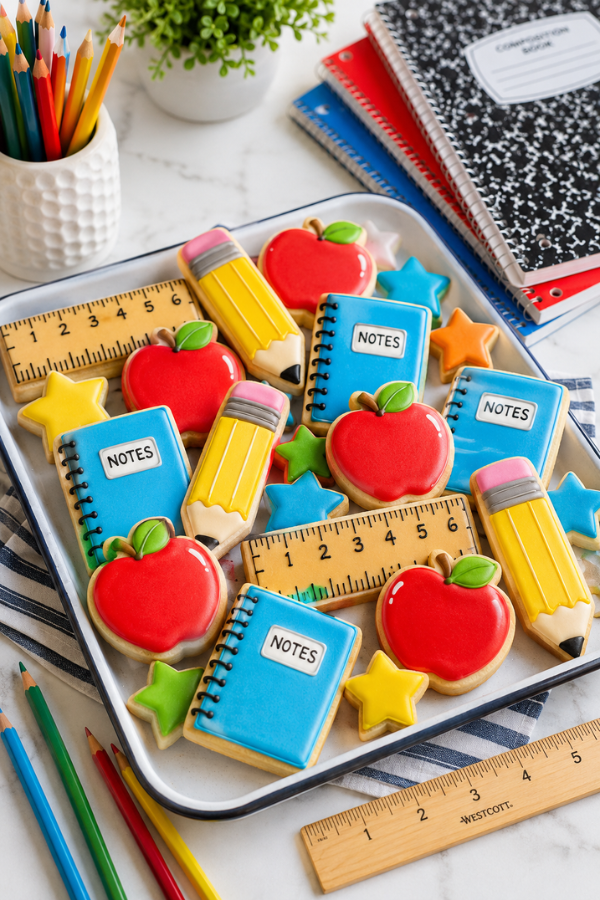
You’ll love this recipe because it’s beginner-friendly, make-ahead friendly, easy to personalize, and perfect for gifting. For example, rectangles can become notebook paper, rulers, or chalkboards, while apples, pencils, and stars make the whole set feel playful and school-ready. Keep it simple with one design, or create a mixed cookie box for teachers, classmates, or lunchbox surprises.
Ingredients You’ll Need
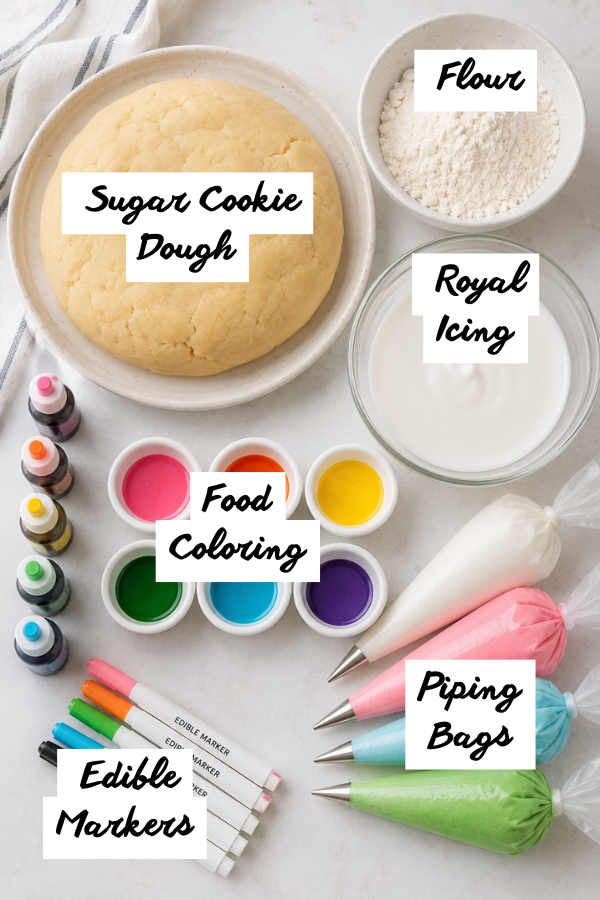
For the classic decorated version, start with a cut-out sugar cookie dough. You want a dough that holds its shape, not a soft drop-cookie dough that spreads in the oven. Therefore, a firm vanilla sugar cookie is ideal because it gives you clean edges and a familiar flavor kids actually like.
For the Sugar Cookies
- 1 batch cut-out sugar cookie dough
- 1/2 cup all-purpose flour, for dusting
- 1–2 teaspoons vanilla extract
- 1/2 teaspoon almond extract, optional
- 1 teaspoon lemon zest, optional
- Gel food colors, if tinting dough
The lemon zest is not required, but it’s lovely. It cuts through the sweetness a bit, like a bright little tap on the shoulder.
For the Royal Icing
- About 3 cups royal icing
- Red gel color for apples
- Yellow gel color for pencils, stars, and rulers
- Green gel color for leaves or chalkboards
- Brown gel color for stems and chalkboard frames
- Black gel color for pencil tips and writing
- Pink gel color for erasers
- White icing for notebook paper and chalk details
About 3 cups of royal icing is usually enough for a batch of 20–24 decorated cookies, especially if you’re making a mixed set with apples, pencils, notebook pages, and stars.
Helpful Decorating Tools
- Piping bags
- Small round piping tips, such as #1 and #2
- Toothpick or scribe tool
- Edible markers
- Small paintbrush
- Parchment paper
- Cooling rack
- Clear treat bags for gifting
Edible markers are a small tool that makes a big difference. In particular, they’re useful for notebook lines, ruler marks, teacher names, short messages, and tiny details that feel tricky to pipe by hand.
Step-by-Step Instructions
Step 1: Make and Chill the Dough
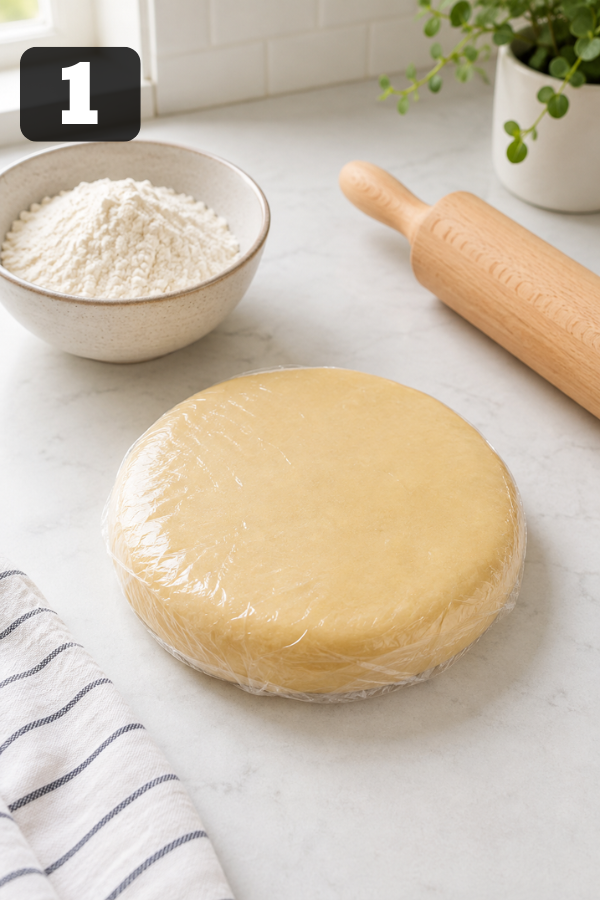
Prepare your sugar cookie dough, shape it into a flat disc, wrap it well, and chill it for at least 1 hour. This way, the cold dough will roll more easily and help the cookies keep their shape.
Don’t skip the chill. I know, waiting is annoying. However, warm dough is like a sleepy toddler in a grocery store: hard to manage and likely to spread everywhere.
Step 2: Roll the Dough
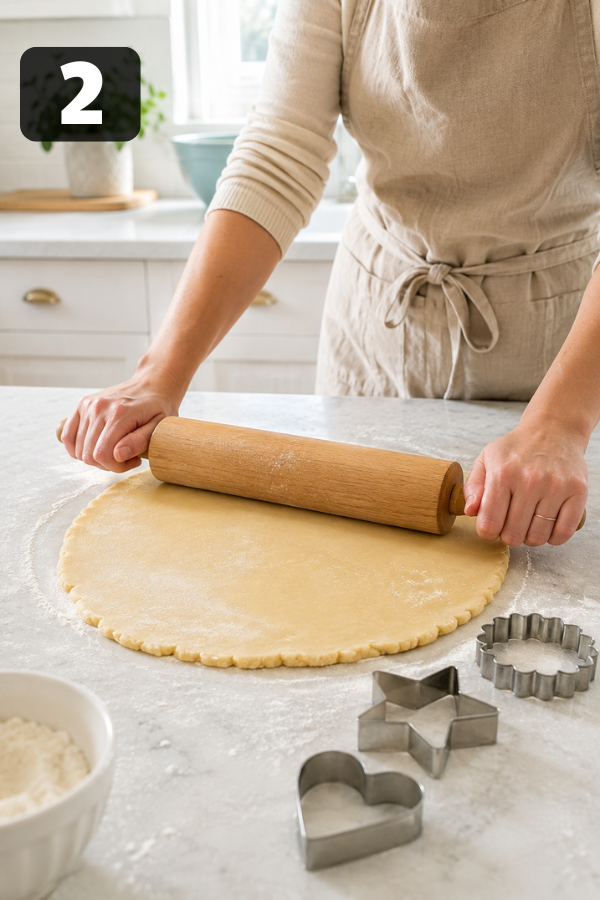
Lightly flour your counter and roll the dough to about 1/4 inch thick. At this thickness, the cookies are sturdy enough for decorating without feeling too heavy.
If the dough cracks, let it sit for 3–5 minutes. On the other hand, if it starts sticking, dust the surface lightly with flour. Lightly is the key word here because too much flour can make the cookies dry.
Step 3: Cut the Shapes
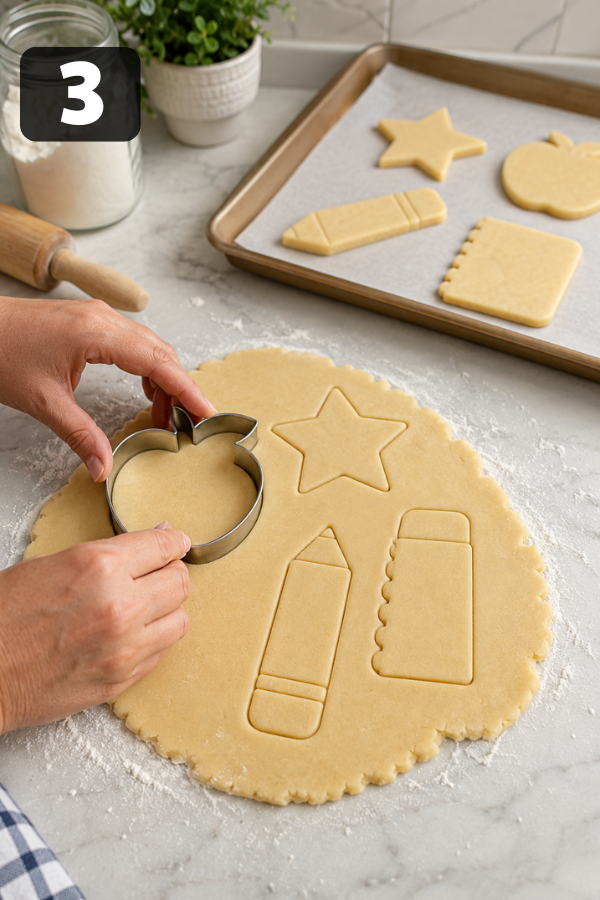
Use school-themed cutters such as apples, pencils, stars, and rectangles. For example, rectangles are the hidden hero because they can become notebook paper, chalkboards, rulers, or even simple pencil shapes.
If you don’t have themed cutters, use what you have:
- Hearts can become apples.
- Rectangles can become notebook pages.
- Stars can become “great job” cookies.
- Long rectangles can become rulers or pencils.
You don’t need a huge cutter collection. Instead, a few simple shapes can create a full back-to-school cookie set that looks thoughtful and complete.
Step 4: Chill the Cut-Out Cookies
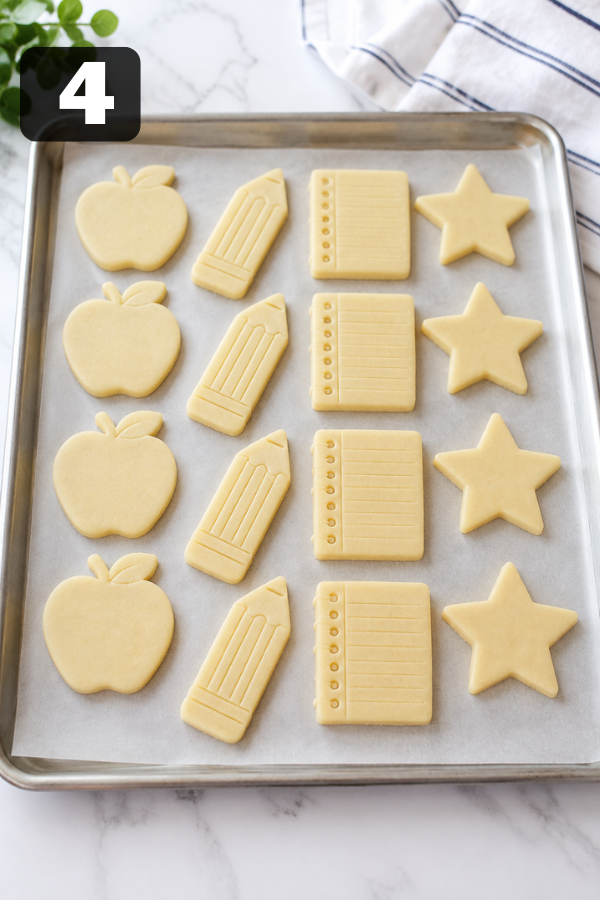
Place the cut cookies on parchment-lined baking sheets and chill them for about 20 minutes before baking. As a result, the edges will stay cleaner and sharper.
This step matters most for pencils and notebook paper. After all, clean edges make decorating easier later.
Step 5: Bake
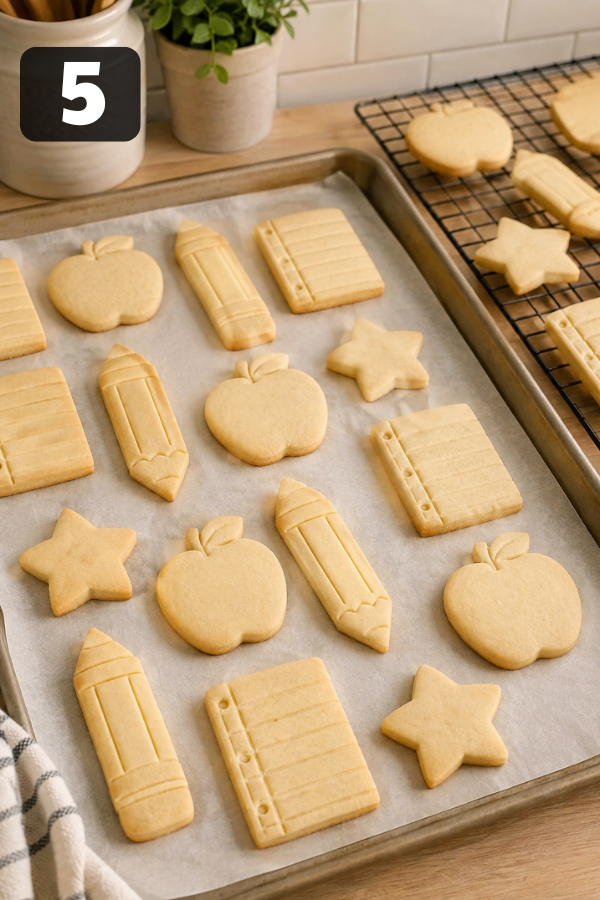
Bake at 325°F for 8–10 minutes, or until the cookies look set but not browned. Then, let them sit on the baking sheet for 1 minute before moving them to a wire rack.
After that, cool them completely before icing. Warm cookies and royal icing are not friends.
Step 6: Mix Your Icing Colors
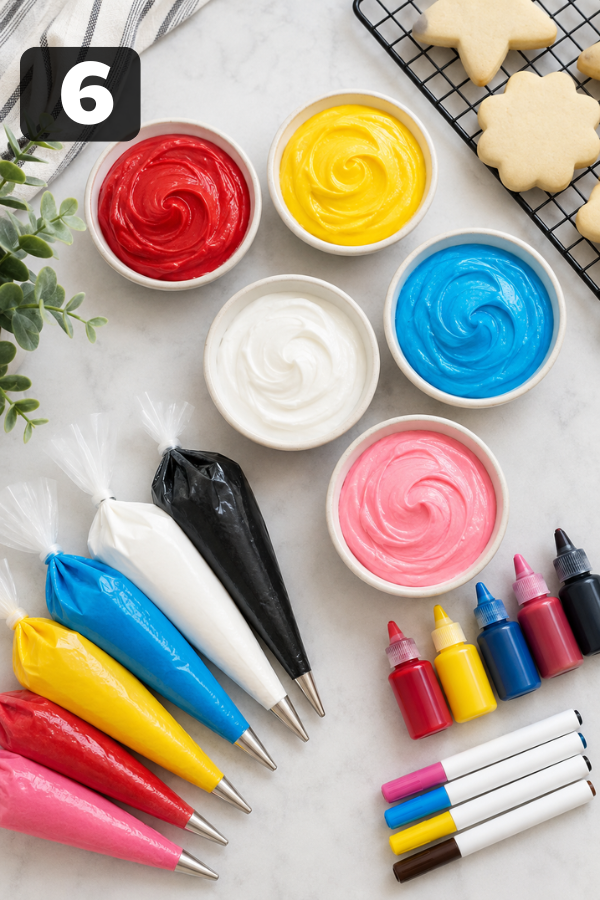
Divide the royal icing into small bowls and tint each color. Next, prepare thicker icing for outlining and thinner icing for flooding.
A simple test is to drag a spoon through the icing. For flood icing, the line should slowly disappear in about 10–15 seconds. If it disappears right away, it’s too thin. However, if the line barely moves and sits there like wet cement, add a tiny bit of water.
Step 7: Outline First, Then Flood
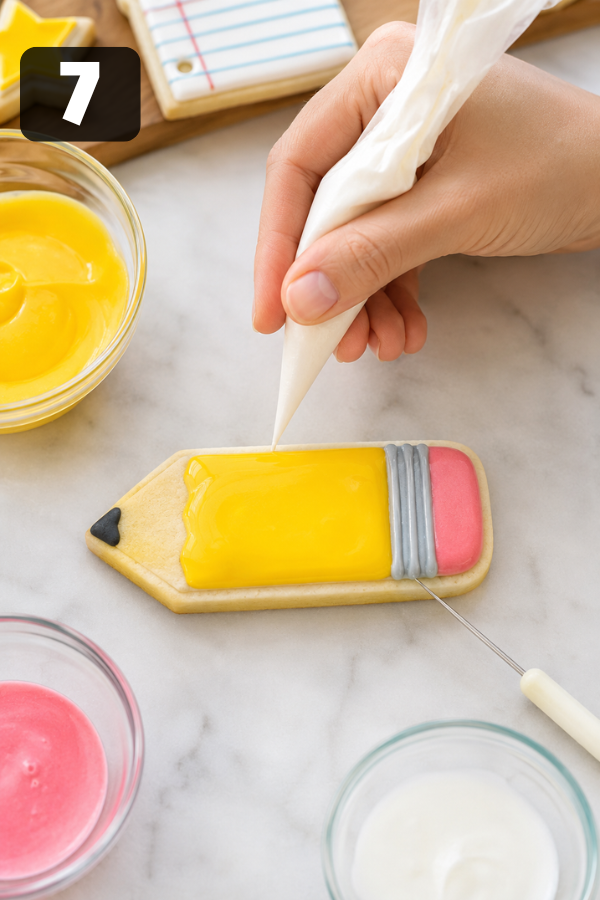
Pipe an outline around each section. Then, fill the inside with thinner icing. Use a toothpick or scribe tool to pull icing into corners and pop bubbles.
For pencil cookies, decorate in sections:
- Pink eraser
- Gray metal band
- Yellow pencil body
- Tan wood tip
- Black lead
Meanwhile, apple cookies only need:
- Red apple body
- Brown stem
- Green leaf
- Small white highlight
For notebook paper, use:
- White base
- Blue horizontal lines
- Red margin line
- “A+” or teacher name
Keep the designs simple if you’re short on time. In fact, a clean outline and one cute detail often look better than too many tiny decorations squeezed onto one cookie.
Step 8: Let the Cookies Dry
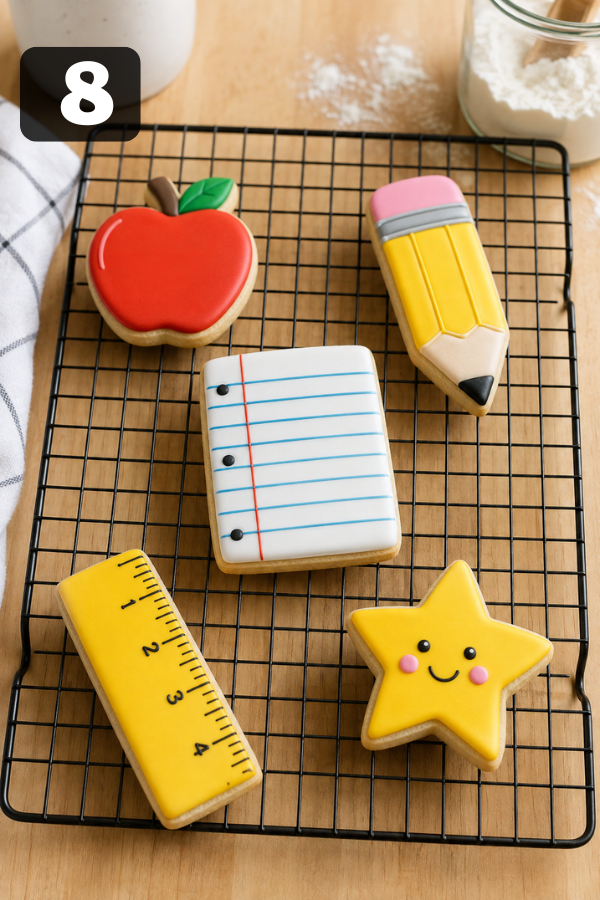
Royal icing needs time. Although some small details can be added after about 1 hour, fully flooded cookies often need 6–8 hours or overnight before writing with edible markers.
This is where many cookie projects go sideways. The cookie may look dry at first. However, writing on it too early can cause the marker to drag through the icing. Therefore, give it more time than you think.
Step 9: Package or Serve
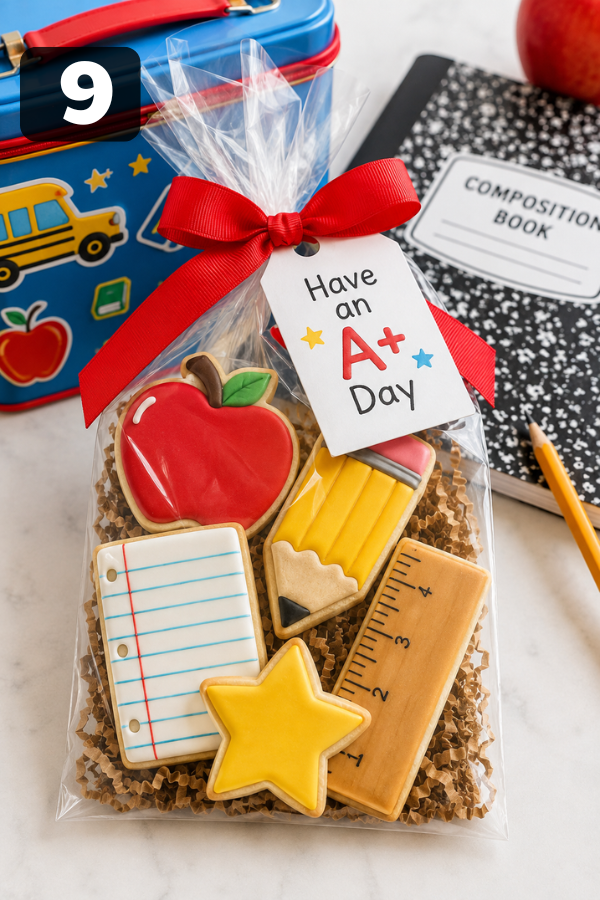
Once the cookies are fully dry, place them in clear bags, lunchboxes, or small bakery boxes. Before sending them to school, however, check the classroom food policy first. Some schools allow homemade treats, while others prefer store-bought or individually labeled items.
For teacher gifts, add a small tag with the ingredients. In addition, this is a thoughtful detail if the cookies include common allergens like wheat, milk, eggs, nuts, soy, or sesame.
Shortcut Version: No-Bake Pencil Cookies
No time to bake? Make pencil cookies with wafer cookies. They’re cute, fast, and very kid-friendly.
You’ll need:
- Wafer cookies
- White candy melts or almond bark
- Pink candy melts
- Chocolate chips
Cut one end of each wafer into a pencil point. Dip or spread white candy coating on the pointed end, then press a chocolate chip at the tip for the pencil lead. Once set, coat the other end with pink candy melts to make the eraser.
That’s it. Really.
The only thing to watch is the candy coating. Keep your bowl dry, use gentle heat, and stir slowly. A tiny splash of water can make melted candy turn thick and clumpy.
Fun Design Ideas
Apple Cookies
Apple cookies are the classic teacher gift. Use red icing for the body, brown for the stem, and green for the leaf. Add a tiny white highlight while the red icing is still wet.
Cute messages:
- A+ Teacher
- First Day
- Welcome Back
- Smart Cookie
Notebook Paper Cookies
These are perfect for personalization. Start with a white rectangle cookie. Add blue lines, a red margin, and a short note.
Try:
- A+
- Grade 2
- You’ve Got This
- Mrs. Lee
- First Day Vibes
Edible markers make this design much easier once the icing is fully dry.
Chalkboard Cookies
Use a rectangle cookie with a brown frame and green or black center. Once dry, write with white icing.
Message ideas:
- ABC
- 1 + 1 = 2
- Welcome Back
- Best Teacher
For cleaner lettering, let the chalkboard base dry fully before adding white writing. If the icing is still soft, the letters may sink or smear.
Ruler Cookies
Flood a long rectangle cookie with yellow icing. Once dry, use a black edible marker to draw numbers and little ruler marks.
This is one of the easiest designs because the marker does most of the work.
Gold Star Cookies
Gold stars are great filler cookies for a gift box. Flood star cookies with yellow icing. For a shiny finish, paint dry cookies with gold luster dust mixed with clear vanilla extract.
They look fancy, but they’re not fussy. We like that.
Tips for Success
Start small. If this is your first time making back to school cookies, choose two designs: apples and notebook paper. They’re easy, cute, and forgiving.
Keep your icing covered when you’re not using it. Royal icing crusts fast, especially in a cool, dry kitchen.
Use gel food color instead of liquid color. Gel gives stronger color without thinning the icing too much.
Let cookies dry longer before packaging. If you can, decorate the night before and package in the morning.
And here’s a tiny truth: not every cookie has to be perfect. Kids don’t care if the notebook lines are a little wobbly. Teachers don’t either. Homemade has charm because a real person made it.
Storage and Make-Ahead Notes
Decorated sugar cookies store well at room temperature once the icing is fully dry. Keep them in an airtight container with parchment between layers.
For best flavor and texture, enjoy them within 5–7 days. They may last longer if stored well, but decorated cookies usually taste freshest during the first week.
You can also freeze plain baked cookies before decorating. Let them cool, freeze flat, then thaw before adding icing. Fully decorated cookies can be frozen, but condensation may affect colors and marker details.
Make-ahead plan:
- 3 days ahead: make dough
- 2 days ahead: bake cookies
- 1 day ahead: decorate
- Day of: package and gift
This schedule keeps the project from taking over your kitchen.
What to Serve With Back to School Cookies
For kids, keep it simple:
- Cold milk
- Apple slices
- Yogurt cup
- Strawberries
- Cheese stick
- Turkey sandwich
- Peanut-free snack mix, if school safe
For teachers or staff rooms:
- Coffee
- Iced coffee
- Tea
- Fruit tray
- Mini muffins
- Bagels
- Yogurt parfaits
If you’re making a back-to-school party table, pair the cookies with lemonade, veggie cups, popcorn, and mini sandwiches. Sweet plus simple always wins.
Common Issues and Easy Fixes
If your cookies spread, the dough was probably too warm. Chill the dough and chill the cut-outs before baking.
If the icing runs over the edges, it’s too thin. Add powdered sugar and use thicker icing for the outline.
If colors bleed, let the base layer dry longer before adding details. Dark colors like black and red need extra patience.
If edible markers smear, the icing isn’t dry enough. Wait overnight if you can.
If candy melts seize, moisture likely got into the bowl. Use low heat, dry tools, and slow stirring.
Small fixes make a huge difference. Cookie decorating is less like cooking dinner and more like packing a backpack: a little order saves you a lot of frustration.
FAQs
1. Can I make back to school cookies ahead of time?
Yes. Make the dough up to 3 days ahead, bake the cookies 1–2 days ahead, and decorate them the day before serving.
2. What are the easiest back to school cookies for beginners?
Wafer pencil cookies, apple cookies, notebook paper cookies, and ruler cookies are the easiest because they use simple shapes.
3. Do I have to use royal icing?
No. You can use glaze icing, buttercream, candy melts, or edible markers. Royal icing works best if you want firm, neat designs.
4. How long does royal icing take to dry?
Small details may dry in 30–60 minutes, but flooded cookies usually need 6–8 hours or overnight.
5. How do I package cookies for teachers?
Use clear treat bags or small bakery boxes. Add ribbon, a short note, and an ingredient label if needed.
Nutrition Info
Nutrition depends on cookie size, icing amount, and decorations. One decorated sugar cookie usually falls around 120–250 calories, with most calories coming from flour, butter, sugar, and icing.
To make a lighter version, use smaller cutters, thinner icing, and fewer candy decorations. These cookies are meant to be a fun seasonal treat, not an everyday lunchbox staple—and that’s perfectly okay.
Final Thoughts
Back to school cookies don’t have to be perfect to feel special. A few simple shapes, colorful icing, and thoughtful packaging can turn basic sugar cookies into a sweet first-week treat for kids, teachers, or classmates. Keep the designs easy, let the icing dry fully, and have fun with the little details.
Don’t Miss: Healthy Banana Oatmeal Cookies
Don’t Miss: Fudgy Chocolate Brownie Cookies
Also Try: 2-Ingredient Banana Donut Holes
Ingredients
Method
- Make and chill the dough: Prepare the sugar cookie dough, shape it into a disc, wrap well, and chill for at least 1 hour.

- Roll the dough: Lightly flour your counter and roll the dough to about 1/4 inch thick.
- Cut the shapes: Use apple, pencil, star, or rectangle cutters. Rectangles can become notebook paper, rulers, or chalkboards.
- Chill the cut-outs: Place cookies on parchment-lined baking sheets and chill for about 20 minutes to help them hold their shape.
- Bake: Bake at 325°F for 8–10 minutes, then cool completely on a wire rack before decorating.
- Mix the icing colors: Divide royal icing into bowls and tint as needed. Use thicker icing for outlines and thinner icing for flooding.
- Outline and flood: Pipe outlines first, then fill with thinner icing. Use a toothpick to smooth icing and pop air bubbles.
- Let cookies dry: Allow small details to set for about 1 hour, and let flooded cookies dry 6–8 hours or overnight before writing on them.
- Package or serve: Once fully dry, place cookies in clear bags, lunchboxes, or small gift boxes. Add an ingredient tag for teacher gifts if needed.
