Melt In Your Mouth Chicken Breast Recipe
If you’ve ever pulled a pan of chicken breasts out of the oven and thought, why does this look good but eat like cardboard?—you’re not alone. That’s exactly why the Melt In Your Mouth Chicken Breast Recipe has earned its cult-favorite status in so many American kitchens. This recipe is simple, cozy, and forgiving. It uses everyday ingredients, creates almost no mess, and somehow turns lean chicken breast into something tender, juicy, and deeply comforting. It’s the kind of dinner you make on a busy Tuesday, then quietly add to your “reliable forever meals” list.
Why This Chicken Is Always Shockingly Tender
Let’s start with the real question: Why does this recipe work when so many baked chicken recipes fail?
Here’s the thing. Chicken breast doesn’t like stress. High heat, long cooking times, or dry ovens will toughen it fast. This recipe avoids all that by wrapping the chicken in a creamy coating that protects moisture while it cooks gently.
The mayo (or Greek yogurt, if that’s your thing) does three important jobs at once:
- It seals in moisture, so the chicken doesn’t dry out
- It slows down protein tightening, keeping the meat soft
- It carries flavor evenly across the surface
Add Parmesan, garlic, and seasoning, and suddenly you’re not just cooking chicken—you’re building a soft, savory blanket around it. That’s the “melt-in-your-mouth” part. And yes, it really lives up to the name.
Why You’ll Love This Recipe (And Probably Make It Again)
This is one of those meals that quietly fits into real life.
- Minimal prep: About 10 minutes, no fancy tools
- One pan: Less cleanup, always a win
- Family-friendly: Mild, creamy, not spicy
- Flexible: Works with mayo, yogurt, or a mix
- Meal-prep friendly: Reheats well without turning rubbery
Honestly, it’s hard to find a downside. Even picky eaters tend to go back for seconds, which says a lot.
Ingredients You’ll Need
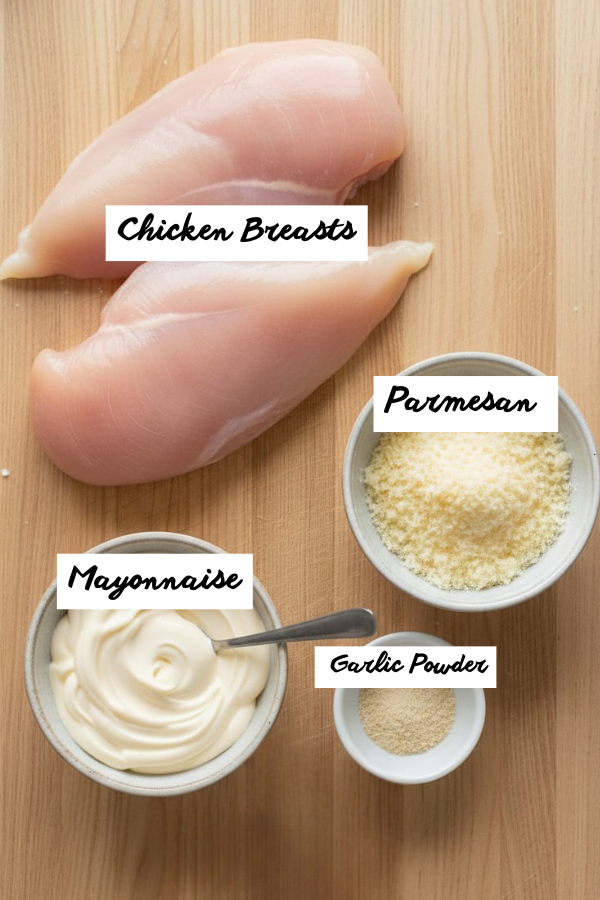
Main Ingredients
- Boneless, skinless chicken breasts (about 1.5–2 pounds)
Try to choose similar sizes, or slice thicker pieces in half lengthwise. - Mayonnaise – ½ cup
Full-fat gives the creamiest result. - Grated Parmesan cheese – ½ cup
Freshly grated melts better, but pre-grated works. - Garlic powder – 1 teaspoon
- Seasoning salt – ½ teaspoon
- Black pepper – ¼ teaspoon
Optional Swaps & Add-Ins
- Greek yogurt instead of mayo (lighter, tangier)
- Paprika or smoked paprika for warmth
- A squeeze of lemon for brightness
- Fresh parsley for finishing
Nothing here is fussy. If you’ve cooked dinner this week, you probably already have most of it.
Step by Step Instructions
Step 1: Get the Oven Ready
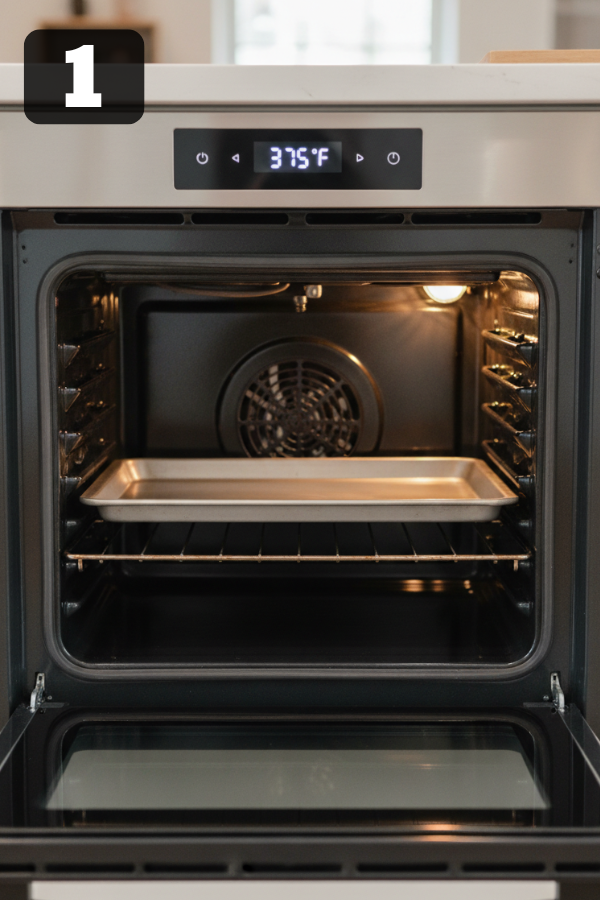
Preheat your oven to 375°F. This moderate heat cooks the chicken evenly without drying it out.
Step 2: Prep the Chicken
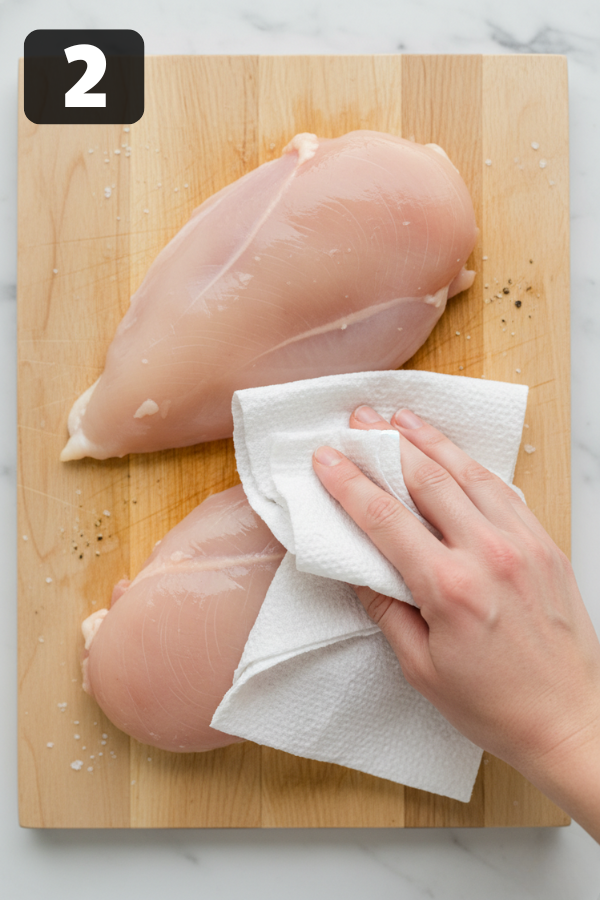
Place chicken breasts in a lightly greased baking dish in a single layer.
If any pieces are very thick, slice them horizontally. Even thickness matters more than you think.
Step 3: Mix the Creamy Topping
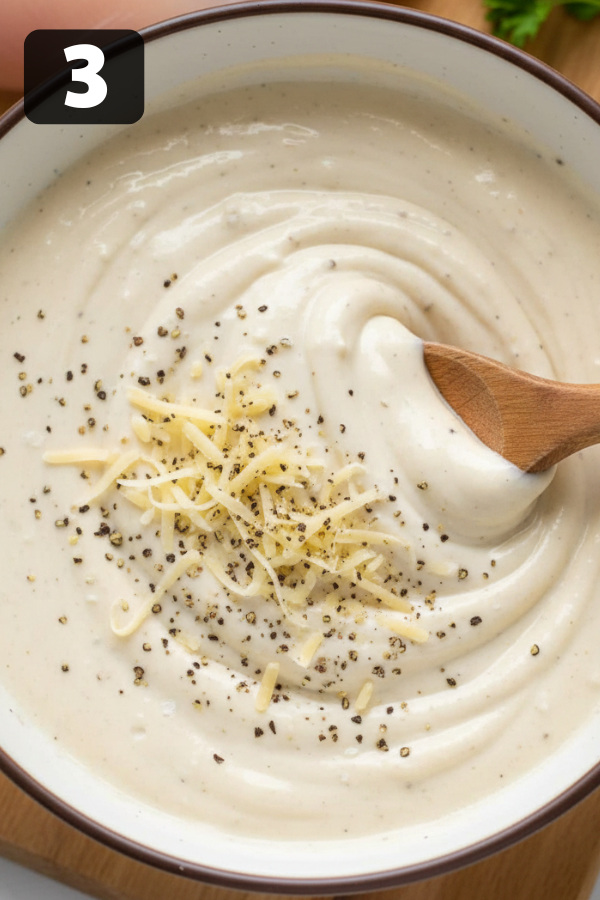
In a bowl, stir together:
- Mayonnaise
- Parmesan cheese
- Garlic powder
- Seasoning salt
- Black pepper
You want a thick, spreadable mixture—not runny, not stiff.
Step 4: Coat Generously (But Not Excessively)
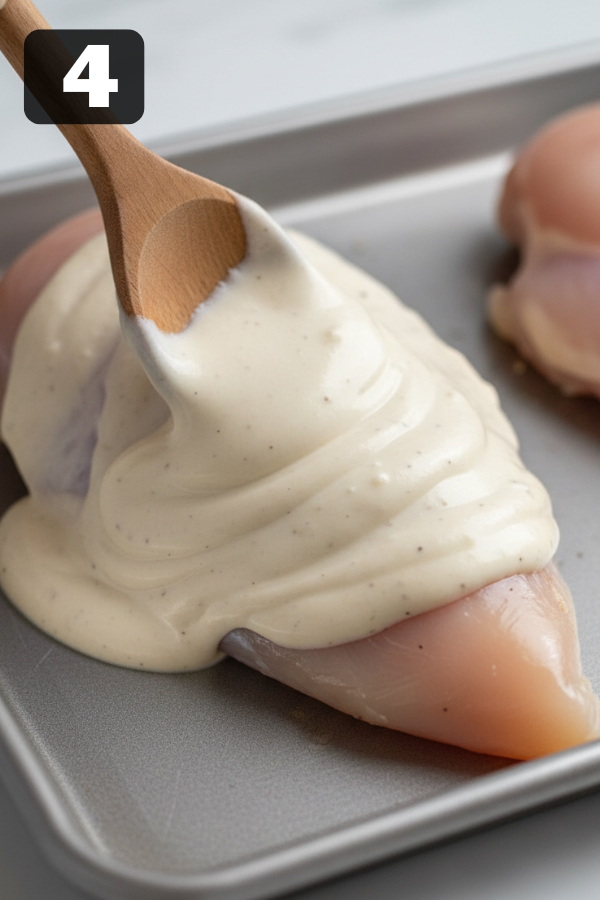
Spread the mixture evenly over each chicken breast.
Cover the top fully, but don’t pile it on. Too much can feel heavy.
Step 5: Bake Until Just Done
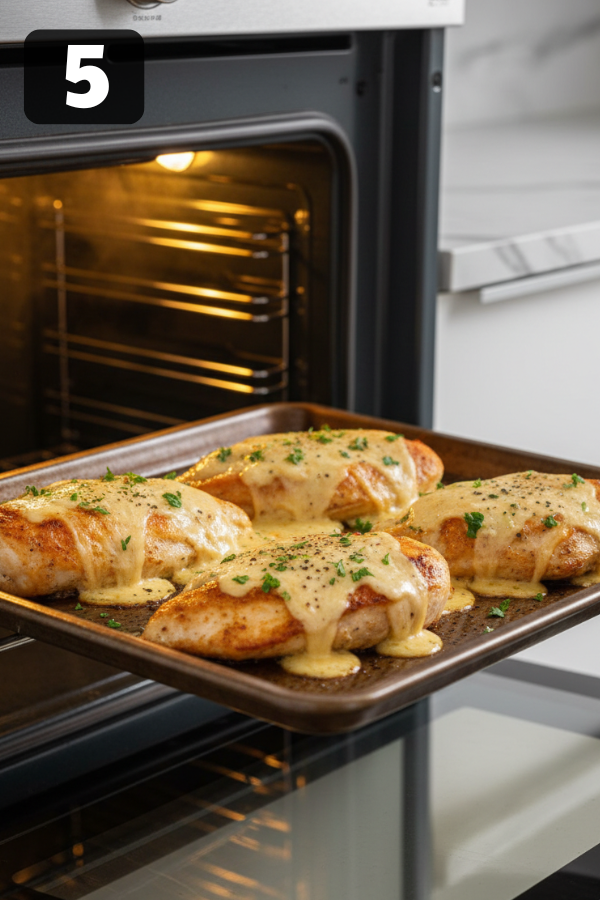
Bake uncovered for 30–40 minutes, depending on thickness.
The internal temperature should hit 165°F at the thickest point.
Step 6: Optional Golden Finish
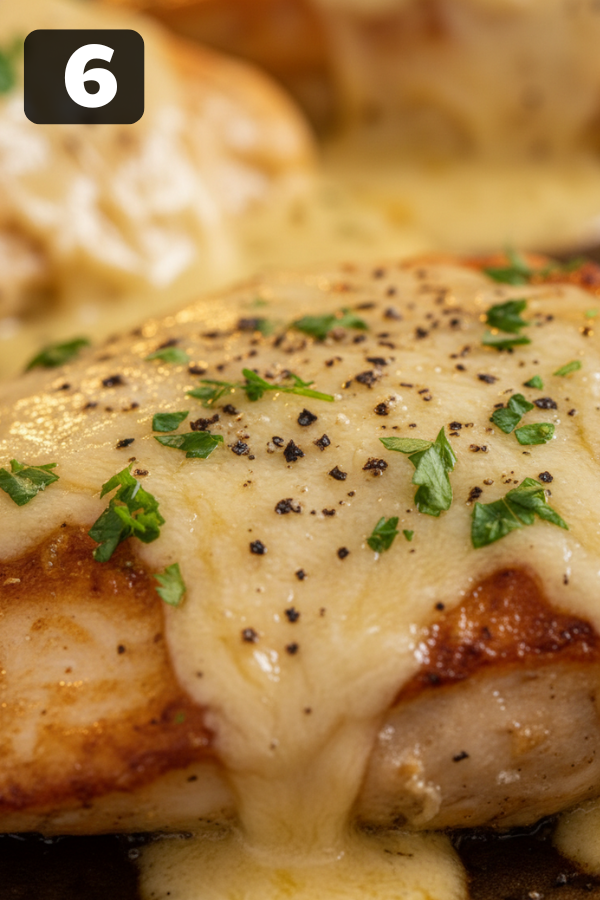
If you like a lightly browned top, switch the oven to broil for 2–3 minutes at the end. Keep an eye on it—Parmesan browns fast.
Step 7: Rest Briefly
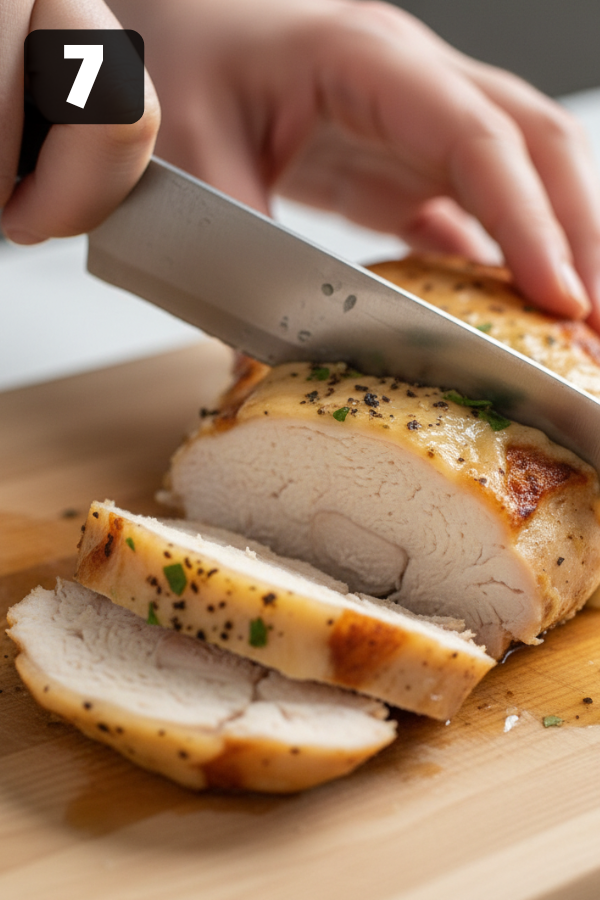
Let the chicken rest for 5 minutes before serving. This keeps the juices where they belong.
A Quick Note About Mayo
You know what? This chicken doesn’t taste like mayonnaise. Not even a little.
The mayo melts into the cheese and seasoning, leaving behind richness, not a sandwich vibe. If the idea still makes you hesitate, try half mayo and half Greek yogurt. Most people end up switching back to full mayo next time.
Tips That Make the Difference
A few small choices can take this from “good” to why is this so good?
- Don’t overbake. Use a thermometer if you can.
- Thin beats thick. Chicken cooks more evenly when it’s uniform.
- Fresh Parmesan melts better than the powdery shelf kind.
- Season lightly underneath if your chicken is very plain.
It’s simple cooking, but details matter.
Common Problems
My Chicken Was Dry
Most likely causes:
- Oven too hot
- Chicken too thick
- Cooked too long
Fix: Lower the heat next time and slice thick breasts in half.
The Topping Didn’t Brown
- Add a short broil at the end
- Sprinkle extra Parmesan on top before broiling
It Tastes Too Rich
- Swap half the mayo for Greek yogurt
- Serve with something fresh or acidic, like a lemony salad
Healthier Variations That Still Taste Comforting
If you’re cooking lighter but still want comfort:
- Greek yogurt version: Fewer calories, more tang
- Low-sodium seasoning: Keeps flavors balanced
- Add veggies to the pan: Broccoli or green beans roast nicely alongside
Chicken breast is naturally lean. This recipe keeps it satisfying without turning it into diet food.
What to Serve With Melt In Your Mouth Chicken
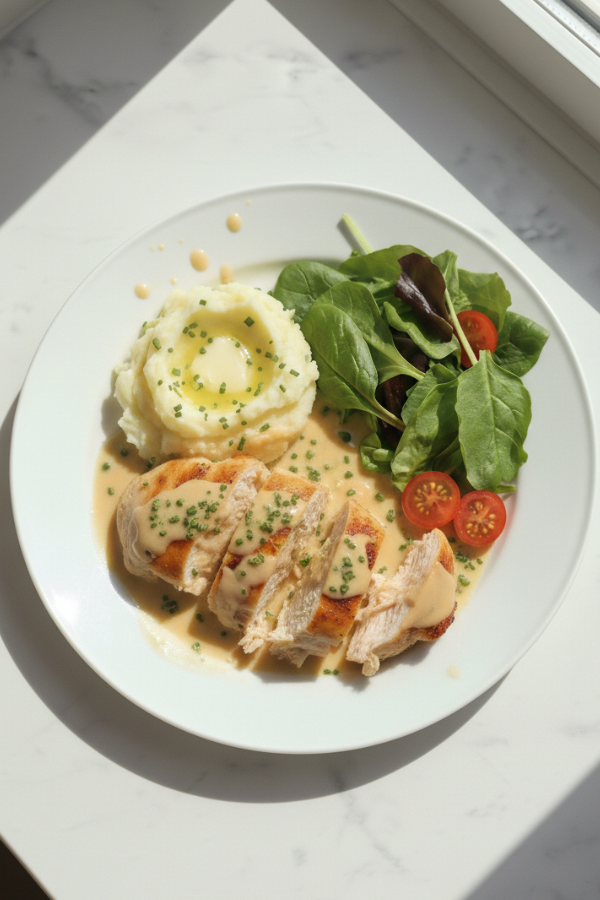
This dish plays well with simple sides.
- Rice or mashed potatoes soak up the sauce
- Roasted vegetables add balance
- A crisp green salad cuts the richness
- Buttered noodles if you’re leaning cozy
Leftovers also work well sliced over salads or tucked into wraps.
FAQs
- Can I make this ahead of time?
Yes. You can assemble the dish, cover it, and refrigerate up to 24 hours before baking. - Can I use chicken thighs instead?
You can, but thighs cook faster and are already juicy. Reduce baking time slightly. - Does Greek yogurt really work?
Yes. The texture is a little tangier, but still tender and moist. - Is this kid-friendly?
Very. The flavor is mild, creamy, and familiar. - Can I cook it in an air fryer?
You can, at 375°F for about 18–22 minutes, depending on thickness.
Nutrition Snapshot
Per serving (varies by portion and topping choice):
- Calories: ~450–550
- Protein: 40–60g
- Fat: Moderate, adjustable with yogurt swap
- Carbs: Very low
It’s filling, satisfying, and works well in balanced meals.
Final Thoughts
Some recipes are flashy. This one is dependable. The Melt In Your Mouth Chicken Breast Recipe is the kind of dinner you make when you want something comforting but don’t want to think too hard. It’s easy, forgiving, and quietly impressive.
And once you make it once? Don’t be surprised if it shows up again next week.

| Prep Time | 10 minutes |
| Cook Time | 30-40 minutes |
| Servings |
servings
|
- 1.5 pounds –2boneless skinless chicken breasts
- cup ½mayonnaise
- cup ½grated Parmesan cheese
- 1 teaspoon Garlic powder
- teaspoon ½seasoning salt
- teaspoon ¼black pepper
- Optional: paprika parsley, lemon juice
Ingredients
|
|
- Get the Oven Ready Preheat your oven to 375°F. This moderate heat cooks the chicken evenly without drying it out.

- Prep the Chicken Place chicken breasts in a lightly greased baking dish in a single layer. If any pieces are very thick, slice them horizontally. Even thickness matters more than you think.
- Mix the Creamy Topping In a bowl, stir together: Mayonnaise Parmesan cheese Garlic powder Seasoning salt Black pepper You want a thick, spreadable mixture—not runny, not stiff.
- Coat Generously (But Not Excessively) Spread the mixture evenly over each chicken breast. Cover the top fully, but don’t pile it on. Too much can feel heavy.
- Bake Until Just Done Bake uncovered for 30–40 minutes, depending on thickness. The internal temperature should hit 165°F at the thickest point.
- Optional Golden Finish If you like a lightly browned top, switch the oven to broil for 2–3 minutes at the end. Keep an eye on it—Parmesan browns fast.
- Rest Briefly Let the chicken rest for 5 minutes before serving. This keeps the juices where they belong.


