Easy Microwave 1-minute Chocolate Mug Cake
Craving something warm, chocolatey, and homemade but absolutely not in the mood to preheat an oven? This Easy Microwave 1-minute Chocolate Mug Cake gives you a soft, fudgy cake in a single mug, using pantry ingredients and about five minutes of your real life. It’s perfect for busy nights, small kitchens, and anyone who wants dessert for one without a pile of dishes.
Why This Little Mug Cake Is Such A Life-Saver
You know what? Some nights you don’t want a “baking project.” You just want a hug in a mug.
That’s exactly what this Easy Microwave 1-minute Chocolate Mug Cake does:
- It cooks in the microwave in about a minute, with another minute or two to cool. That’s it.
- Everything happens in one mug—no mixing bowls, no mixer, no pans to scrub.
- It uses ingredients most U.S. home cooks already have on hand: flour, cocoa, sugar, milk, oil or butter, baking powder, salt, vanilla.
- It makes just one portion, which means built-in portion control and no full 9×13 pan calling your name from the counter.
And because this version is egg-free, the texture stays soft and slightly fudgy instead of turning rubbery, which is a common complaint with microwave cakes that use a whole egg. So you get something that feels like a real dessert, not a science experiment.
Is it “healthy”? It’s still cake—but you can lighten it up a little, and we’ll talk about that in a bit. For now, think of it as a smart comfort treat: small batch, fast, and way cheaper than a late-night DoorDash dessert run.
Ingredients
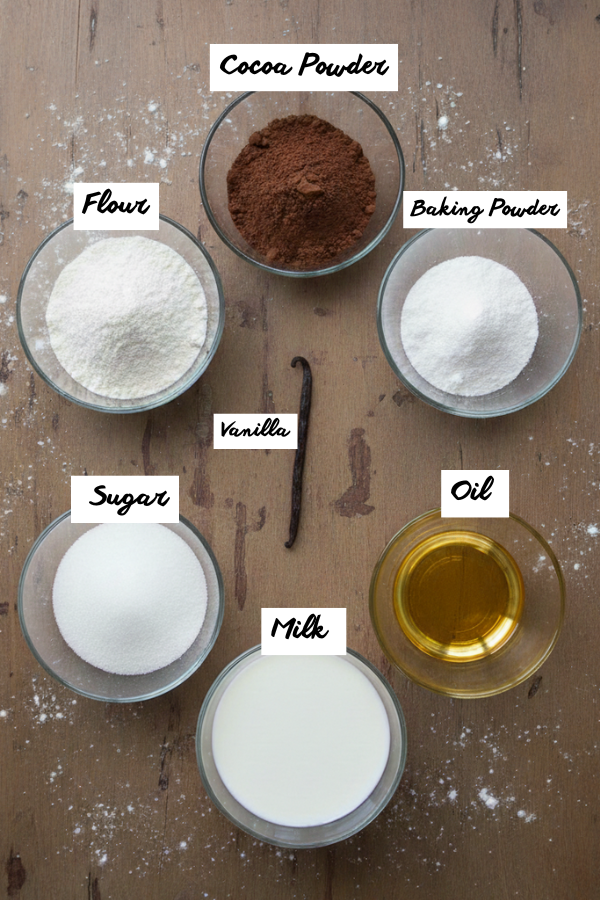
Let’s walk through what goes into your Easy Microwave 1-minute Chocolate Mug Cake and why each part matters.
The Main Dry Ingredients
- All-purpose flour – Creates structure so your cake stands up instead of turning into chocolate soup.
- You’ll use a few tablespoons, just enough to hold everything together without making it bready.
- Unsweetened cocoa powder – The star.
- Any unsweetened cocoa works; a good-quality cocoa gives deeper flavor and color.
- Sugar – Sweetens and keeps the texture soft.
- Regular white sugar is classic.
- Want a slightly deeper taste? Swapping part of it for brown sugar adds a gentle caramel note.
- Baking powder – Helps the batter puff up in the microwave.
- Measure it carefully; too much and your cake will rise fast, then sink and turn gummy.
- Salt – Just a pinch.
- It doesn’t make the cake salty; it makes the chocolate taste more “chocolatey.”
The Wet Ingredients
- Milk – Adds moisture and tenderness.
- Whole or 2% milk gives the best texture.
- Plant-based milks (almond, oat, soy) also work if that’s what you keep in the fridge.
- Oil or melted butter – Gives richness and keeps the cake moist.
- Neutral oil usually makes a very soft, moist crumb.
- Butter adds flavor but can make the cake set a bit firmer once it cools.
- Vanilla extract – Rounds out the flavor.
- It’s only a splash, but it makes the cake smell and taste like a “real” bakery treat.
Optional Mix-Ins And Toppings
This is where you can play a little:
- Chocolate chips or chunks for gooey pockets
- A spoonful of peanut butter or Nutella in the center for a “lava” moment
- Mini marshmallows and crushed graham crackers for a quick s’mores vibe
- Whipped cream, ice cream, or berries on top once it’s cooked
If you’re cooking for kids, letting them choose a mix-in or topping is an easy way to make it feel special without extra work from you.
Step-by-Step Instructions
Here’s the thing: the steps are simple, but the tiny details are what make the cake turn out soft instead of weird and chewy. So we’ll keep them clear and short.
Step 1 – Pick The Right Mug
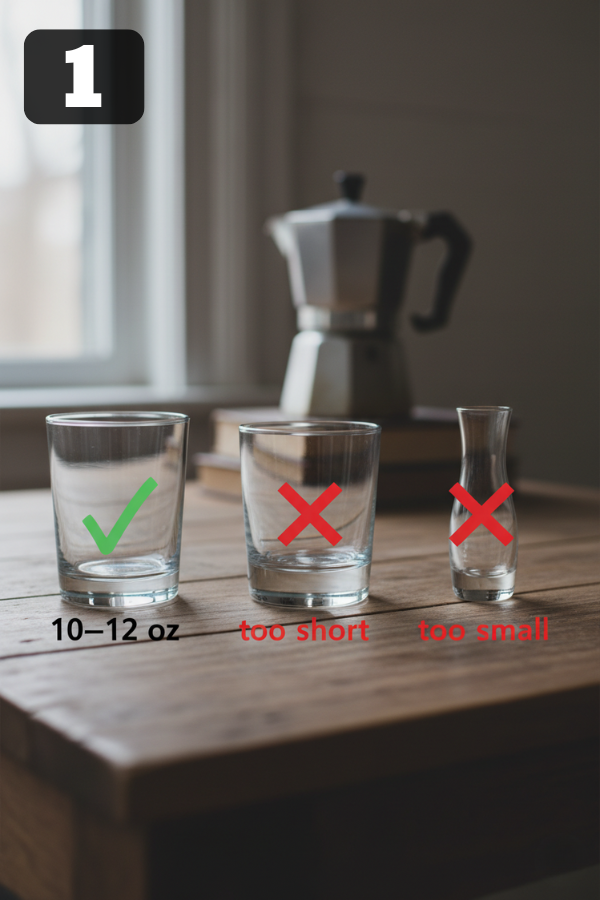
Use a microwave-safe mug that holds about 10–12 ounces (a standard big coffee mug).
- The batter should fill the mug no more than halfway.
- Avoid metal trims or very thin glass. A sturdy ceramic mug is your friend here.
Step 2 – Whisk The Dry Ingredients Right In The Mug
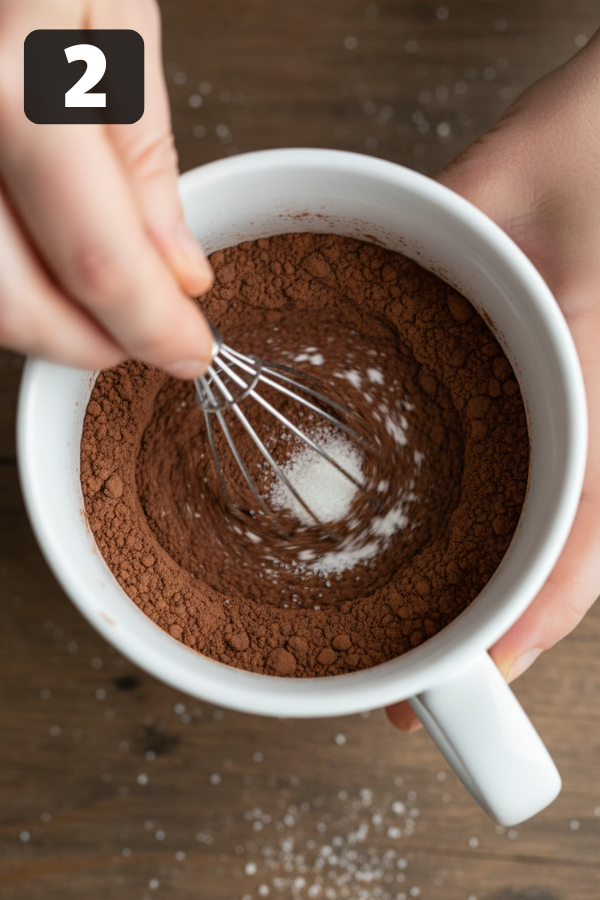
Add your flour, cocoa, sugar, baking powder, and a pinch of salt directly into the mug.
- Use a fork or mini whisk to stir everything until the color looks even.
- This prevents dry pockets of flour hiding at the bottom.
Honestly, this 10-second whisking step makes the difference between “Oh wow” and “Why is there raw flour in my last bite?”
Step 3 – Add The Wet Ingredients And Mix Until Smooth
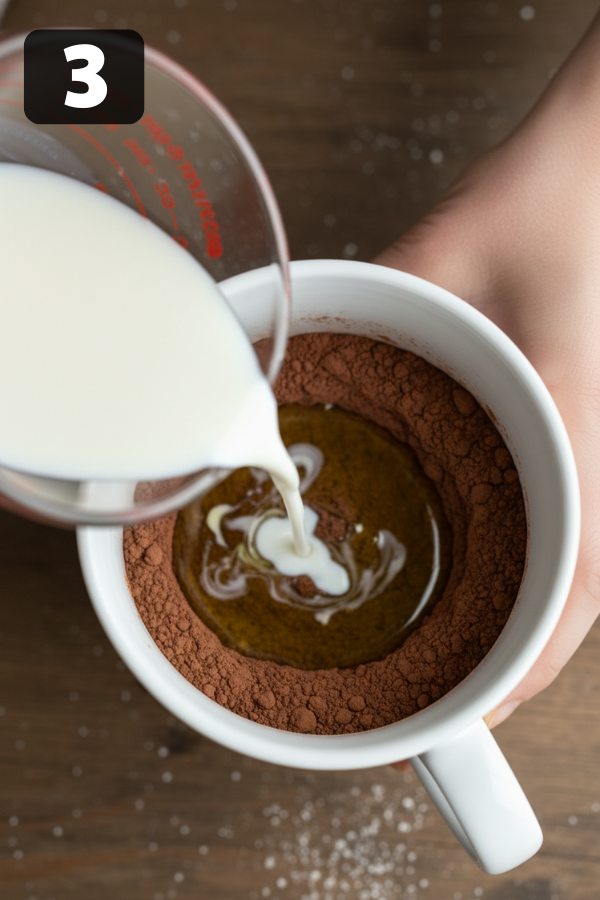
Pour in the milk, oil or melted butter, and vanilla.
- Stir from the bottom of the mug up, scraping the sides as you go.
- The batter should look smooth and slightly thick—like a loose brownie batter.
- If it feels too thick, you can add a tiny splash of milk (about ½ teaspoon) to loosen it.
Try not to beat it like pancake batter. Just mix until you don’t see dry spots anymore.
Step 4 – Stir In Any Mix-Ins

Fold in chocolate chips, a few mini marshmallows, or a sprinkle of crushed nuts.
- For a lava center, gently press a piece of chocolate or a small spoonful of Nutella right into the middle.
- Don’t stir that part in—just let it sit there. It’ll melt as the cake cooks.
This is also a nice little “customization” moment if you’re making two mugs for movie night. Same base batter, different mix-ins.
Step 5 – Microwave For About 1 Minute
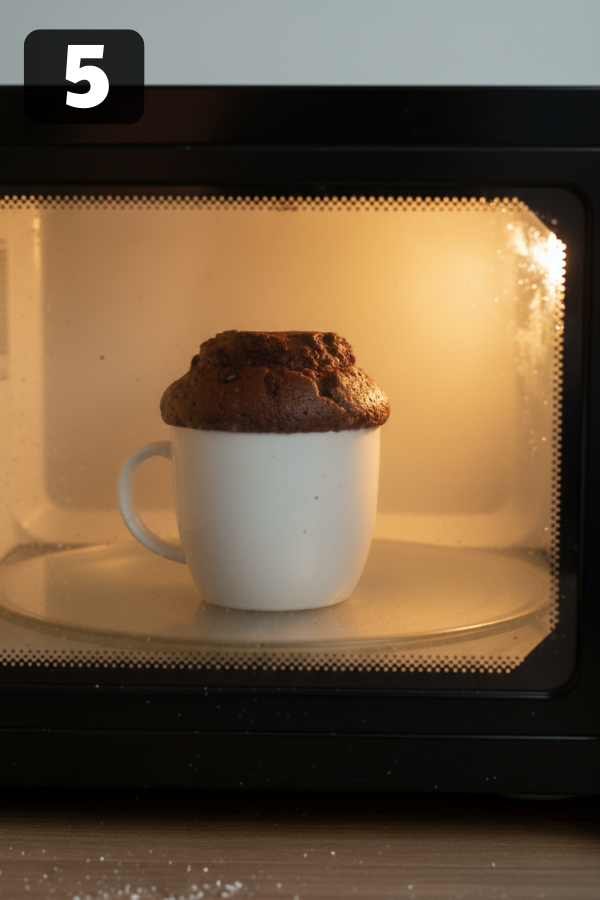
Place the mug in the center of the microwave.
- In a typical 1000W microwave, start with 45–60 seconds on high.
- If your microwave is very powerful, you may need closer to 45 seconds.
- If it’s older or lower wattage, you might need closer to 60–75 seconds, but always check early.
The cake should rise, set on top, and look slightly glossy in the middle. If it still looks very wet, microwave in 10-second bursts until it’s just done.
A tiny bit underdone is better than overdone. You can always add a few more seconds. You can’t un-cook a rubbery cake.
Step 6 – Let It Rest For A Minute
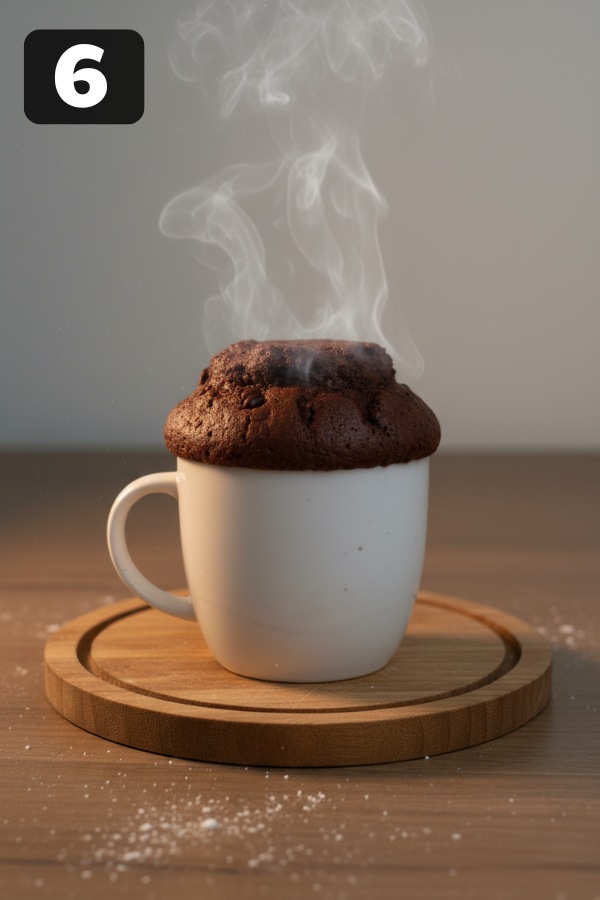
This part is easy to skip, but don’t:
- Let the mug sit on the counter for 1–2 minutes.
- The cake will finish cooking from residual heat and the crumb will settle.
- The mug will also cool down just enough so you don’t burn your fingers.
Step 7 – Top And Serve Warm
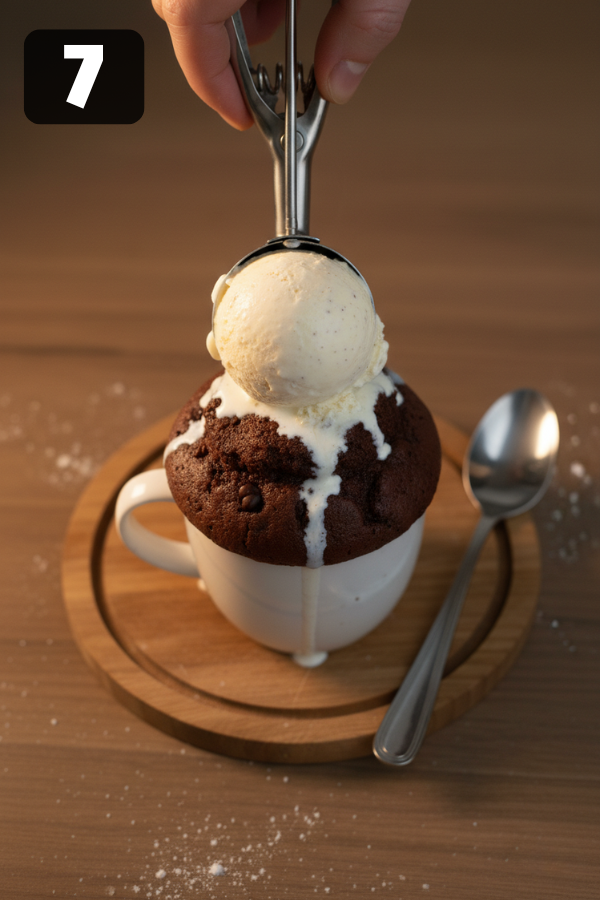
Now the fun part:
- Add a scoop of vanilla ice cream, a swirl of whipped cream, or some berries.
- Eat it straight from the mug with a spoon. No need to unmold it; this is a “lazy but smart” dessert.
If you’re serving someone else, you can wipe the rim of the mug and sprinkle a little cocoa or powdered sugar on top. It looks fancy even though it took you less than five minutes.
Tips for Success
You don’t have to be a baker to get this right, but a few small habits help.
Make Friends With Your Microwave
Every microwave is a bit different, so think of the first mug cake as your test run.
- If your cake came out dry: cut the cooking time by 10–15 seconds next time.
- If it was gooey in the middle but raw at the very bottom: cook 5–10 seconds longer, or stir the batter more carefully before cooking.
- If it overflowed: use a larger mug, or reduce the batter slightly.
Once you learn the sweet spot for your microwave, this recipe becomes almost automatic.
Keep The Batter Small And Gentle
It’s tempting to double the batter in one mug, but that usually ends with overflow or a weirdly cooked center.
- For two servings, make two separate mugs. Same amount of work, better results.
- Stir only until combined. Overmixing can make the cake tough.
Adjust For Your Goals: Indulgent Vs “Lighter”
Want a lighter version?
- Use slightly less sugar and swap part of the oil for unsweetened applesauce or Greek yogurt.
- Stick with plant-based milk if that’s already part of your routine.
Want full comfort mode?
- Add extra chocolate chips, use butter instead of oil, and top with ice cream.
- Maybe don’t do that every night—but for a hard day? It works.
What To Serve With Your Chocolate Mug Cake
You don’t need anything extra, but pairing can make it feel like a tiny “moment” at the end of the day.
- Classic combo: hot mug cake + cold vanilla ice cream. The contrast is everything.
- Cozy combo: mug cake with a cup of herbal tea or decaf coffee while you watch Netflix.
- Family movie night: make a few mugs, top them with whipped cream and sprinkles, and let everyone decorate their own.
If you like to keep things a bit balanced, serving the cake with some fresh berries adds a bit of brightness and cuts through the richness.
FAQs
- Can I really cook it in just one minute?
Cooking time in the microwave is usually around one minute, sometimes a little more or less depending on your microwave. Mixing and cooling adds a couple of minutes, but it’s still a very fast dessert. - Can I make this recipe dairy-free?
Yes. Use almond milk, oat milk, or soy milk and a neutral oil. If you add chocolate chips, just choose dairy-free ones. - Can I switch the flour?
A gluten-free all-purpose blend usually works well. Coconut or almond flour don’t behave the same and need different ratios, so stick to a tested recipe if you want those. - Is it safe for kids to make?
Kids can definitely help with measuring and stirring. An adult should handle putting the mug in and out of the microwave, because the mug gets hot. - Can I bake it in the oven instead?
You can, but it stops being a “1-minute” cake. Use an oven-safe mug or ramekin and bake at 350°F for roughly 10–15 minutes, until the center is just set.
Common Issues And Quick Fixes
You make it once, it’s perfect. You make it another time, something’s… off. It happens. Here’s how to troubleshoot.
The cake is rubbery or spongy.
You probably cooked it too long or used an egg. Next time, shorten the cook time and stick with an egg-free version.
The cake is dry.
Usually this means too much flour or cocoa, or too much time in the microwave. Level off your measuring spoons and try adding a tiny splash more milk next time.
The cake overflowed.
Your mug was too small, or you had too much baking powder. Use a bigger mug and measure the baking powder carefully.
The center is still raw.
Give it another 5–10 seconds in the microwave. If you’re aiming for a lava center, you want it a little gooey, but not raw batter at the bottom.
Nutrition Snapshot
Exact numbers will vary based on your ingredients, but a standard mug cake like this usually lands somewhere around:
- 300–450 calories
- 4–6 grams of protein
- 40–60 grams of carbs
- 15–25 grams of fat
If you swap part of the oil for yogurt or applesauce and use a bit less sugar, you can shave off some calories while still keeping it satisfying. But again—this is dessert. Small portion, big comfort.
Final Thoughts
Sometimes the best kind of baking isn’t really “baking” at all—it’s you, a spoon, a mug, and five quiet minutes at the end of a long day. This Easy Microwave 1-minute Chocolate Mug Cake isn’t meant to impress a crowd or win a bake-off; it’s there for the nights when you’re tired, you still want something warm and chocolatey, and you’d rather not face a sink full of dishes. Keep the ingredients nearby, learn the sweet spot for your microwave, and this little recipe turns into a tiny ritual: measure, stir, microwave, breathe, enjoy. One mug, one minute, and a small reminder that you’re allowed to spoil yourself—just a little.

| Prep Time | 2 minutes |
| Cook Time | 1 minutes |
| Servings |
serving
|
- 4 Tbsp all-purpose flour
- 2 Tbsp unsweetened cocoa powder
- 3 Tbsp granulated sugar
- tsp ¼baking powder
- 1 pinch smallof salt
- 3 Tbsp milk dairy or plant-based
- 2 Tbsp neutral oil or melted butter
- tsp ¼vanilla extract
- Optional mix-ins
- 1 –2 Tbsp chocolate chips or chunks
- 1 tsp Nutella or peanut butter for a lava center
- Optional toppings
- Whipped cream or vanilla ice cream
- Fresh berries extra chocolate chips, or a drizzle of chocolate/caramel sauce
Ingredients
|
|
- Pick The Right Mug Use a microwave-safe mug that holds about 10–12 ounces (a standard big coffee mug). The batter should fill the mug no more than halfway. Avoid metal trims or very thin glass. A sturdy ceramic mug is your friend here.

- Whisk The Dry Ingredients Right In The Mug Add your flour, cocoa, sugar, baking powder, and a pinch of salt directly into the mug. Use a fork or mini whisk to stir everything until the color looks even. This prevents dry pockets of flour hiding at the bottom. Honestly, this 10-second whisking step makes the difference between “Oh wow” and “Why is there raw flour in my last bite?”
- Add The Wet Ingredients And Mix Until Smooth Pour in the milk, oil or melted butter, and vanilla. Stir from the bottom of the mug up, scraping the sides as you go. The batter should look smooth and slightly thick—like a loose brownie batter. If it feels too thick, you can add a tiny splash of milk (about ½ teaspoon) to loosen it. Try not to beat it like pancake batter. Just mix until you don’t see dry spots anymore.
- Stir In Any Mix-Ins Fold in chocolate chips, a few mini marshmallows, or a sprinkle of crushed nuts. For a lava center, gently press a piece of chocolate or a small spoonful of Nutella right into the middle. Don’t stir that part in—just let it sit there. It’ll melt as the cake cooks. This is also a nice little “customization” moment if you’re making two mugs for movie night. Same base batter, different mix-ins.
- Microwave For About 1 Minute Place the mug in the center of the microwave. In a typical 1000W microwave, start with 45–60 seconds on high. If your microwave is very powerful, you may need closer to 45 seconds. If it’s older or lower wattage, you might need closer to 60–75 seconds, but always check early. The cake should rise, set on top, and look slightly glossy in the middle. If it still looks very wet, microwave in 10-second bursts until it’s just done. A tiny bit underdone is better than overdone. You can always add a few more seconds. You can’t un-cook a rubbery cake.
- Let It Rest For A Minute This part is easy to skip, but don’t: Let the mug sit on the counter for 1–2 minutes. The cake will finish cooking from residual heat and the crumb will settle. The mug will also cool down just enough so you don’t burn your fingers.
- Top And Serve Warm Now the fun part: Add a scoop of vanilla ice cream, a swirl of whipped cream, or some berries. Eat it straight from the mug with a spoon. No need to unmold it; this is a “lazy but smart” dessert. If you’re serving someone else, you can wipe the rim of the mug and sprinkle a little cocoa or powdered sugar on top. It looks fancy even though it took you less than five minutes.


