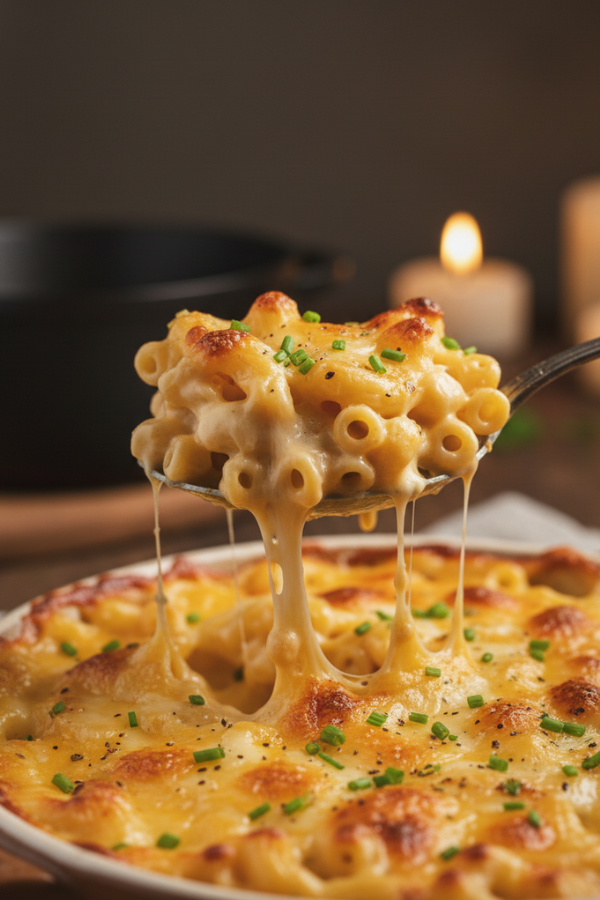
Creamy Baked Macaroni and Cheese
If you want Creamy Baked Macaroni and Cheese that stays saucy (not dry), tastes like real cheese (not bland), and still feels doable on a busy night—this is it. The “secret” is simple: slightly undercook the pasta, keep the sauce a touch looser than you think, and bake just long enough to get that golden top without drying out the middle.
And yes—you can make it ahead, reheat it without sadness, and even sneak in a little nutrition without ruining the comfort factor.
Why You’ll Love This Recipe
Mac and cheese is supposed to feel like a warm blanket, not a homework assignment. This version leans into that.
- Creamy middle, golden top — the contrast is the whole point
- Weeknight realistic — common ingredients, no fancy steps
- Low-stress cleanup — one pot for pasta + one pan for sauce (or use the same pot if you like)
- Meal-prep friendly — you can assemble ahead and bake later
- Flexible — keep it classic, add veggies, or turn it into a full dinner with protein
Ingredients
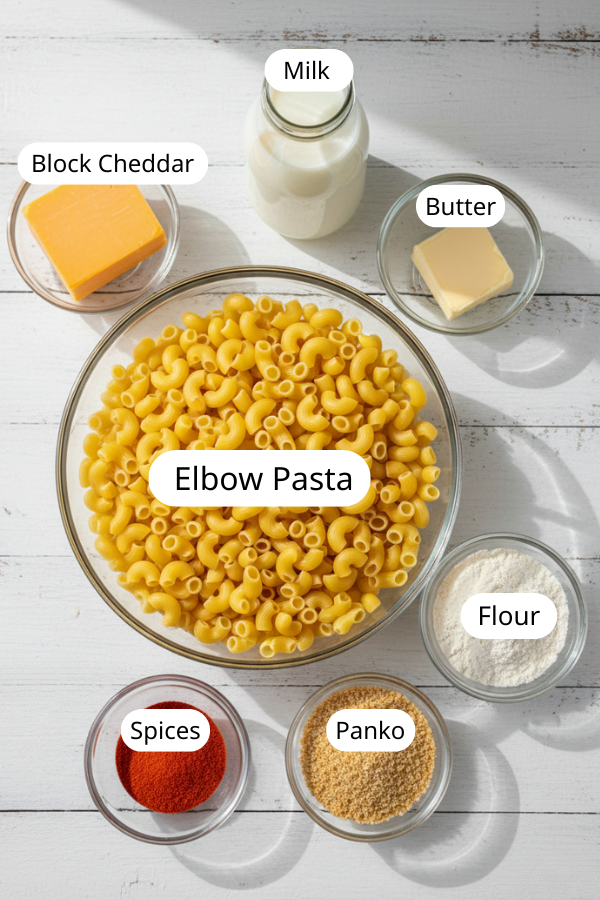
Pasta
- 1 lb elbow macaroni (or cavatappi)
- Short shapes hold sauce well and bake evenly
- If using small shells, you’ll get extra “pockets” of sauce (which is never a bad thing)
Cheese (choose a simple blend)
You don’t need five cheeses to make great mac. Two or three is plenty.
- 8 oz sharp cheddar, shredded
- Gives the familiar mac-and-cheese flavor
- 4–8 oz melty cheese, shredded (pick one)
- Monterey Jack, Colby Jack, mild cheddar, or mozzarella
- Optional: 2–4 oz “flavor cheese”
- Gruyère-style, smoked cheddar, or a little parmesan for a savory edge
Quick note: Shredding from a block usually melts smoother. Bagged pre-shredded is fine when life is busy—just expect the sauce to be slightly less silky.
Sauce base (two easy routes)
Pick the one that fits your mood and pantry.
Option A — Classic roux sauce (traditional, reliable)
- 3 tbsp butter
- 3 tbsp all-purpose flour
- 3 cups milk (whole milk is easiest; 2% works too)
- 1/2 tsp salt, plus more to taste
- Black pepper, to taste
Option B — Creamy shortcut (very weeknight-friendly)
- 2 1/2–3 cups milk
- 2 oz cream cheese (optional, for extra smoothness)
- Same cheese + seasonings as above
Seasonings (small amounts, big difference)
Choose 2–4:
- 1/2 tsp mustard powder (or 1 tsp Dijon)
- 1/2 tsp garlic powder
- 1/2 tsp smoked paprika
- Pinch cayenne (optional)
- Tiny pinch nutmeg (optional, but cozy)
Topping (choose your crunch)
Buttery panko topping
- 1 cup panko
- 2 tbsp melted butter
- Optional: 1/4 cup parmesan or a small handful of shredded cheddar
Cheese-only top
- 1–1 1/2 cups shredded cheese reserved for the top
Step-by-Step Instructions
Step 1 — Heat the oven + prep your baking dish
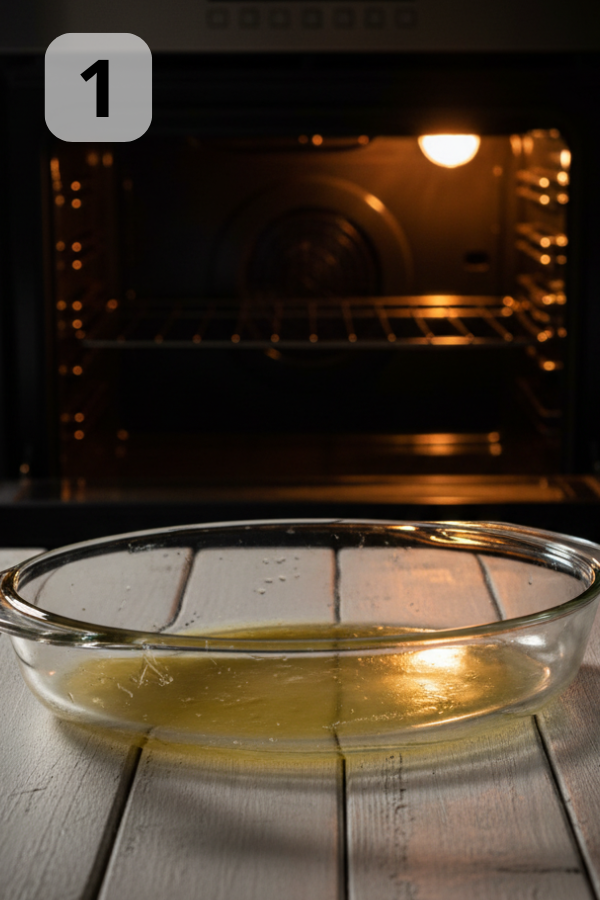
- Preheat oven to 350°F
- Grease a 9×13-inch baking dish (or similar size)
- If you want fewer dishes, use an oven-safe skillet for the final bake
Step 2 — Boil pasta (slightly under)
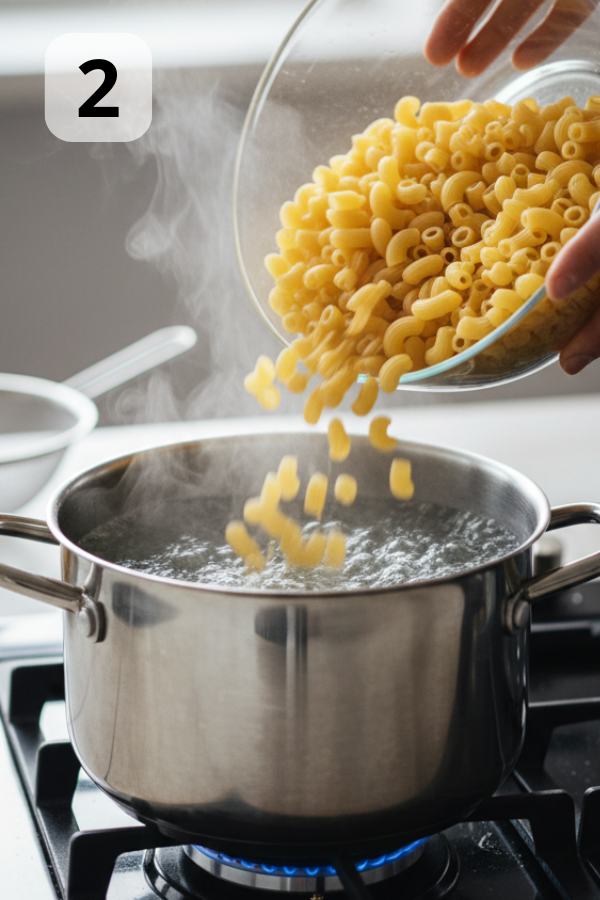
- Salt your water so it tastes pleasantly salty
- Cook pasta 1 minute less than the package says
- Drain well
- Toss pasta with 1 tbsp butter (helps reduce sticking and keeps texture nicer)
Step 3 — Make the sauce (smooth and calm)
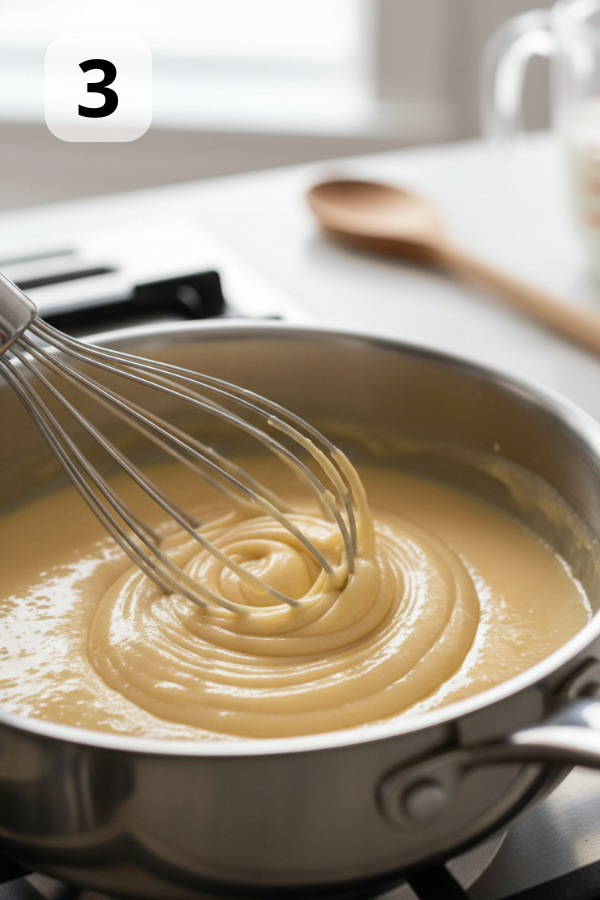
Classic roux route
- Melt butter in a saucepan over medium heat
- Whisk in flour; cook 30–60 seconds
- Slowly pour in milk while whisking
- Stir until it thickens slightly—think “creamy soup,” not “pudding”
Shortcut route
- Warm milk over medium-low heat
- Whisk in cream cheese (if using) until smooth
- Keep heat gentle
Step 4 — Add cheese (don’t rush this part)
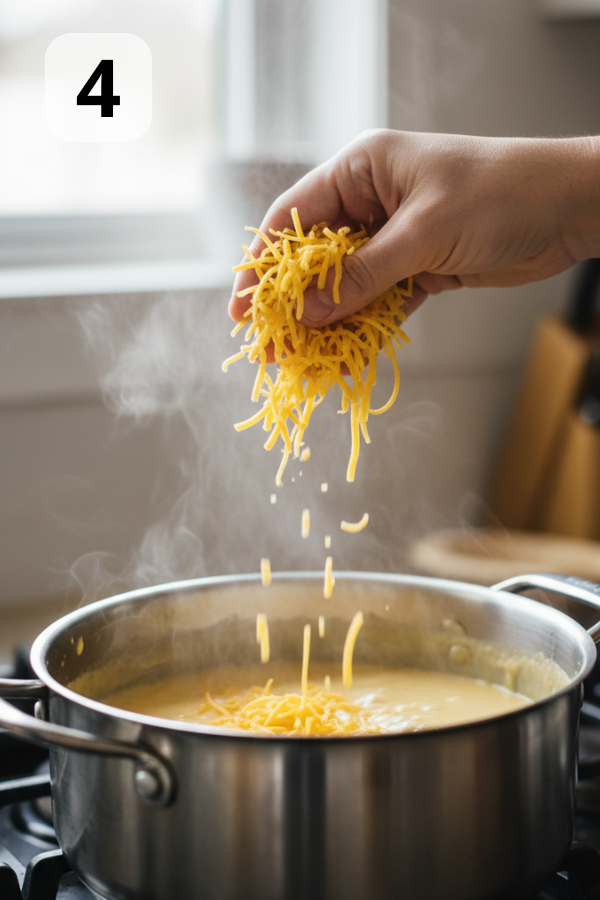
- Lower heat to low (or turn it off briefly)
- Add shredded cheese in small handfuls, stirring until melted each time
- Stir in seasonings
- Taste and adjust salt/pepper
If sauce looks too thick: add a splash of warm milk and stir.
Step 5 — Combine pasta + sauce
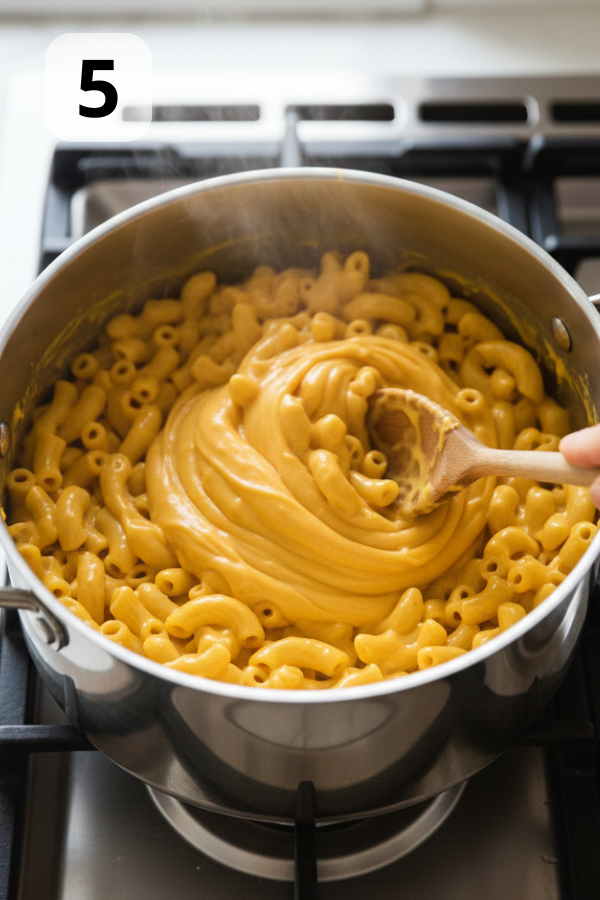
- Pour sauce over pasta (or add pasta into the sauce pot)
- Stir gently until evenly coated
Step 6 — Top it
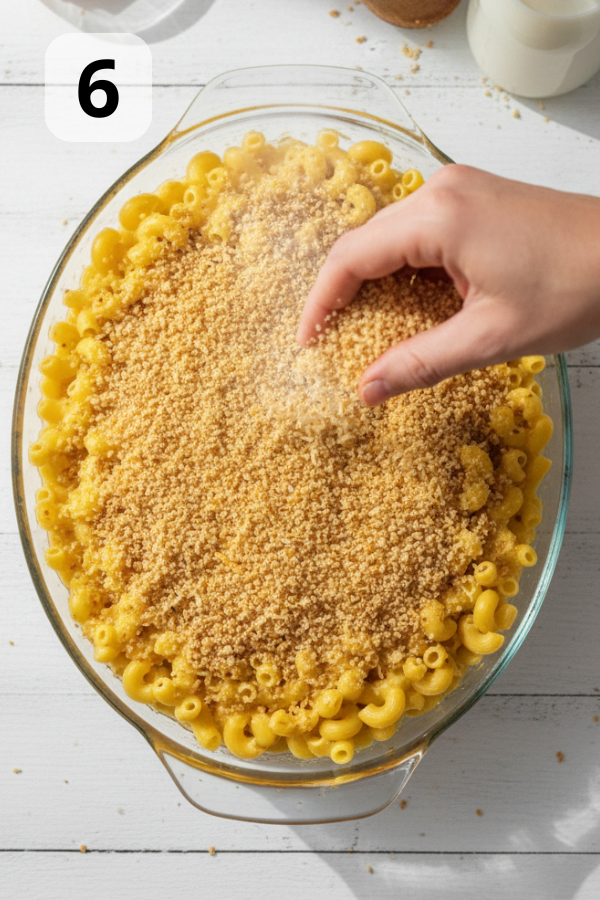
- Panko topping: mix panko + butter and sprinkle evenly
- Cheese-only top: sprinkle reserved cheese across the surface
Step 7 — Bake
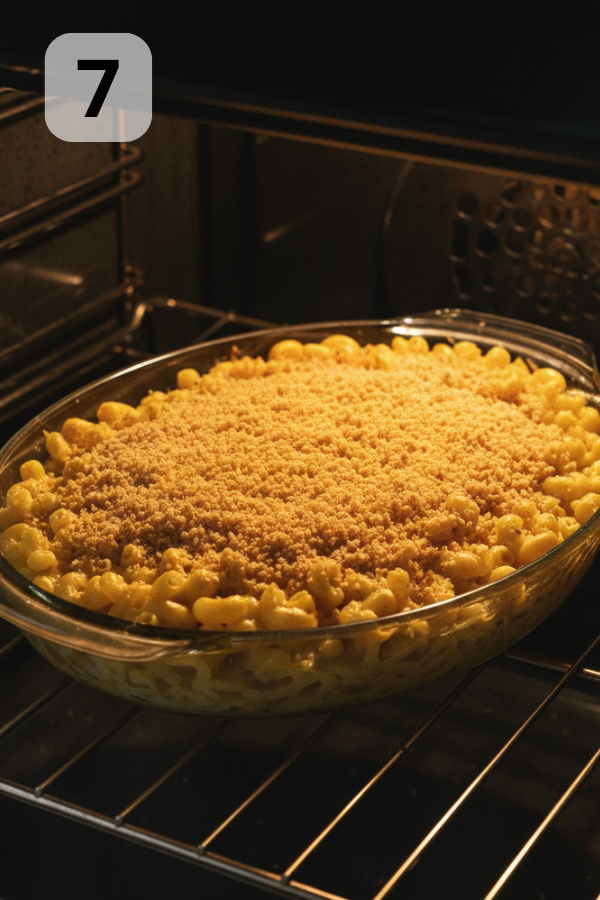
- Bake at 350°F for 25–35 minutes
- You’re looking for bubbly edges and a golden top
- Optional: broil 1–2 minutes for deeper color
- Watch closely—broiling goes from “perfect” to “oops” fast
Step 8 — Rest before serving

- Rest 10 minutes
- The sauce settles into that creamy, scoopable texture
Tips for Success
Creaminess is a chain of small choices
- Undercook pasta slightly
- Fully cooked pasta keeps drinking sauce in the oven
- Keep sauce a little looser than you think
- Baking firms it up
- Use gentle heat for cheese
- High heat can make sauce grainy
A simple “lighter” approach that still feels cozy
Here’s a mild contradiction: mac and cheese is rich… and it can still fit a “busy, healthy-ish” dinner.
- Serve a smaller portion and add a big side salad
- Stir in steamed broccoli, peas, or spinach right before baking
- Use 2% milk and keep the cheese bold (sharp cheddar does more flavor work)
Want a more “one-pan” vibe?
- Cook pasta, drain, then make the sauce in the same pot
- Assemble directly in the baking dish to avoid extra bowls
Storage & Leftover Notes
How long it keeps
- Refrigerate leftovers in an airtight container for 3–4 days
- Texture changes over time (still tasty, just less “fresh-baked”)
Best reheating method (so it doesn’t dry out)
- Microwave in short bursts
- Add 1–2 tbsp milk per portion, stir halfway
- Oven reheat (best for bigger portions)
- Cover with foil at 350°F until hot
- Uncover for a few minutes if you want the top to wake up again
Make-ahead plan (real-life friendly)
- Assemble fully, don’t bake
- Cool, cover, refrigerate up to 2 days
- Let sit at room temp 20–30 minutes
- Bake as directed, adding 5–10 minutes if it’s very cold
Freezing notes
- Freezing works, but the sauce can lose some silkiness after thawing
- If freezing:
- Freeze in portions for easier reheating
- Reheat with a splash of milk and gentle heat
What to Serve With It
Mac is rich. Pair it with something fresh and simple.
- Fast veggie sides
- Roasted broccoli, green beans, Brussels sprouts, salad kits
- Protein add-ons
- Rotisserie chicken, leftover grilled chicken, turkey, or ham
- Quick “weeknight” dessert
- Greek yogurt + berries, sliced apples with peanut butter, or a simple cookie
A small tangent that matters: if you’re cooking for kids, the side dish can be your quiet win. A crunchy cucumber salad or apple slices often get eaten even when “vegetables in the mac” don’t.
FAQs
- Can I make this ahead of time?
- Yes—assemble, chill up to 2 days, then bake
- Add a few extra minutes if it goes into the oven cold
- How do I keep baked mac and cheese creamy?
- Slightly undercook pasta
- Keep sauce looser before baking
- Reheat with a splash of milk
- Can I use pre-shredded cheese?
- Yes
- Expect slightly less smooth melt; still very good
- What’s the best pasta for baked mac?
- Elbows and cavatappi are the easiest
- Small shells are great if you want sauce pockets
- Can I add vegetables without ruining the vibe?
- Yes—broccoli, peas, spinach, or finely chopped cauliflower work well
- Keep additions cooked and well-drained so the sauce stays creamy
- Is this spicy?
- Not unless you add cayenne or hot sauce
- You can keep it mild and still flavorful

| Prep Time | 15-20 minutes |
| Cook Time | 25–35 minutes |
| Servings |
people
|
- 1 lb elbow macaroni
- 3 tbsp Butter
- 3 tbsp Flour
- 3 cups milk
- 12–16 oz shredded cheese (cheddar + melty cheese)
- Seasonings (mustard powder, garlic powder, paprika, pepper)
Ingredients
|
|
- Cook pasta 1 minute under; drain; toss with butter

- Make sauce; melt cheese gently
- Combine; top; bake until bubbly and golden
- Rest 10 minutes; serve


