Why These Cookies Are So Hard to Stop Eating
Chocolate Peanut Butter Ritz Cookies have been floating around American kitchens for decades. They show up on holiday cookie platters, church bake sales, school potlucks—basically anywhere people bring desserts meant to disappear quickly.
And they always do.
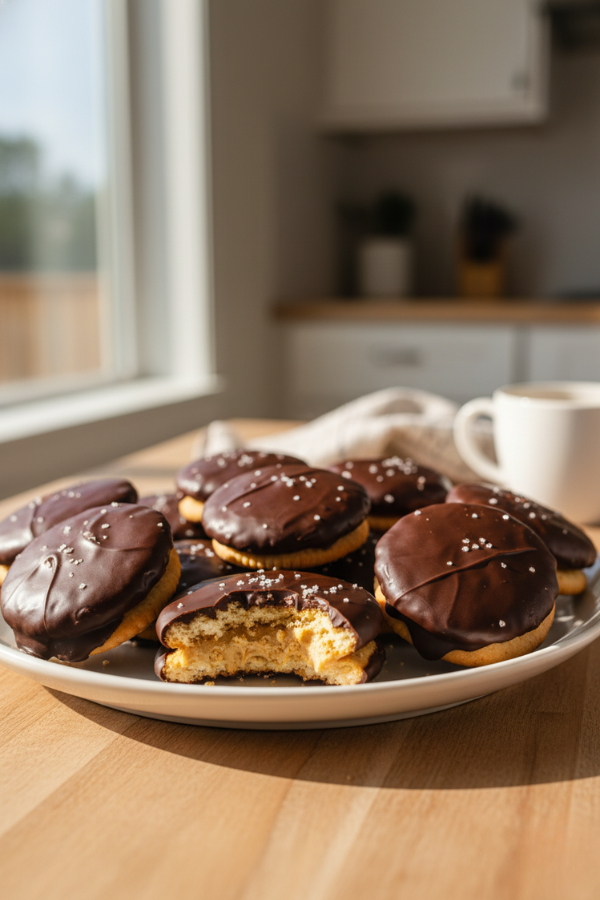
The reason is simple. You’re stacking three flavors that people already love on their own: buttery crackers, peanut butter, and chocolate. Put them together and something almost magical happens. Sweet meets salty. Creamy meets crunchy. Rich meets light.
Honestly, it’s the same reason peanut butter cups work so well.
Ritz crackers add something special here. Unlike plain cookies, they bring that subtle salty bite that cuts through the sweetness. The result feels balanced instead of heavy.
Even better? These cookies require no oven. That alone makes them a favorite for busy home cooks, especially when you want a homemade dessert without turning the kitchen into a baking zone.
The Sweet-Salty Combo That Makes This Recipe Work
If you’ve ever eaten chocolate-covered pretzels or salted caramel, you already understand the secret behind these cookies.
Salt amplifies sweetness.
It’s a small thing, but it changes everything. Ritz crackers contain just enough salt to make the peanut butter filling taste richer and the chocolate coating taste deeper.
Think of it like seasoning soup. Without salt, things taste flat.
With these cookies, the balance comes naturally.
- The cracker provides crunch and salt
- The peanut butter adds creamy richness
- The chocolate coating delivers sweetness
Together, you get a dessert that somehow tastes both indulgent and light at the same time.
And yes—people often eat two or three without even noticing.
Ingredients You’ll Need
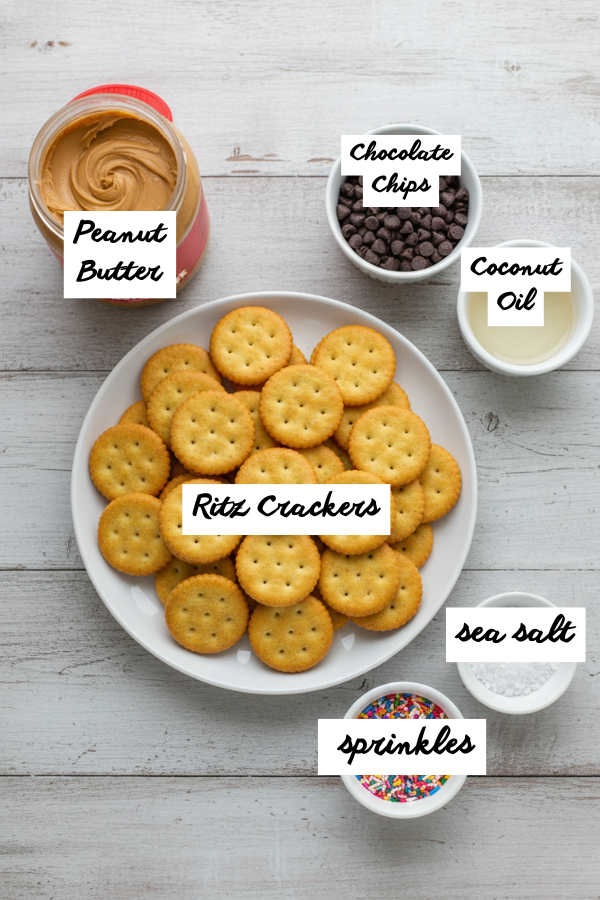
One reason Chocolate Peanut Butter Ritz Cookies are so popular is how short the ingredient list is.
You probably have most of this in your pantry already.
Essential Ingredients
Ritz Crackers
- 48 Ritz crackers (makes about 24 cookies)
- Buttery flavor and crisp texture
- Thin enough to sandwich easily
Ritz crackers work best because they’re light and flaky. Thicker crackers can overpower the filling.
Creamy Peanut Butter
- About ¾ cup to 1 cup
- Smooth peanut butter spreads easier
- Brands like Jif or Skippy work well
Natural peanut butter can work, but it tends to separate and get oily. If that’s what you have, just stir it really well first.
Chocolate Chips
- 16 ounces chocolate chips
- Semi-sweet or milk chocolate
Semi-sweet chocolate tends to balance the sweetness nicely.
Optional Ingredients
These aren’t required—but they’re nice upgrades.
Powdered Sugar
Some cooks mix powdered sugar into the peanut butter filling. It makes the center taste more like the inside of a peanut butter cup.
Coconut Oil
Adding a teaspoon or two to melted chocolate helps create a smoother dipping consistency.
Sea Salt or Sprinkles
Toppings can turn these cookies into holiday treats or party desserts.
Step-by-Step Instructions
Here’s the good news: the entire process is simple and forgiving. No mixer required. No oven required. Just a little assembly and dipping.
Let’s walk through it step by step.
Step 1 – Prepare the Cookie Base
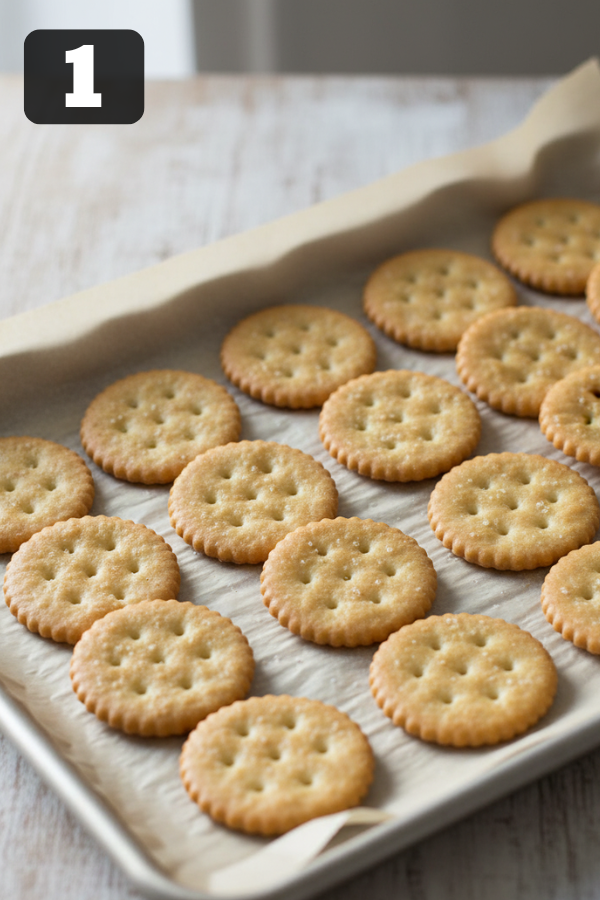
Line a baking sheet with parchment paper or wax paper.
Lay 24 Ritz crackers flat on the tray.
These will become the bottom halves of your cookie sandwiches.
Keep the remaining crackers nearby—you’ll use them in a minute.
Step 2 – Add the Peanut Butter Filling
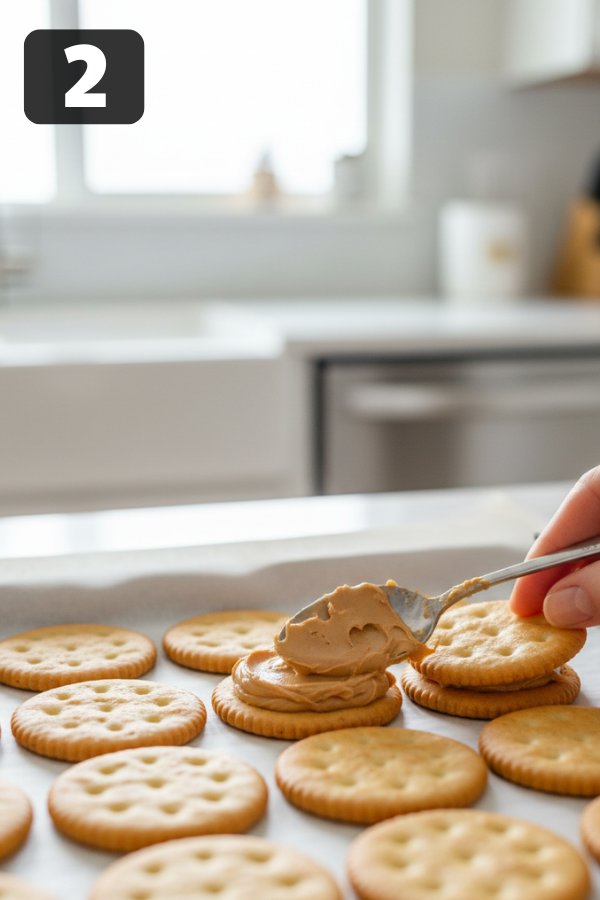
Place about one teaspoon of peanut butter in the center of each cracker.
Spread it gently with a spoon or butter knife.
You don’t need perfection here. Once the top cracker goes on, the filling will spread naturally.
Step 3 – Assemble the Sandwich Cookies
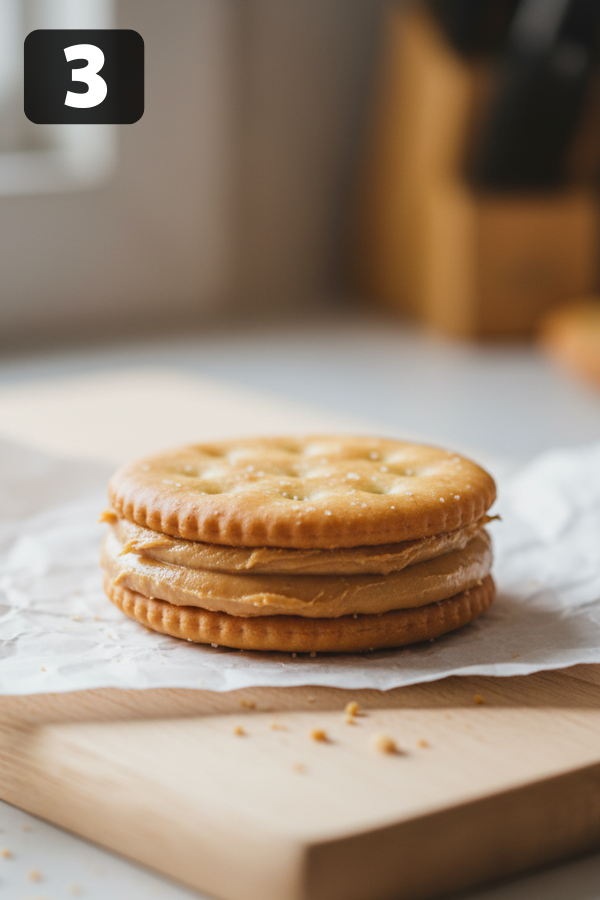
Top each peanut butter cracker with another Ritz cracker.
Press gently.
You want the peanut butter to spread slightly toward the edges, but not spill out.
If a little does? Honestly, that’s fine.
Step 4 – Chill the Sandwiches
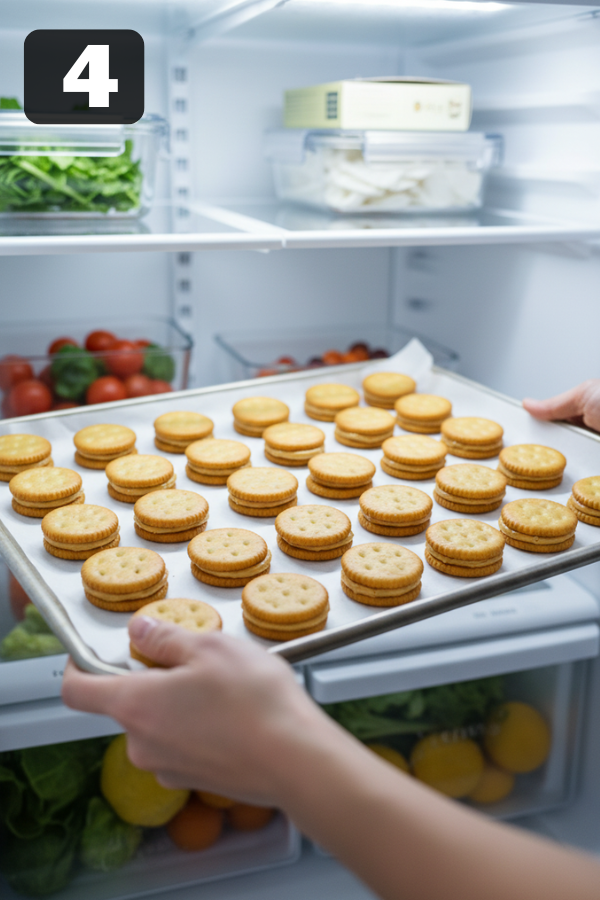
Place the tray in the refrigerator for 20–30 minutes.
This step firms up the peanut butter so the cookies hold together when dipped in chocolate.
It might feel like an unnecessary pause, but trust me—it makes the next step easier.
Step 5 – Melt the Chocolate

Add chocolate chips to a microwave-safe bowl.
Microwave in 15-second intervals, stirring between each round until smooth.
This prevents burning.
If the chocolate feels thick, stir in 1 teaspoon coconut oil.
The texture should be smooth and glossy.
Step 6 – Dip the Cookies in Chocolate
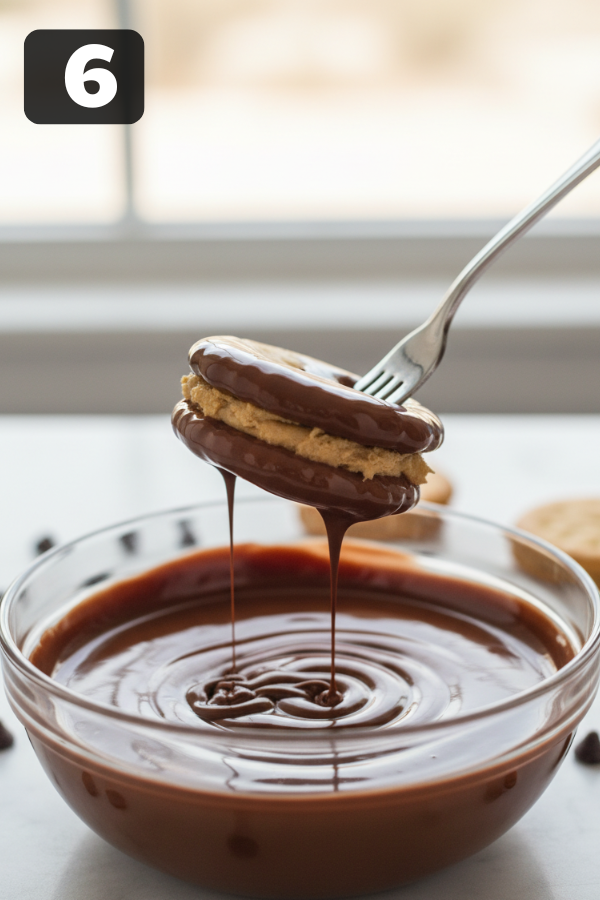
Use a fork to lower each peanut butter sandwich into the melted chocolate.
Flip it to coat both sides completely.
Lift it out and let the extra chocolate drip off for a second.
Then place it back onto the parchment-lined tray.
This step gets a little messy—and honestly that’s part of the fun.
Step 7 – Add Toppings and Let Them Set
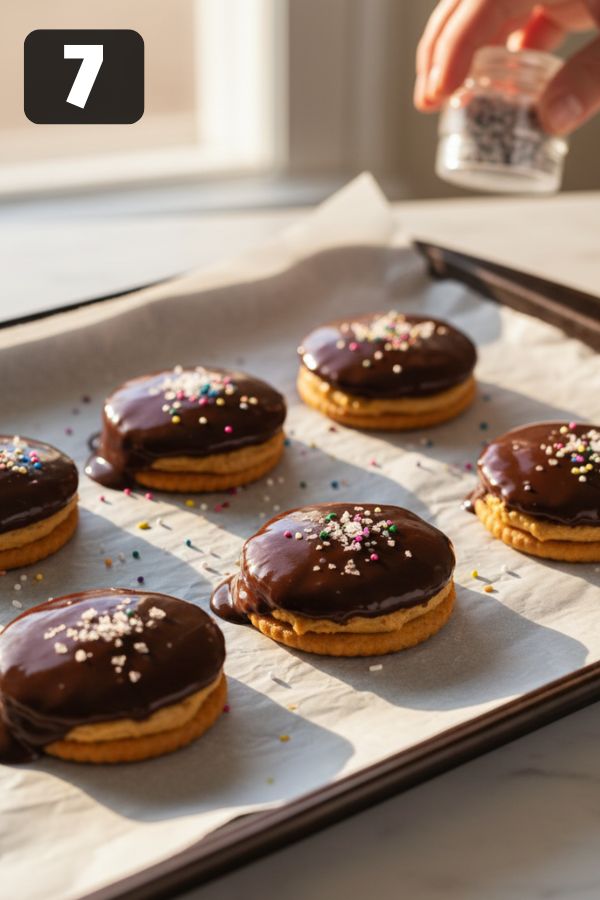
If you’re adding sprinkles, sea salt, or crushed nuts, sprinkle them on immediately while the chocolate is still wet.
Place the tray in the refrigerator for 10–15 minutes until the chocolate hardens.
Once set, the cookies are ready to eat.
Or, you know, disappear.
Helpful Tips That Make the Cookies Even Better
Even though this recipe is easy, a few small tricks make it smoother.
Use a deep bowl for chocolate dipping
This allows the cookies to submerge fully.
Work in batches
Chocolate cools and thickens over time. Dipping a few cookies at once keeps it manageable.
Don’t press the crackers too hard
Ritz crackers are delicate and can break easily.
Chill before dipping
Skipping this step often leads to sliding crackers and messy dipping.
Storage and Make-Ahead Options
These cookies store surprisingly well.
Room Temperature
- Store in airtight container
- Lasts about 4–5 days
Refrigerator
- Keeps chocolate firm
- Good for up to 2 weeks
Freezer
Yes—you can freeze them.
- Store in freezer-safe container
- Keeps 3–4 months
Some people actually like eating them straight from the freezer. The chocolate becomes crisp while the peanut butter stays creamy.
Fun Variations to Try
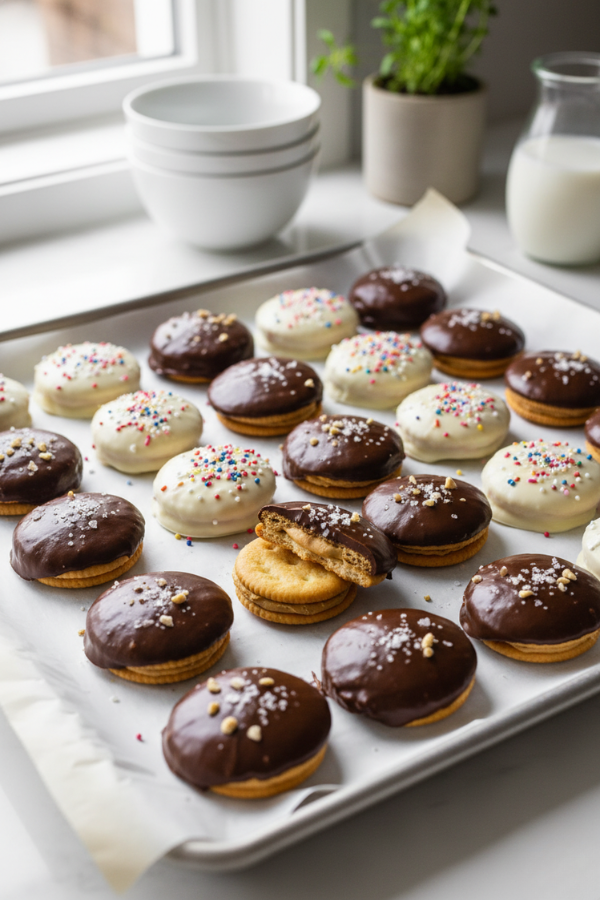
Once you’ve made the classic version, it’s easy to experiment.
Dark Chocolate Ritz Cookies
Swap milk chocolate for 70% dark chocolate. The stronger flavor pairs beautifully with peanut butter.
White Chocolate Holiday Cookies
Dip the sandwiches in white chocolate and add crushed candy cane or red sprinkles.
These are especially popular during Christmas.
Almond Butter Version
If someone in your house avoids peanuts, almond butter works just as well.
The flavor is slightly nuttier and a little less sweet.
Drizzled Chocolate Cookies
After the cookies set, drizzle contrasting chocolate over the top.
Milk chocolate over dark chocolate looks especially nice.
What to Serve With These Cookies
These cookies work best alongside simple drinks.
A few easy pairings:
- Cold milk
- Coffee
- Cappuccino
- Hot chocolate
They’re also perfect for dessert trays with brownies, fudge, or peanut butter blossoms.
Honestly, they rarely last long enough to make it onto a second plate.
Nutrition Snapshot
Each cookie contains roughly:
- Calories: 130–150
- Fat: 8 g
- Carbohydrates: 12 g
- Protein: 3 g
It’s definitely a treat—but a small one.
And sometimes, that’s exactly what you want.
FAQs
1. Can I make Chocolate Peanut Butter Ritz Cookies ahead of time?
Yes. They store well for several days and can even be frozen.
Many people make them a week before holiday gatherings.
2. Can I use crunchy peanut butter?
Absolutely. It adds extra texture and nutty flavor.
3. What chocolate works best?
Semi-sweet chocolate chips are the most balanced, but milk chocolate or dark chocolate also work well.
4. Are these good for kids to help make?
Yes. Since there’s no baking involved, kids can easily help assemble and dip the cookies.
5. Can I make these gluten-free?
Yes. Simply replace Ritz crackers with gluten-free butter crackers.
Conclusion
Chocolate Peanut Butter Ritz Cookies prove that great desserts don’t need to be complicated. With just a handful of pantry ingredients and about 30 minutes, you get a treat that’s crunchy, creamy, sweet, and a little salty all at once. They’re easy enough for busy weeknights, fun to make with kids, and always welcome on holiday dessert trays. Make a batch once, and chances are you’ll find yourself coming back to this simple recipe again and again.
Don’t Miss: 3 INGREDIENT COTTAGE CHEESE PANCAKES HIGH PROTEIN FLUFFY
Ingredients
Method
- Prepare the Cookie Base Line a baking sheet with parchment paper or wax paper. Lay 24 Ritz crackers flat on the tray. These will become the bottom halves of your cookie sandwiches. Keep the remaining crackers nearby—you’ll use them in a minute.

- Add the Peanut Butter Filling Place about one teaspoon of peanut butter in the center of each cracker. Spread it gently with a spoon or butter knife. You don’t need perfection here. Once the top cracker goes on, the filling will spread naturally.
- Assemble the Sandwich Cookies Top each peanut butter cracker with another Ritz cracker. Press gently. You want the peanut butter to spread slightly toward the edges, but not spill out. If a little does? Honestly, that’s fine.
- Chill the Sandwiches Place the tray in the refrigerator for 20–30 minutes. This step firms up the peanut butter so the cookies hold together when dipped in chocolate. It might feel like an unnecessary pause, but trust me—it makes the next step easier.
- Melt the Chocolate Add chocolate chips to a microwave-safe bowl. Microwave in 15-second intervals, stirring between each round until smooth. This prevents burning. If the chocolate feels thick, stir in 1 teaspoon coconut oil. The texture should be smooth and glossy.
- Dip the Cookies in Chocolate Use a fork to lower each peanut butter sandwich into the melted chocolate. Flip it to coat both sides completely. Lift it out and let the extra chocolate drip off for a second. Then place it back onto the parchment-lined tray. This step gets a little messy—and honestly that’s part of the fun.
- Add Toppings and Let Them Set If you're adding sprinkles, sea salt, or crushed nuts, sprinkle them on immediately while the chocolate is still wet. Place the tray in the refrigerator for 10–15 minutes until the chocolate hardens. Once set, the cookies are ready to eat. Or, you know, disappear.


