Best Classic Deviled Eggs Recipe
Classic deviled eggs are hard-cooked egg halves filled with a creamy yolk mixture. They’re worth making because they feel “special” with almost no effort, and they’re one of the easiest make-ahead bites you can keep in the fridge for snacking, lunches, or last-minute guests. The flavor is familiar and comforting—creamy, tangy, and lightly savory—with just enough mustard and pickle brightness to keep you coming back for “one more.”
Why You’ll Love These
Deviled eggs have a funny way of making a day feel more put-together. You can be wearing leggings, answering emails, and still set down a platter that looks like you planned ahead.
- Fast, minimal cleanup. One pot, one bowl, one fork. You’re not washing a sink full of pans.
- Simple ingredients. The classic version uses pantry staples—mayo, mustard, salt, pepper—and one tangy add-in like relish or pickle juice.
- Make-ahead friendly. You can prep components in advance so serving feels easy, not frantic.
- Easy to adjust. Want it more tangy? Add mustard. Want it more “picnic classic”? Add relish. Want a cleaner, brinier bite? Use pickle juice.
And here’s a small truth: deviled eggs aren’t complicated. They just punish rushing. If you slow down for two steps—cooling and seasoning—you’ll get the “best” result every time.
Ingredients
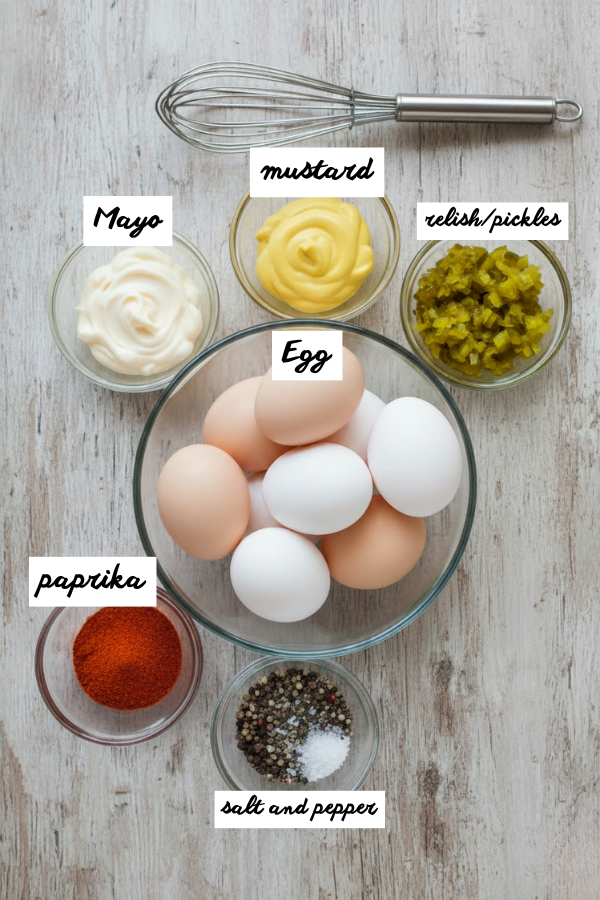
This is a classic American-style deviled egg: creamy, tangy, lightly savory, and not too fussy. It’s designed for busy home cooks who want big flavor with simple steps.
Classic Batch (12 eggs = 24 halves)
- 12 large eggs
- 1/3 cup mayonnaise
- Optional: replace half the mayo with plain Greek yogurt for a lighter feel
- 2 tablespoons pickle relish
- Or use finely diced dill pickles
- 1 1/2 teaspoons Dijon mustard (or yellow mustard)
- Salt and freshly ground black pepper, to taste
- Paprika, for garnish
Optional Add-ons (choose 1–2 for “classic-but-better”)
You don’t need extras, but the right small add-on can make the flavor pop.
- 1–2 teaspoons dill pickle juice (adds clean tang—add slowly)
- 1/4 teaspoon garlic powder (savory warmth, not “garlic bread”)
- 1 teaspoon chopped fresh dill (herby and fresh)
- 1–2 teaspoons finely sliced chives or green onion (bright bite)
- A few drops of hot sauce (gentle heat—optional)
Quick Substitutions (so you can still make them today)
- No relish? Use a little pickle juice or finely chopped pickles. Add gradually.
- No Dijon? Yellow mustard is the most “classic potluck” taste.
- Want lighter? Half mayo + half Greek yogurt still tastes creamy, just less heavy.
- Need it sweeter? A tiny pinch of sugar can soften sharp mustard. Start very small.
Step-by-Step Instructions
Step 1: Hard-Cook The Eggs (Pick One Method)
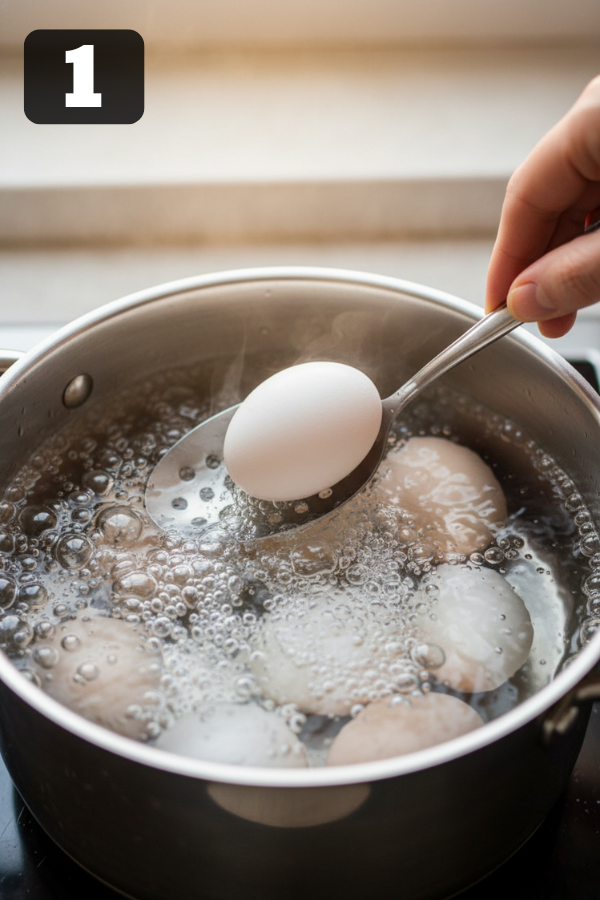
Choose what fits your kitchen and schedule. Any of these work.
Option A: Stovetop “rest method” (simple and reliable)
- Place eggs in a saucepan and cover with cold water by about 1 inch.
- Bring to a boil.
- Turn off the heat, cover the pot, and let the eggs rest for 12 minutes.
- Transfer eggs to an ice bath to cool.
Option B: Stovetop boil method (clear timing)
- Bring a large pot of water to a boil.
- Lower the eggs in gently.
- Reduce heat slightly so the boil stays steady, and cook for about 12 minutes.
- Transfer to an ice bath.
Option C: “1-minute boil + covered rest” (nice for bigger batches)
- Bring eggs and water to a boil.
- Boil for 1 minute.
- Remove from heat, cover, and let rest for about 17 minutes.
- Transfer to an ice bath.
Option D: Instant Pot (hands-off and batch-friendly)
- A popular approach is a short pressure cook + short release + ice bath. If you already use an Instant Pot, it’s a tidy way to get consistent eggs.
A quick aside: peeling is often easier when eggs cool fast and the whites firm up. The ice bath isn’t just tradition—it makes handling easier and helps prevent overcooked yolks.
Step 2: Cool, Peel, And Slice (The “Don’t Skip” Step)
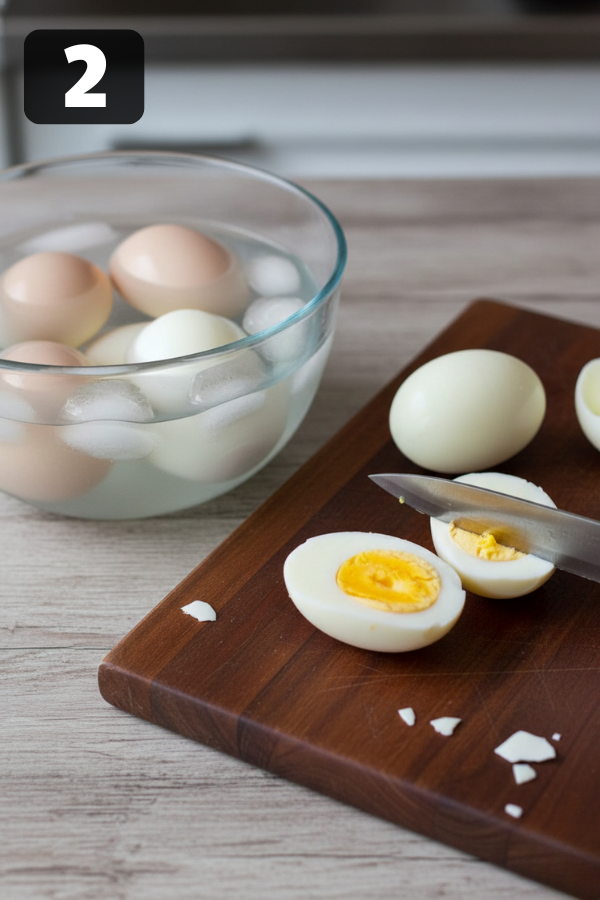
- Let eggs sit in the ice bath until fully cool to the touch.
- Peel gently. If you’re struggling, peel under cool running water to help slip off shell bits.
- Slice each egg lengthwise with a clean, sharp knife.
If you want picture-perfect whites, slow down here. Torn whites still taste fine, but they look messy on a platter and don’t hold filling as neatly.
Step 3: Make The Filling (Creamy, Not Runny)
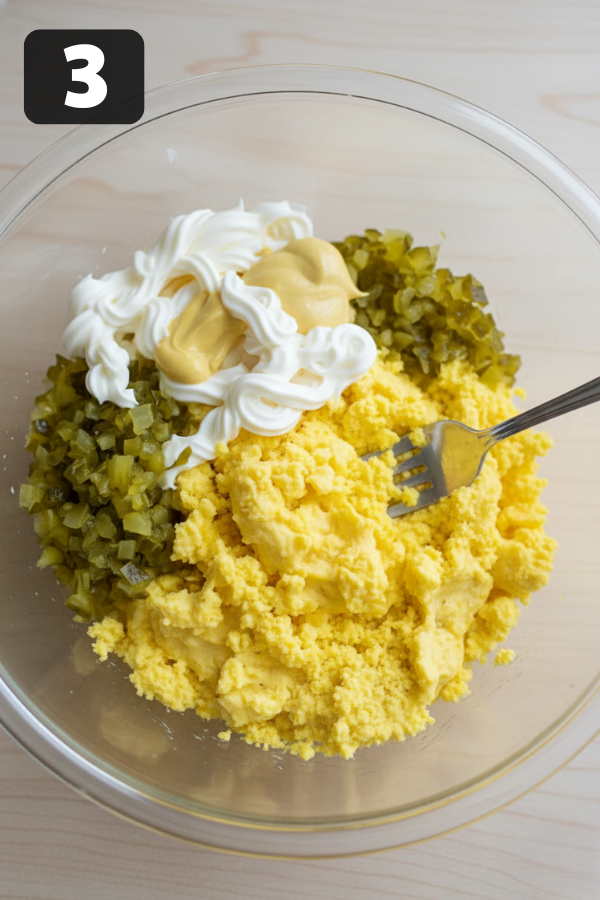
- Pop the yolks into a mixing bowl.
- Add mayonnaise, relish, mustard, salt, and pepper.
- Mash with a fork until smooth and fluffy.
Texture goal: spoonable and thick enough to hold its shape.
- If it’s too stiff, add a tiny spoonful of mayo or a few drops of pickle juice.
- If it’s too loose, chill it for 10–15 minutes before filling.
Honestly, the difference between “fine” and “wow” is often just mashing long enough. You want the filling to feel like a smooth spread, not crumbles.
Step 4: Fill The Egg Whites (Pretty And Fast)
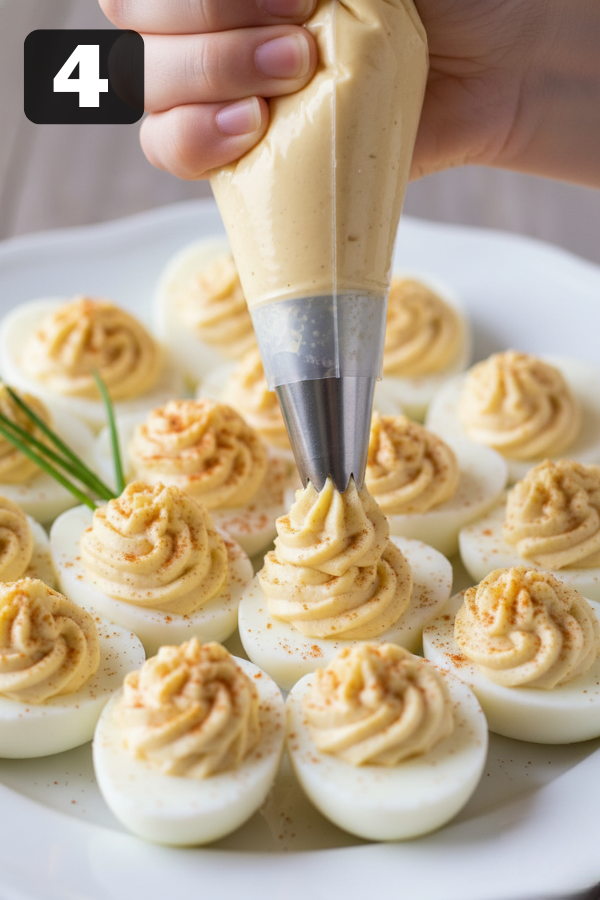
- Fast method: spoon the filling into the whites.
- Prettier method: pipe the filling.
No piping bag? Use a zip-top bag. Spoon filling in, push it to one corner, and snip a small hole at the tip. It works shockingly well.
Step 5: Garnish And Chill
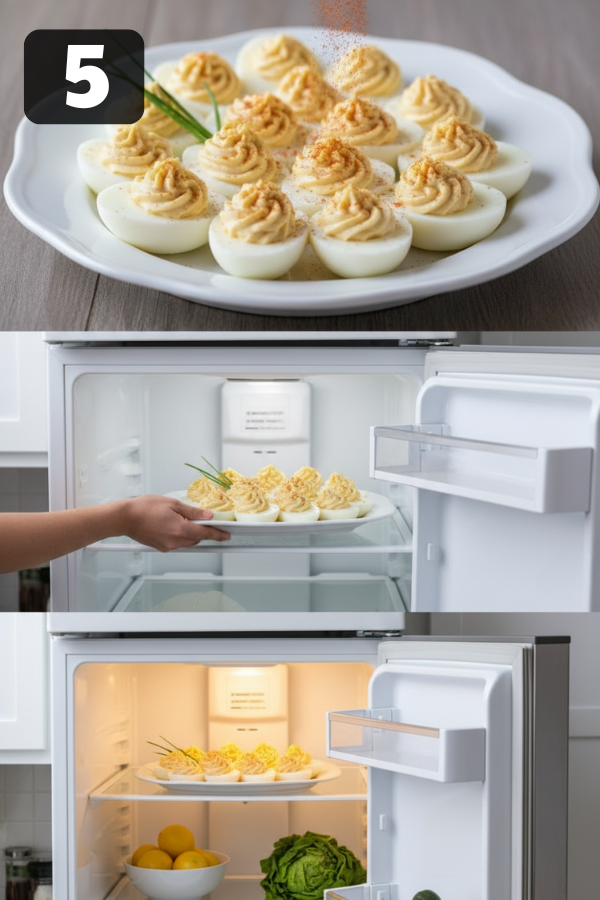
- Sprinkle with paprika for that classic look.
- Add chives or dill if you like a fresh finish.
- Chill until serving.
Tips For Success
Deviled eggs are simple, but a few tiny choices make them feel special.
1) Keep Yolks Bright And Tender
- Overcooking can make yolks dry and give them a gray-green edge. It’s harmless, but it looks less appetizing.
- The ice bath helps stop carryover cooking quickly.
If you’ve had deviled eggs that taste chalky, it’s usually the egg, not the filling.
2) Season In A Calm, Careful Way
Deviled eggs aren’t the place to throw in ten spices. They’re more like a classic white tee—if the fit is right, you don’t need accessories.
- Flat taste? Add a pinch more salt.
- Needs brightness? Add a little more mustard or a few drops of pickle juice.
- Too sharp? Add a touch more mayo to soften it.
3) Control Moisture (This Is Where Many Fillings Go Wrong)
Relish and pickles bring flavor, but they can also bring extra liquid.
- If using relish, make sure it’s not overly watery.
- If using pickle juice, add it slowly. A little goes far.
4) Make Them Look “Party-Ready” Without Extra Work
- A simple piping swirl makes deviled eggs look polished.
- Garnish right before serving so herbs don’t wilt.
- If your eggs slide around on a tray, set them on a bed of greens for stability (and it looks nice).
5) A Small Contradiction That’s True
You don’t need fancy ingredients… but a tiny upgrade can be worth it.
- A pinch of smoked paprika instead of regular paprika adds a gentle, cozy flavor.
- A small spoon of Greek yogurt can lighten the feel without losing creaminess.
It’s still classic. Just a little fresher.
Storage & Leftover Notes
Deviled eggs are best served cold and stored carefully.
- Fridge (assembled): best quality for 2–3 days in an airtight container.
- Make-ahead trick: store whites and filling separately, then fill before serving. This keeps the whites from drying out and the filling from getting watery.
- Party rule: don’t leave deviled eggs out at room temperature for more than 2 hours. If it’s very hot out, shorten that time.
If you’re hosting, use a smaller tray and refill it from the fridge. It looks fresher, and it’s safer.
What To Serve With It
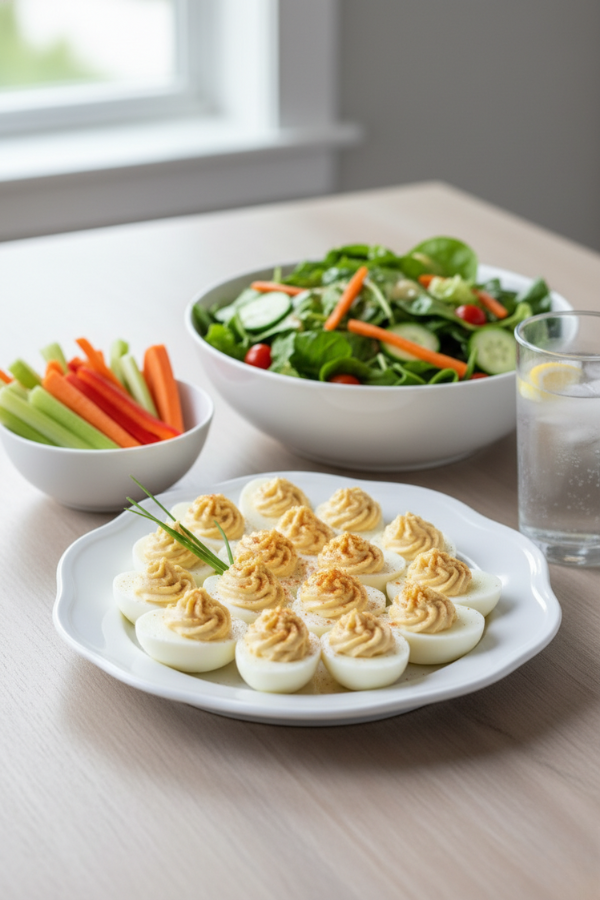
Deviled eggs fit into almost any spread. They’re the friendly guest that gets along with everyone.
Easy Side Pairings
- Crunchy veggie tray (carrots, cucumbers, snap peas)
- Simple green salad with a tart dressing
- Potato salad, pasta salad, or coleslaw (classic picnic vibe)
- Soup + deviled eggs for a cozy lunch plate
Drinks
- Iced tea, lemonade, sparkling water with citrus
- If it’s a party: a crisp white wine or a dry rosé works nicely
Dessert (low-effort)
- Cookies, brownies, fruit salad, or berries with whipped topping
FAQs
-
Can I make deviled eggs ahead of time?
Yes. For the best texture, store the whites and filling separately for up to 1–2 days, then fill and garnish right before serving.
-
How long do deviled eggs last in the fridge?
For best quality, plan on 2–3 days. Keep them tightly covered, and refrigerate promptly after serving.
-
How long can deviled eggs sit out at a party?
Try to keep them out no more than 2 hours at room temperature. If it’s hot out (outdoor party season), keep them chilled and refill the tray as needed.
-
Dijon or yellow mustard—what’s more “classic”?
Yellow mustard tastes more old-school and familiar. Dijon tastes a little sharper and more grown-up. Either is classic in its own way.
-
How do I keep the filling from getting watery?
Add liquids slowly. If you use pickle juice, add it a few drops at a time. If you use relish, make sure it isn’t overly watery before mixing.
-
Do I have to use a piping bag?
No. Spoon filling works fine. If you want the pretty swirl, the zip-top bag trick is an easy shortcut.
Nutrition Info
Nutrition varies by mayo brand and add-ins, but deviled eggs are typically a small, protein-friendly bite. If you want to lighten them, use half Greek yogurt and keep add-ins simple. For a more indulgent version, lean into full mayo and richer garnishes.
Final Thoughts
If you’ve ever thought deviled eggs were “too basic” to matter, this is the version that changes your mind. When the eggs peel cleanly, the yolks mash smooth, and the filling hits that creamy–tangy balance, they go from background snack to the first thing people hover around. Make them once, then keep this little formula in your back pocket: cool fast, season gently, add tang slowly. And if you’re bringing them somewhere, do yourself a favor—pack the whites and filling separately, pipe them right before serving, and enjoy that quiet, satisfying moment when the tray comes back empty.

| Prep Time | 15 minutes |
| Cook Time | 10 minutes |
| Servings |
servings
|
- 12 large eggs
- 1/3 cup mayonnaise or half mayo + half plain Greek yogurt
- 2 Tbsp pickle relish or chopped dill pickles
- 1 1/2 tsp Dijon mustard or yellow mustard
- Salt & pepper to taste
- paprika for garnish
- Optional: chives dill, garlic powder, hot sauce
Ingredients
|
|
- Hard-Cook The Eggs (Pick One Method) Choose what fits your kitchen and schedule. Any of these work. Option A: Stovetop “rest method” (simple and reliable) Place eggs in a saucepan and cover with cold water by about 1 inch. Bring to a boil. Turn off the heat, cover the pot, and let the eggs rest for 12 minutes. Transfer eggs to an ice bath to cool. Option B: Stovetop boil method (clear timing) Bring a large pot of water to a boil. Lower the eggs in gently. Reduce heat slightly so the boil stays steady, and cook for about 12 minutes. Transfer to an ice bath. Option C: “1-minute boil + covered rest” (nice for bigger batches) Bring eggs and water to a boil. Boil for 1 minute. Remove from heat, cover, and let rest for about 17 minutes. Transfer to an ice bath. Option D: Instant Pot (hands-off and batch-friendly) A popular approach is a short pressure cook + short release + ice bath. If you already use an Instant Pot, it’s a tidy way to get consistent eggs. A quick aside: peeling is often easier when eggs cool fast and the whites firm up. The ice bath isn’t just tradition—it makes handling easier and helps prevent overcooked yolks.

- Cool, Peel, And Slice (The “Don’t Skip” Step) Let eggs sit in the ice bath until fully cool to the touch. Peel gently. If you’re struggling, peel under cool running water to help slip off shell bits. Slice each egg lengthwise with a clean, sharp knife. If you want picture-perfect whites, slow down here. Torn whites still taste fine, but they look messy on a platter and don’t hold filling as neatly.
- Make The Filling (Creamy, Not Runny) Pop the yolks into a mixing bowl. Add mayonnaise, relish, mustard, salt, and pepper. Mash with a fork until smooth and fluffy. Texture goal: spoonable and thick enough to hold its shape. If it’s too stiff, add a tiny spoonful of mayo or a few drops of pickle juice. If it’s too loose, chill it for 10–15 minutes before filling. Honestly, the difference between “fine” and “wow” is often just mashing long enough. You want the filling to feel like a smooth spread, not crumbles.
- Fill The Egg Whites (Pretty And Fast) Fast method: spoon the filling into the whites. Prettier method: pipe the filling. No piping bag? Use a zip-top bag. Spoon filling in, push it to one corner, and snip a small hole at the tip. It works shockingly well.
- Garnish And Chill Sprinkle with paprika for that classic look. Add chives or dill if you like a fresh finish. Chill until serving.


