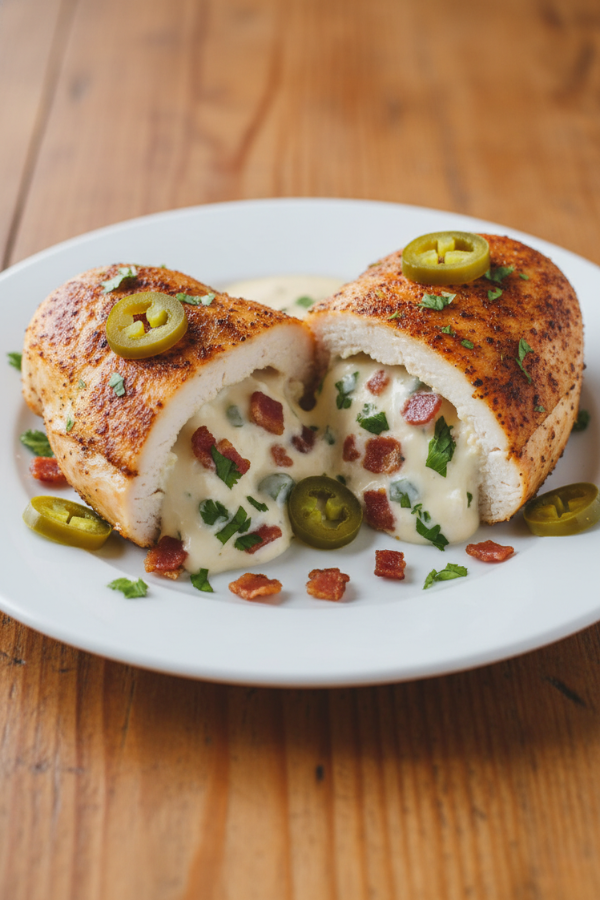
If you love the creamy, cheesy kick of jalapeño poppers but want something more filling (and honestly, more dinner-worthy), this Jalapeño Popper Stuffed Chicken hits that sweet spot. It’s juicy chicken packed with a rich, spicy filling—crispy bacon, melty cheese, and just enough heat to wake things up. The best part? It’s a one-pan, low-carb-friendly meal that feels indulgent but fits right into a busy weeknight routine.
Why This Recipe Just Works
You know those meals that feel like a treat but don’t take over your evening? This is one of them.
It borrows everything people love about jalapeño poppers—creaminess, saltiness, a bit of heat—and wraps it into something practical: chicken. Protein-packed, filling, and easy to portion out for leftovers.
- Ready in about 35 minutes total
- Uses simple ingredients you probably already have
- Naturally low-carb and gluten-free
- Easy to adjust spice level (mild to bold)
- Great for meal prep—reheats surprisingly well
And here’s the thing: it feels like comfort food, but it doesn’t leave you feeling heavy. That balance is rare.
Let’s Talk Ingredients
This recipe doesn’t rely on fancy ingredients. It’s more about how everything comes together.
Main Ingredients
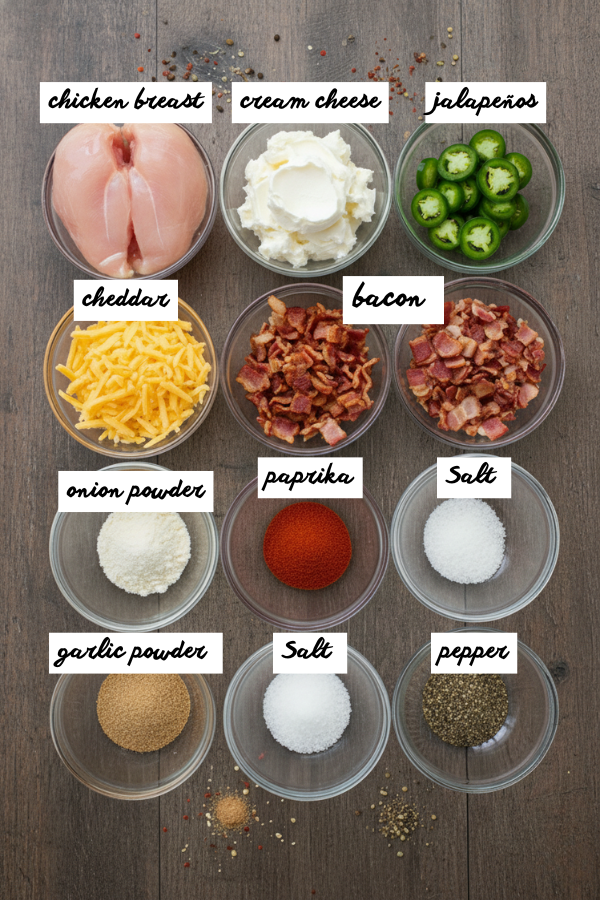
- Chicken breasts (2–4 large pieces)
Go for thick ones—you’ll need room for stuffing. - Cream cheese (4–6 oz, softened)
This is the base. Smooth, rich, and holds everything together. - Cheddar cheese (½–1 cup shredded)
Sharp cheddar gives the best flavor punch. - Jalapeños (1–3, diced)
Remove seeds if you want less heat. - Bacon (4–6 slices, cooked and crumbled)
Adds crunch and that smoky, savory note.
Seasonings
- Garlic powder
- Onion powder
- Paprika (smoky or regular)
- Salt and pepper
Optional Add-Ins
- Green onions for freshness
- A pinch of ranch seasoning (surprisingly good)
- Mozzarella for extra stretchiness
Honestly, this is one of those recipes where small tweaks make it feel new every time.
Step-by-Step Instructions
Step 1: Prep the Chicken
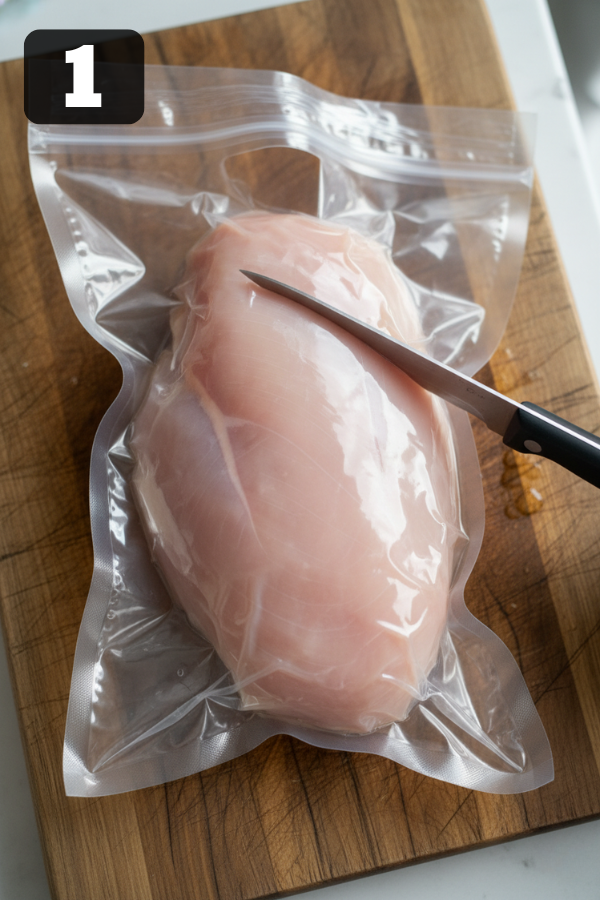
Start by slicing a pocket into each chicken breast. Not all the way through—just enough to create space for the filling.
Pat the chicken dry (this matters more than you think), then season both inside and outside.
Step 2: Mix the Filling
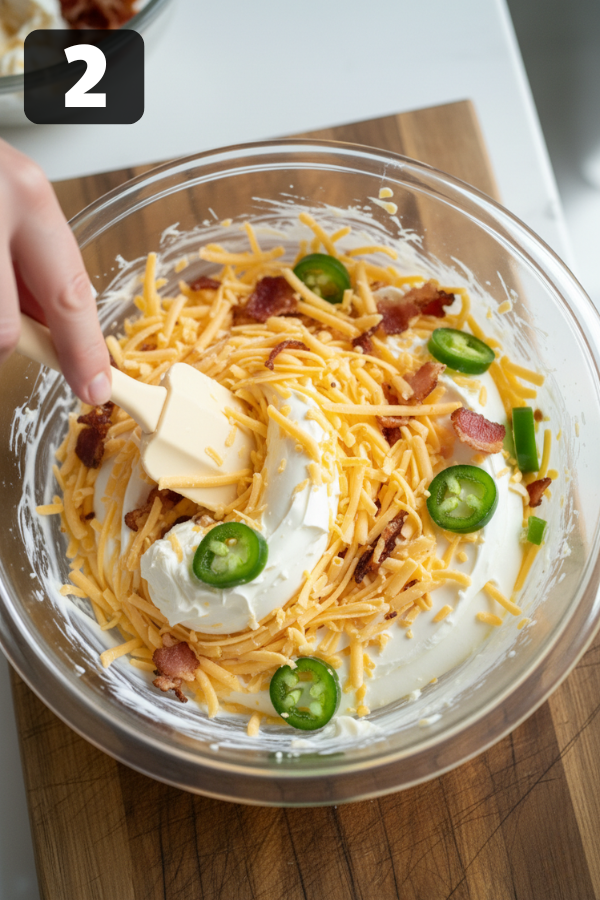
In a bowl, combine:
- Cream cheese
- Cheddar
- Jalapeños
- Bacon
Stir until it’s thick and creamy. It should hold its shape but still be easy to scoop.
Step 3: Stuff the Chicken
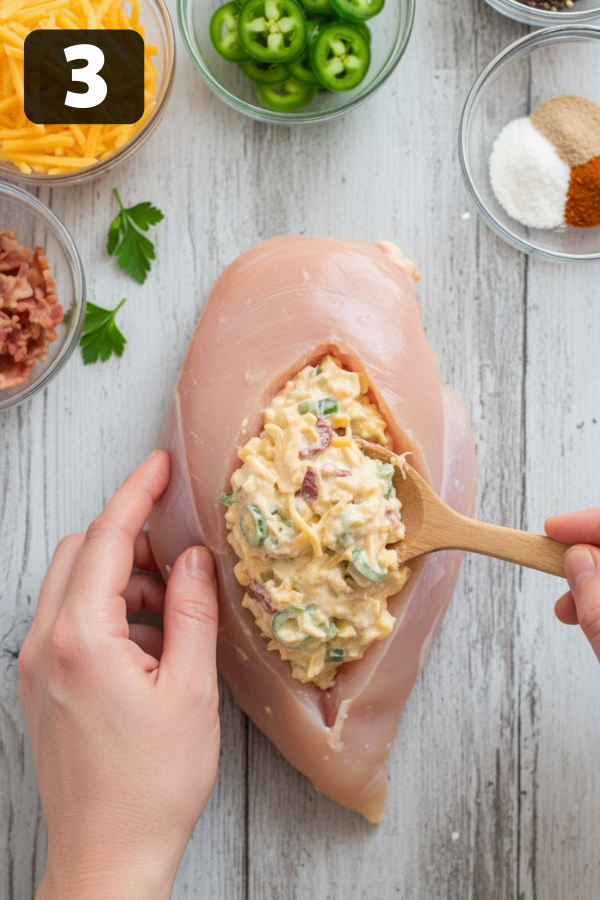
Spoon the filling into each pocket. Don’t overdo it—seriously, less is more here.
If needed, secure with toothpicks to keep everything tucked in.
Step 4: Quick Sear
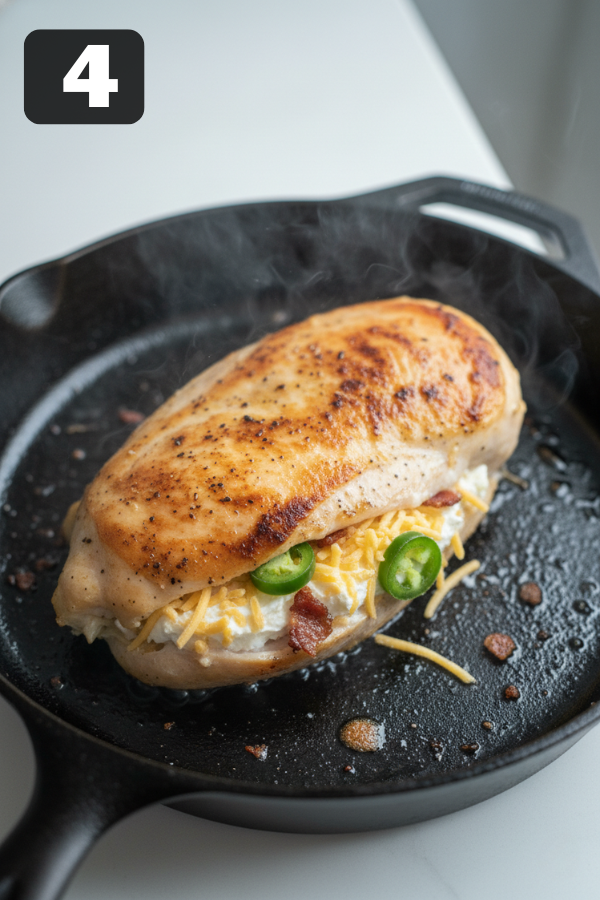
Heat a skillet with a bit of oil and sear the chicken for about 2–3 minutes per side.
This step adds flavor and gives you that golden crust. Skip it if you’re in a rush—but if you have the time, do it.
Step 5: Bake to Finish
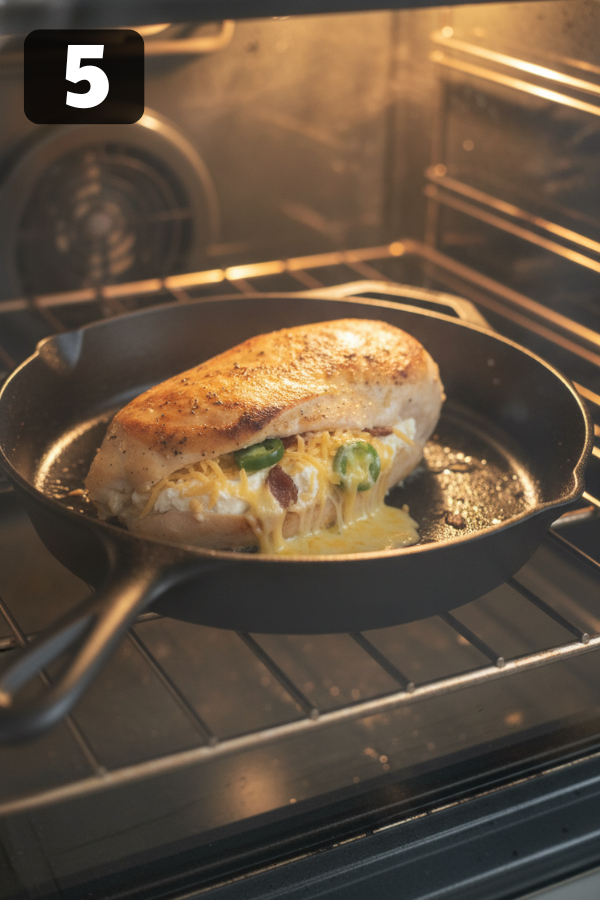
Transfer to the oven at 375°F and bake for 20–25 minutes, until the internal temp hits 165°F.
Let it rest for a few minutes before cutting. The filling settles, and the juices stay where they belong.
A Few Tips That Make a Big Difference
Let me explain—this recipe is simple, but small details matter.
- Don’t overstuff → prevents filling from leaking out
- Use room-temp cream cheese → mixes smoother
- Even out chicken thickness → helps it cook evenly
- Check temperature early → overcooked chicken dries fast
And here’s a trick: if you want next-level flavor, wrap the chicken in bacon before baking. It’s a little extra, but wow—it works.
Storage, Leftovers, and Real-Life Meal Prep
This dish is actually better the next day. Not always the case with chicken, but here we are.
- Store in the fridge: 3–4 days
- Reheat in oven (best) or microwave (cover it to keep moisture)
- Freeze before cooking if prepping ahead
Real-life example:
Make 4 portions on Sunday. Pair with roasted veggies or cauliflower rice. That’s lunch or dinner handled for a few days—no stress.
What to Serve With It
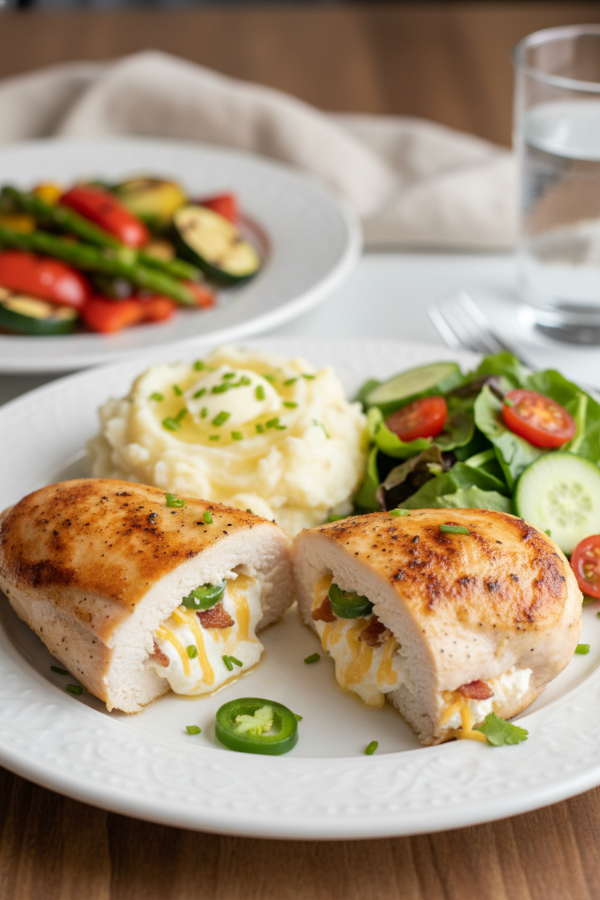
This chicken is rich, so balance it out.
Lighter Options
- Steamed broccoli
- Zucchini noodles
- Side salad with vinaigrette
Comfort Pairings
- Mashed potatoes
- Buttered rice
- Mac and cheese (yes, it’s a lot—but sometimes that’s the point)
Drinks
- Chardonnay or a light white wine
- Sparkling water with lemon
Common Problems And How to Fix Them
Filling leaks out
- Cause: Overstuffing
- Fix: Use less filling + secure with toothpicks
Chicken turns out dry
- Cause: Overcooking
- Fix: Use a thermometer (pull at 165°F)
Too spicy
- Cause: Jalapeño seeds
- Fix: Remove seeds or add more cream cheese
Flavor feels flat
- Cause: Not enough seasoning
- Fix: Season generously inside and out
FAQs
- Can I make this ahead of time?
Yes—assemble everything up to a day ahead and bake when ready. - Is it very spicy?
Not really. It depends on the jalapeños. Remove seeds for a milder version. - Can I grill it instead of baking?
Absolutely. Grill over medium heat and finish on indirect heat. - Can I swap the protein?
You can try chicken thighs—they’re juicier and more forgiving.
Nutrition Snapshot
- Calories: 400–500
- Protein: 35–45g
- Fat: 25–35g
- Carbs: 3–6g
Keto-friendly, high-protein, and filling without being heavy.
Final Thoughts
This is one of those recipes you’ll come back to—not because it’s trendy, but because it works. It’s easy, flexible, and just… satisfying.
Try it once, adjust the spice, maybe swap cheeses—and it’ll feel like your own.
And if you’re anything like most home cooks, you’ll probably end up making a double batch next time.
Don’t Miss: Spinach and Artichoke Chicken Bake
Ingredients
Method
- Step 1: Prep the ChickenStart by slicing a pocket into each chicken breast. Not all the way through—just enough to create space for the filling.Pat the chicken dry (this matters more than you think), then season both inside and outside.

- Step 2: Mix the FillingIn a bowl, combine:Cream cheeseCheddarJalapeñosBaconStir until it’s thick and creamy. It should hold its shape but still be easy to scoop.
- Step 3: Stuff the ChickenSpoon the filling into each pocket. Don’t overdo it—seriously, less is more here.If needed, secure with toothpicks to keep everything tucked in.
- Step 4: Quick SearHeat a skillet with a bit of oil and sear the chicken for about 2–3 minutes per side.This step adds flavor and gives you that golden crust. Skip it if you’re in a rush—but if you have the time, do it.
- Step 5: Bake to FinishTransfer to the oven at 375°F and bake for 20–25 minutes, until the internal temp hits 165°F.Let it rest for a few minutes before cutting. The filling settles, and the juices stay where they belong.


