
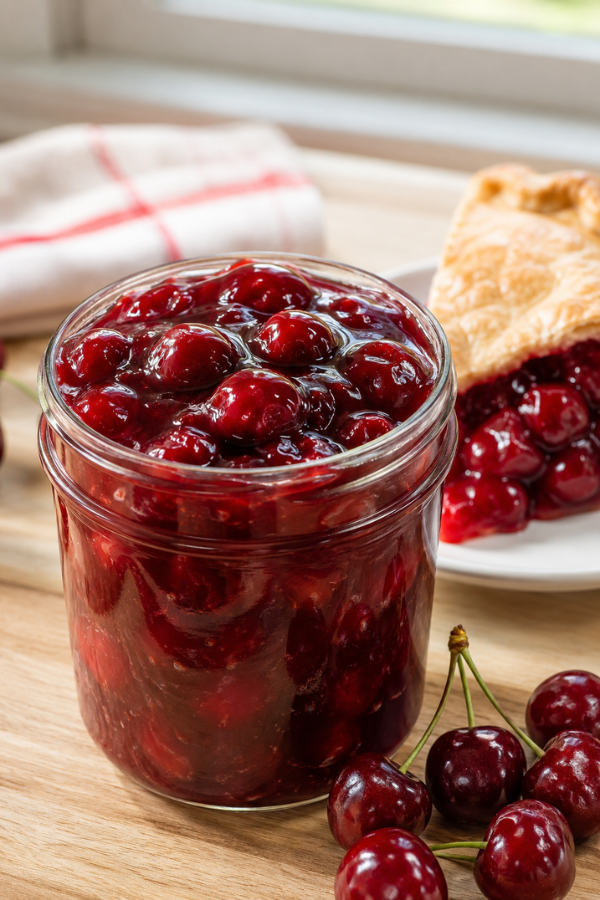
There’s something so satisfying about watching Homemade Cherry Pie Filling turn into a deep ruby dessert topping. At first, it’s just cherries in a pan. A little sugar. A little lemon. A spoonful of cornstarch. Then the cherries soften, the juices bubble, and suddenly the whole kitchen smells like a small-town bakery.
That’s the charm of this cherry filling. It feels cozy and a little nostalgic, but it doesn’t ask much from you. One saucepan, a few everyday ingredients, and about 20 minutes are enough to make a glossy filling that tastes like it belongs inside a homemade pie.
This is the kind of recipe that works when cherries are in season and when they’re not. Fresh cherries bring that bright summer flavor, frozen cherries keep things easy year-round, and canned cherries can save the day when the pantry is doing the heavy lifting.
Use it for cherry pie, of course, but don’t stop there. Spoon it over cheesecake, pancakes, waffles, vanilla ice cream, Greek yogurt, oatmeal, pound cake, or brownies. It’s a simple little recipe that quietly makes everyday desserts feel more special.
Why You’ll Love This Recipe
This recipe is practical in the best way: quick, flexible, and easy to make without leaving a pile of dishes behind.
- One-pan easy: Everything cooks in one saucepan, so cleanup stays simple.
- Works with what you have: Use fresh cherries in summer, frozen cherries any time, or canned cherries when you need a fast pantry dessert.
- Easy to adjust: Make it sweeter, more tart, thicker for pie, or softer for spooning over desserts.
- Make-ahead friendly: Keep it in the fridge for quick toppings, pies, breakfast bowls, or last-minute desserts.
- Better than canned: The flavor tastes fresher, brighter, and more like real cherries.
You know what? Homemade doesn’t always mean complicated. Sometimes it just means you get to choose the flavor instead of letting a can choose it for you. If your cherries are naturally sweet, use less sugar. If they’re tart, add a little more. And if you love that classic cherry-almond bakery flavor, add a tiny splash of almond extract. Tiny is the key word there.
Ingredients You’ll Need
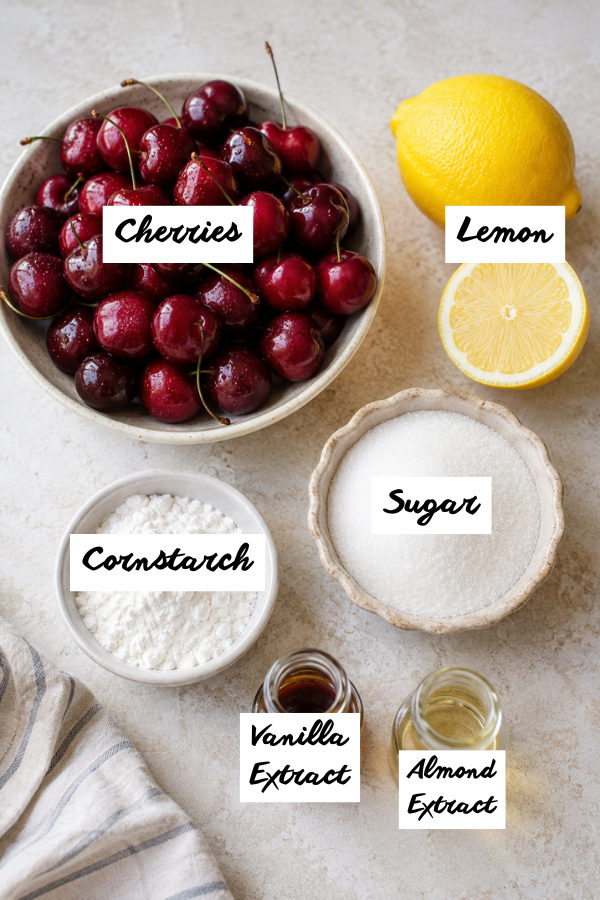
The ingredient list is short, but each item has a clear job. That’s what makes this recipe easy to remember once you’ve made it once.
Cherries
You’ll need about 4 cups of pitted cherries for a standard batch.
Fresh cherries are wonderful when they’re in season. They give the filling a juicy texture and a fresh fruit flavor that tastes like summer. The only catch is the pitting. It takes a little time, but it’s worth it if you have beautiful cherries on hand.
Frozen cherries are the busy cook’s friend. They’re already pitted, easy to store, and available year-round. They may release more juice as they cook, but that’s easy to manage with a little extra simmering.
Canned cherries also work. Just make sure you’re using canned cherries, not canned cherry pie filling. Drain them first, save some of the juice, and reduce the sugar if they’re packed in syrup.
You can use:
- Fresh sweet cherries
- Fresh tart cherries
- Frozen cherries
- Canned cherries in juice
- Canned cherries in light syrup
Sugar
Sugar sweetens the filling and helps create that glossy syrup around the cherries.
For sweet cherries, start with ½ cup sugar. For tart cherries, you may want closer to ¾ cup or even 1 cup, depending on how sharp they taste.
The best rule? Taste and adjust. Cherries are not always the same. One batch can be candy-sweet; another can make your mouth pucker a little. That’s normal.
Cornstarch
Cornstarch thickens the cherry juices and turns them into that shiny, spoonable sauce.
Use 3 tablespoons for a softer topping-style filling. Use ¼ cup if you want a thicker filling for pie.
A small tip that helps a lot: mix the cornstarch with the sugar before adding it to the cherries. Cornstarch can clump if it hits hot liquid too fast. Mixing it with sugar helps it spread more evenly.
Lemon Juice
Lemon juice brightens the flavor. It keeps the filling from tasting flat or overly sweet.
Use about 1 tablespoon for most batches. If your cherries are very sweet, add a little more. If they’re already tart, use less.
Lemon is like a volume knob for fruit. A small squeeze can make the cherry flavor louder.
Salt
A tiny pinch of salt balances the sweetness. It won’t make the filling taste salty. It just helps the cherries taste more like themselves.
Vanilla Extract
Vanilla adds warmth and rounds out the flavor. It gives the filling a soft, dessert-like finish.
Add it after cooking so the flavor stays fresh.
Almond Extract
Almond extract is optional, but it pairs beautifully with cherries. Use only ¼ teaspoon. It’s strong, and a little goes a long way.
If you’re making this for kids or for someone who prefers simple fruit flavor, you can skip it.
Lemon Zest
Lemon zest is optional, but it’s a lovely touch. It adds fresh citrus aroma without adding more liquid.
Use it when you want the filling to feel a little brighter, especially for cheesecake, pancakes, or summer desserts.
Step-by-Step Instructions
Step 1: Prep the Cherries
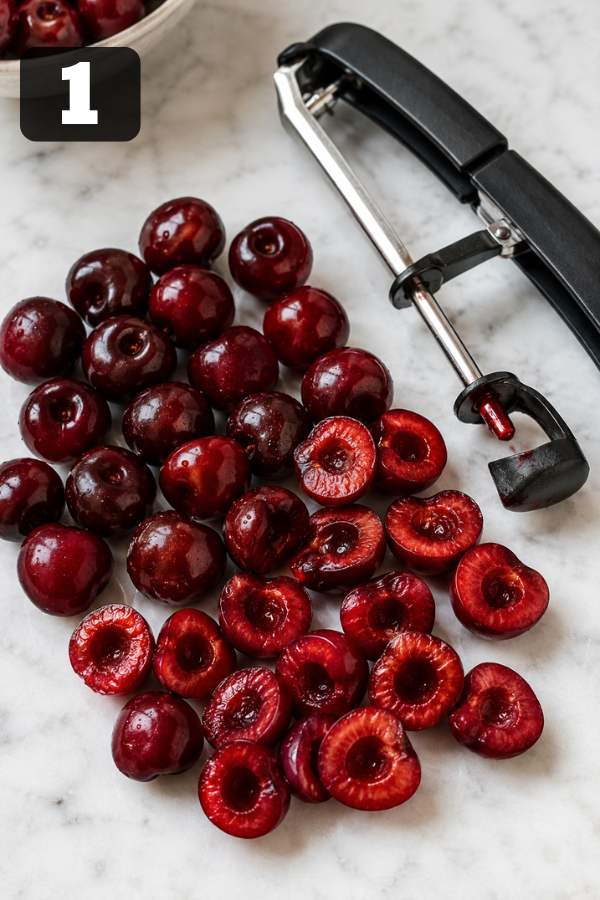
If using fresh cherries, wash them well, remove the stems, and pit them. Cut the cherries in halves. If you’re making pie, cut some into quarters too. Smaller pieces help the filling settle better into the crust and make cleaner slices later.
If using frozen cherries, you can use them straight from the freezer for a quick filling. If there’s a lot of ice on them, let them sit for a few minutes or rinse quickly and drain.
If using canned cherries, drain them and save about ½ cup of the juice. That juice can replace the water in the recipe and give the filling a deeper cherry flavor.
Step 2: Mix the Sugar and Cornstarch
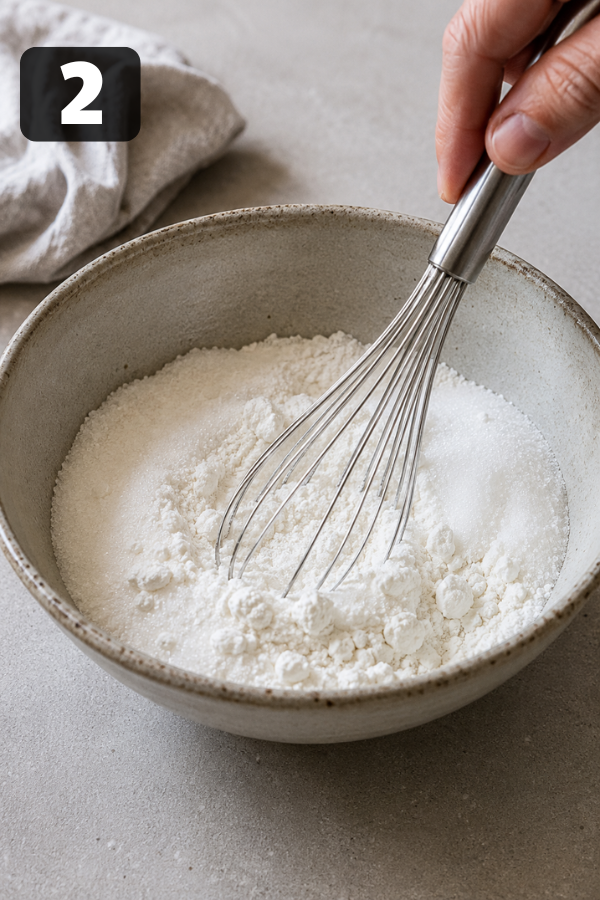
In a small bowl, whisk the sugar and cornstarch together.
This step is small, but it matters. If cornstarch goes straight into hot cherry juice, it can clump. And once it clumps, it’s annoying to fix. Mixing it with sugar first helps it blend smoothly into the fruit.
Step 3: Add Everything to the Saucepan
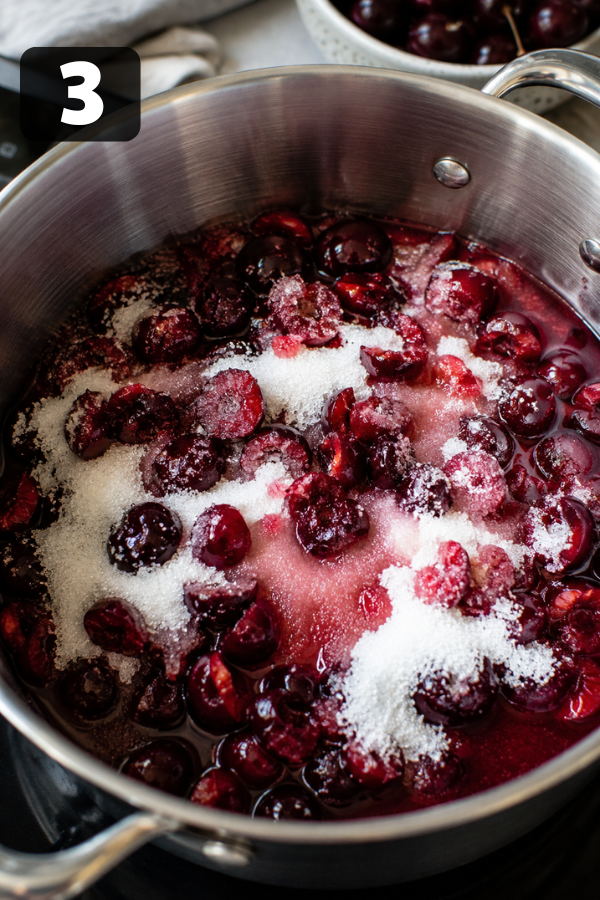
Add the cherries to a medium saucepan. Stir in the sugar-cornstarch mixture, lemon juice, salt, and water or reserved cherry juice.
At first, the mixture may look a little dry. Don’t worry. As the cherries warm up, they’ll release their juices. Frozen cherries especially will give off quite a bit of liquid.
Keep the heat at medium. You want the cherries to cook gently, not scorch at the bottom.
Step 4: Cook Until Juicy and Bubbling
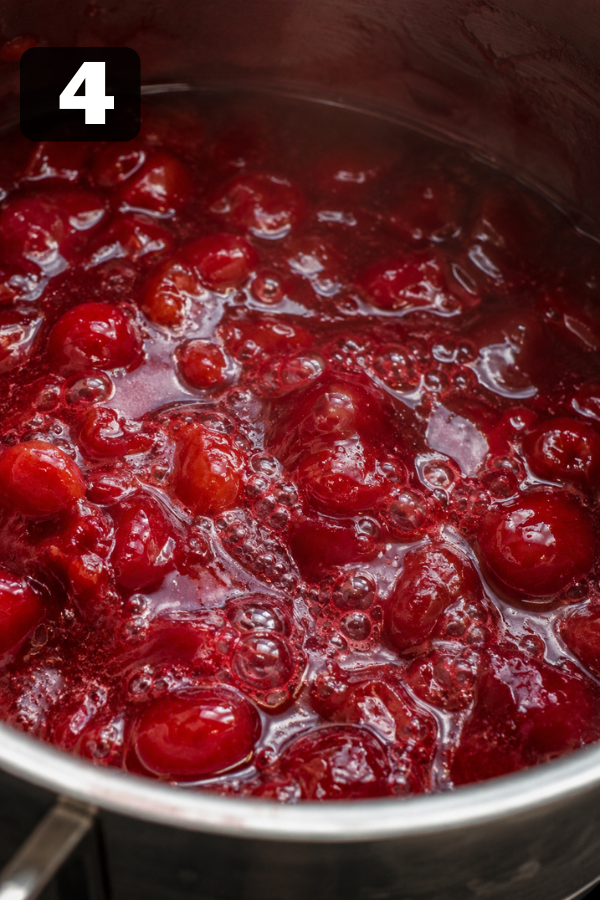
Stir often as the cherries heat. After a few minutes, the fruit will soften, and the liquid will start to look red and syrupy.
Once the mixture starts bubbling, reduce the heat to low or medium-low. Keep stirring. The filling will begin to thicken as the cornstarch cooks.
Look for these signs:
- The sauce turns glossy.
- The cloudy look disappears.
- The filling coats the back of a spoon.
- The cherries look suspended in syrup.
- The mixture bubbles slowly and evenly.
This usually takes about 8–10 minutes after the cherries start releasing juice. If your cherries are very juicy, simmer a little longer.
Step 5: Add the Flavor Boosters
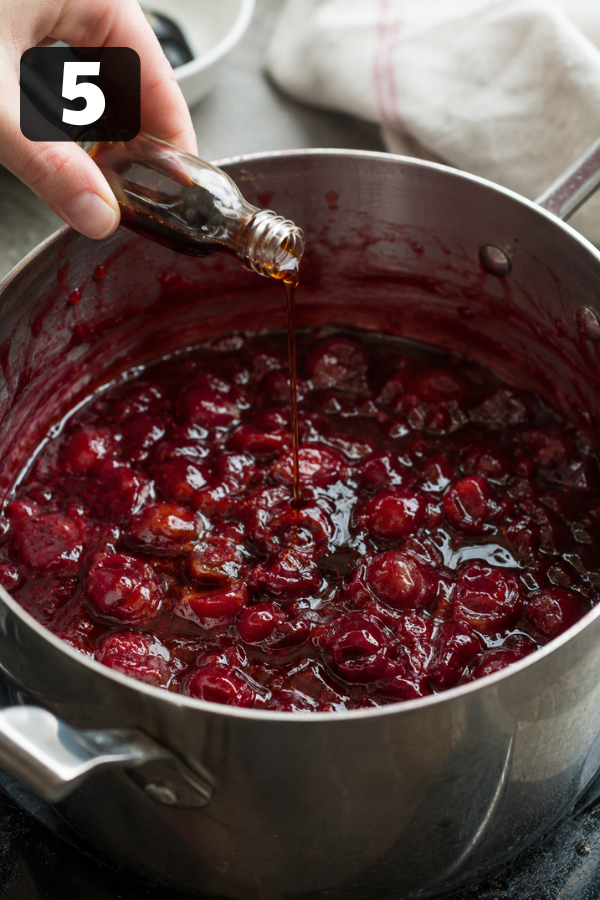
Remove the saucepan from heat. Stir in vanilla extract, lemon zest, and almond extract if using.
Adding these at the end keeps the flavors clear and fresh. Vanilla stays warm and sweet. Lemon zest stays bright. Almond extract stays soft instead of overpowering.
Take a small taste. Too sweet? Add a tiny squeeze of lemon. Too tart? Add a spoonful of sugar while the filling is still warm.
Step 6: Cool Before Using
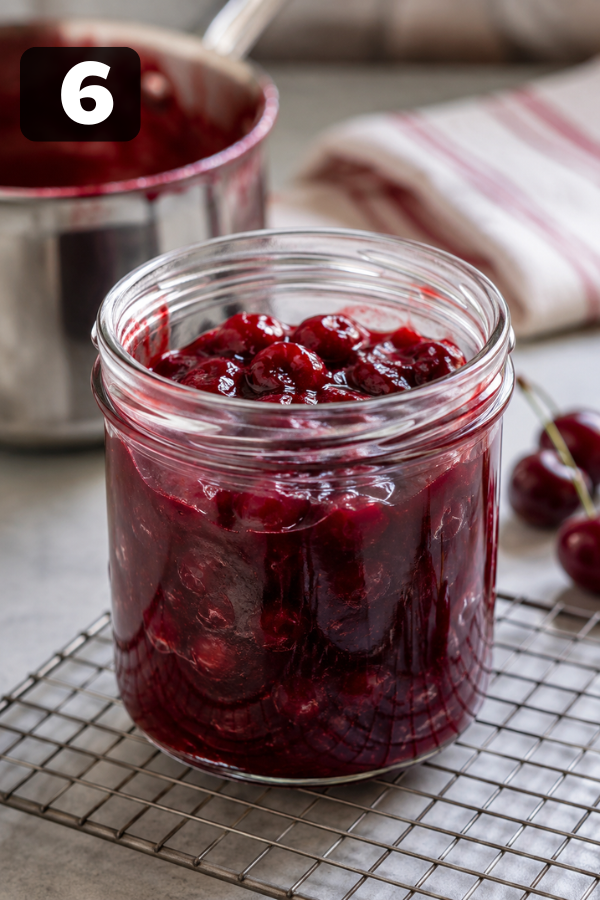
Let the filling cool for at least 10–15 minutes if you’re using it as a topping.
If you’re using it in pie, let it cool completely. Warm filling can soften pie dough too fast and make the crust harder to handle.
Also, the filling thickens more as it cools. So if it looks slightly loose while hot, give it time. Fruit filling has a way of pulling itself together once it rests.
Tips for Success
Don’t rush the simmer. Cornstarch needs enough heat to thicken properly. If the sauce still looks cloudy, cook it a little longer.
Taste before cooling. Cherries vary so much. Even frozen bags from the same store can taste different from one season to the next.
Use less sugar at first if you’re unsure. You can always add more. You can’t easily remove it.
Be careful with almond extract. It’s one of those ingredients that goes from “mmm, bakery” to “why does this taste like perfume?” pretty fast.
If using frozen cherries, expect extra juice. Simmer longer or add a small amount of extra cornstarch slurry if needed.
If using canned cherries, reduce the sugar and lemon juice. Canned fruit can already be sweet and soft.
If you want a thicker pie filling, let it cool fully before judging the texture. Hot filling often looks thinner than it really is.
Storage and Leftovers
Let the cherry pie filling cool completely before storing.
Spoon it into an airtight container or glass jar and refrigerate. It keeps well for several days and is great to have ready for quick desserts.
You can also freeze it. Place cooled filling in a freezer-safe container, leaving a little room at the top because it may expand. Freeze for up to 3 months.
To use frozen filling, thaw it overnight in the refrigerator. Stir it well before serving. If it looks too thick, warm it gently in a saucepan with a splash of water or cherry juice.
For meal prep, this filling is a quiet little hero. Make it once, and you can use it all week in small ways: a spoonful over oatmeal, a swirl in yogurt, a topping for toast with cream cheese. Not every dessert needs a full production.
What to Serve With Homemade Cherry Pie Filling
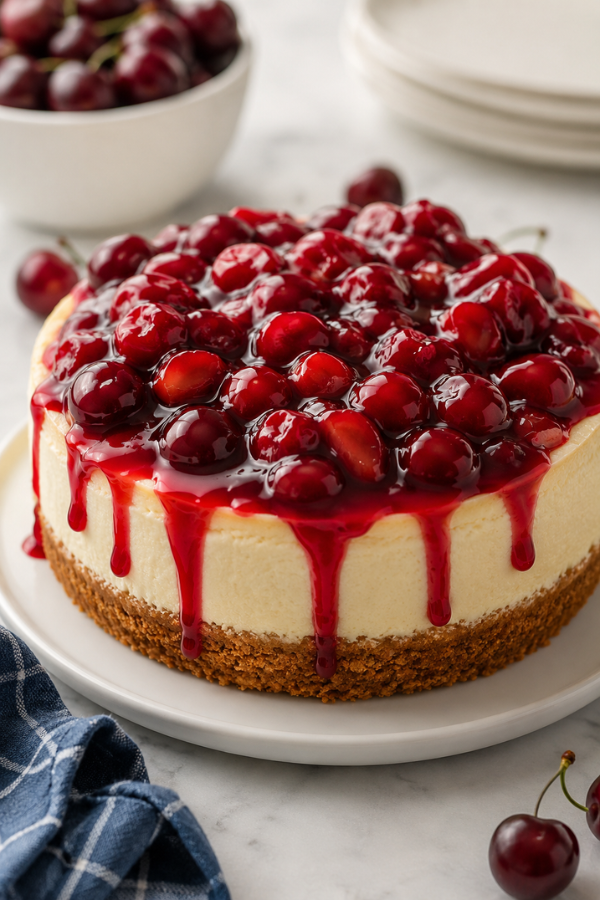
Cherry pie is the obvious answer, but this filling can do much more.
Try it with:
- Vanilla ice cream
- Cheesecake
- Pancakes
- Waffles
- French toast
- Greek yogurt
- Oatmeal
- Pound cake
- Brownies
- Crepes
- No-bake cheesecake cups
- Rice pudding
- Chocolate cake
For drinks, keep it simple. Coffee works well with cherry desserts. Iced tea is great in summer. Sparkling water with lemon keeps things light. For a cozy family dessert, warm cherry filling over vanilla ice cream with a glass of cold milk is hard to beat.
It’s also a nice topping for brunch. Put out pancakes, yogurt, granola, and a bowl of cherry filling, and suddenly breakfast feels like you planned something special.
Common Issues and Easy Fixes
My filling is too runny
This usually means one of three things: the cherries released a lot of juice, the filling didn’t cook long enough, or there wasn’t enough cornstarch.
Fix it by simmering the filling a little longer. If it’s still too thin, mix 1 teaspoon cornstarch with 1 tablespoon cold water. Stir that slurry into the hot filling and cook for another minute or two.
Let it cool before judging. Filling thickens as it rests.
My filling is too thick
Warm it over low heat and stir in water or cherry juice, 1 tablespoon at a time.
Go slowly. A little liquid can loosen it quickly.
My filling tastes too sweet
Add lemon juice, ½ teaspoon at a time. A tiny pinch of salt can also help balance the sweetness.
If it’s still very sweet, serve it with something plain, like Greek yogurt, unsweetened whipped cream, or vanilla ice cream.
My filling tastes too tart
Add sugar, 1 tablespoon at a time, while the filling is still warm. Stir well and taste again.
Vanilla can also soften tartness without making the filling taste overly sugary.
My cornstarch clumped
Next time, whisk the cornstarch with the sugar before adding it to the fruit.
For now, stir firmly and press larger clumps against the side of the pan with a spoon. If the texture really bothers you, strain the sauce and add the cherries back in.
My pie crust got soggy
The filling may have been too warm or too loose when added to the crust.
Next time, cool the filling completely before assembling the pie. If the filling has extra juice, reduce the juice first. Also, make sure the top crust has vents so steam can escape while baking.
Nutrition Info
Nutrition will vary based on the cherries, sugar amount, and serving size.
In general, cherry pie filling is mostly carbohydrates from cherries and sugar. It is naturally low in fat unless you add butter. It is also usually dairy-free and vegetarian.
To make it lighter:
- Use sweet cherries.
- Reduce the sugar.
- Add lemon juice for brightness.
- Serve with yogurt instead of ice cream.
- Use it as a topping instead of a full pie filling.
This recipe can be gluten-free if your cornstarch is certified gluten-free. It can also be nut-free if you skip the almond extract.
FAQs
1. Can I make Homemade Cherry Pie Filling ahead of time?
Yes. Make it 1–2 days ahead, cool it fully, and store it in an airtight container in the fridge.
2. Can I use frozen cherries?
Yes. Frozen cherries work very well. They may release more liquid than fresh cherries, so cook the filling a little longer if needed.
3. Can I use canned cherries?
Yes. Drain them first and save some of the juice. Use the juice instead of water for better flavor. Reduce the sugar if the cherries are packed in syrup.
4. Why is my cherry pie filling runny?
It may need more cooking time, more thickener, or more cooling time. Frozen cherries can also release extra liquid.
5. How do I thicken cherry pie filling?
Simmer it longer. If needed, add a cornstarch slurry made from 1 teaspoon cornstarch and 1 tablespoon cold water.
6. What can I use this filling for besides pie?
Use it on cheesecake, pancakes, waffles, ice cream, yogurt, oatmeal, brownies, pound cake, crepes, or no-bake desserts.
Final Thoughts
Homemade Cherry Pie Filling is one of those small kitchen wins that feels bigger than it is. It’s simple, useful, and just a little nostalgic. You get glossy cherries, a sweet-tart sauce, and a dessert shortcut that works all week long.
Make one batch, tuck it in the fridge, and suddenly breakfast, dessert, and late-night snacks all have a little more sparkle.
Not bad for cherries, sugar, and one saucepan.
Don’t Miss: Cherry Pie Bars
Don’t Miss: Homemade Blackberry Jam
Also Try: Easy Homemade Blueberry Pie
Ingredients
Method
- Prep the cherries: Wash, stem, and pit fresh cherries, then halve them. For pie, cut some into quarters. If using frozen cherries, use straight from frozen or rinse off excess ice. If using canned cherries, drain and save ½ cup juice.

- Mix the thickener: In a small bowl, whisk together the sugar and cornstarch to help prevent clumps.
- Combine in saucepan: Add cherries, sugar-cornstarch mixture, lemon juice, salt, and water or reserved cherry juice to a medium saucepan.
- Cook and thicken: Cook over medium heat, stirring often, until the cherries release juice and the mixture starts bubbling. Reduce heat and simmer 8–10 minutes until thick, glossy, and syrupy.
- Add flavor: Remove from heat, then stir in vanilla extract, lemon zest, and almond extract if using. Taste and adjust with a little lemon juice or sugar if needed.
- Cool before using: Let cool 10–15 minutes for toppings, or cool completely before using in pie. The filling will thicken more as it rests.
