
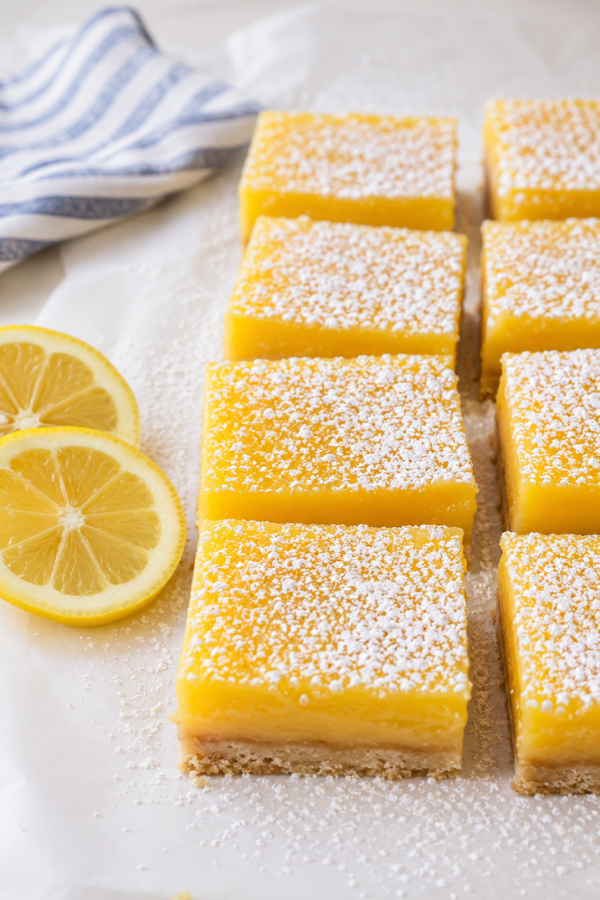
Gluten-Free Lemon Bars are like sunshine in dessert form: sweet, sharp, soft, buttery, and just a little fancy without trying too hard. Even better, they keep all of that classic lemon bar charm, but they’re made with a gluten-free shortbread crust that still tastes rich and tender.
And honestly, that’s the whole goal here: lemon bars that don’t feel like a “gluten-free version.” Instead, they should taste like lemon bars. Period.
This recipe is made for busy home cooks who want a dessert that’s simple, reliable, and easy to prep ahead. First, you’ll press the crust into one pan and bake it. Then, you’ll whisk the lemon filling, pour it over the warm crust, bake again, and chill. That’s it. No rolling dough. No fussy layers. No sink full of bowls.
Many gluten-free lemon bar recipes rely on the same core method: a buttery shortbread crust, fresh lemon juice, eggs, sugar, and a solid chill before slicing. For example, Mama Knows Gluten Free, Meaningful Eats, and Gluten Free on a Shoestring all use that classic crust-plus-custard structure, with chilling as a key step for clean slices.
Why You’ll Love This Recipe
These bars hit that sweet spot between “easy enough for Tuesday” and “pretty enough for Easter brunch.” You know what? That’s rare.
They taste bright and refreshing, but the buttery crust still makes them feel cozy. Plus, they’re easy to carry to a potluck, slice for a dessert tray, or tuck into the fridge for a little after-dinner treat.
You’ll especially love them because:
- They come together in one pan with simple ingredients.
- The crust is pressed in, not rolled out.
- Fresh lemon juice and zest give the filling real citrus flavor.
- Because they chill beautifully, they’re great for making ahead.
- You can cut them into large squares, small party bars, or tiny dessert bites.
A note for gluten-free baking: gluten is the protein found in wheat, barley, rye, and triticale, and a gluten-free diet removes those grains and ingredients made from them. Mayo Clinic explains that gluten helps foods keep their shape, which is why gluten-free baking often needs the right flour blend for structure.
Ingredients You’ll Need
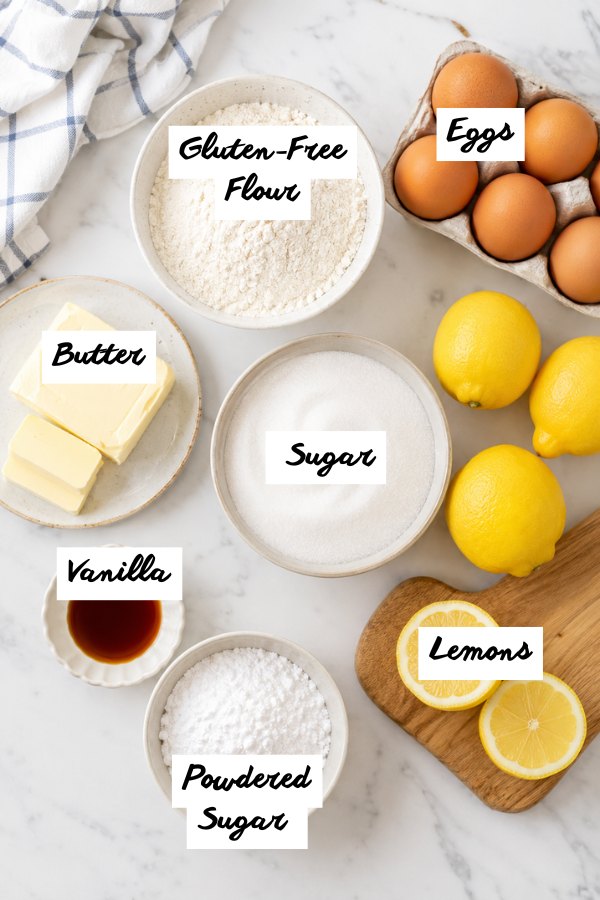
The ingredient list is short, which is part of the appeal. After all, lemon bars don’t need much. They just need the right balance.
For the Gluten-Free Shortbread Crust
Gluten-free 1:1 baking flour: Use a cup-for-cup blend made for baking. A blend with xanthan gum usually gives the crust better structure.
Unsalted butter: Gives the crust that rich shortbread flavor.
Granulated sugar: Adds light sweetness and helps the crust brown.
Salt: Keeps the crust from tasting flat.
Vanilla extract: Adds warmth.
Lemon zest: Not required, but highly recommended. It makes the crust taste fresh and bakery-like.
For the Lemon Filling
Large eggs: Help the filling set.
Granulated sugar: Balances the tart lemon juice.
Fresh lemon juice: This is where the flavor lives. Therefore, use fresh lemons if you can.
Lemon zest: Adds bright citrus oil and a stronger lemon aroma.
Gluten-free flour: Helps thicken the filling.
Powdered sugar: For that classic snowy finish.
Fresh lemon juice matters here. Bottled lemon juice can work in a pinch, but it often tastes sharper or flatter. In fact, Cupcakes & Kale Chips recommends fresh lemons because bottled lemon juice may taste too tart or bitter in lemon bars.
Step-by-Step Instructions
Here’s the thing: lemon bars are simple, but timing matters. The crust needs a head start, the filling needs a gentle bake, and the finished bars need time to chill. If you rush the chilling step, you’ll get lemon pudding with crumbs. Tasty? Sure. Pretty? Not so much.
Step 1: Prep the Pan
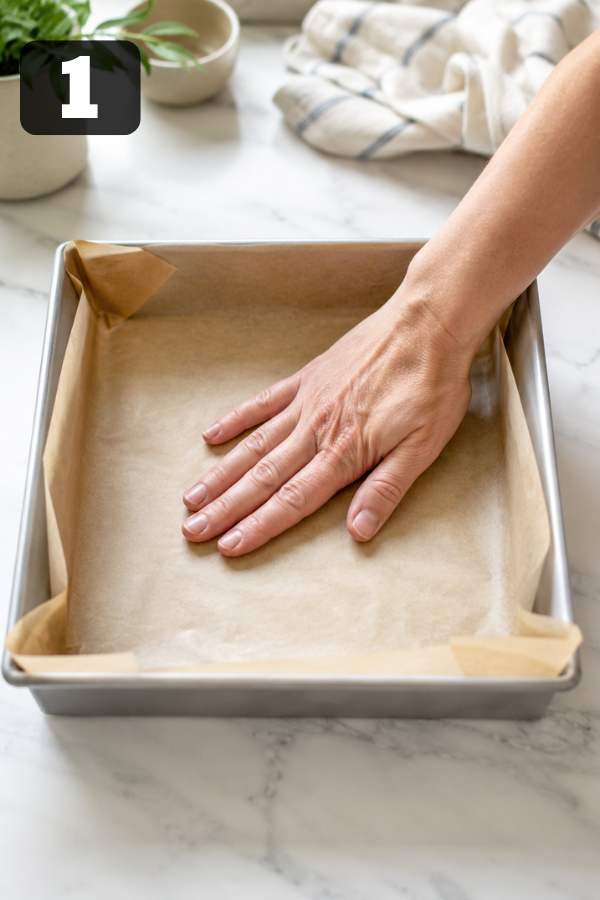
Preheat your oven to 350°F. Then, line an 8×8-inch pan with parchment paper, leaving a little overhang on two sides. This makes it easy to lift the bars out later.
Lightly grease the parchment and corners. Lemon filling loves to cling to bare spots, so don’t give it the chance.
Step 2: Make the Crust
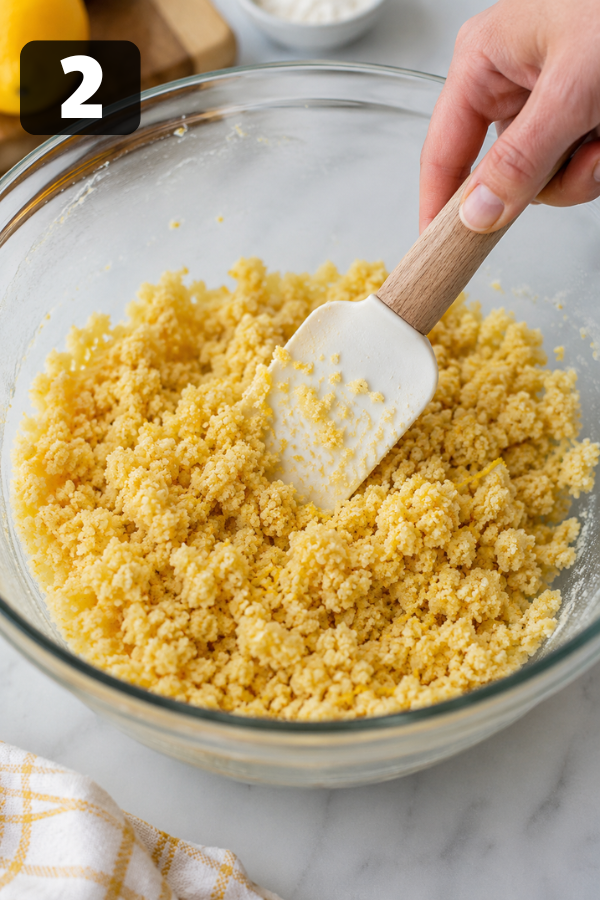
In a bowl, mix the gluten-free flour, sugar, salt, melted butter, vanilla, and lemon zest. The dough should look soft and a little crumbly, but it should hold together when pressed.
Next, press it firmly into the pan. Use your fingers first, then the bottom of a measuring cup to smooth it out. Try to keep the corners the same thickness as the center.
That little detail matters. Otherwise, thick corners bake slower and can feel heavy.
Step 3: Par-Bake the Crust
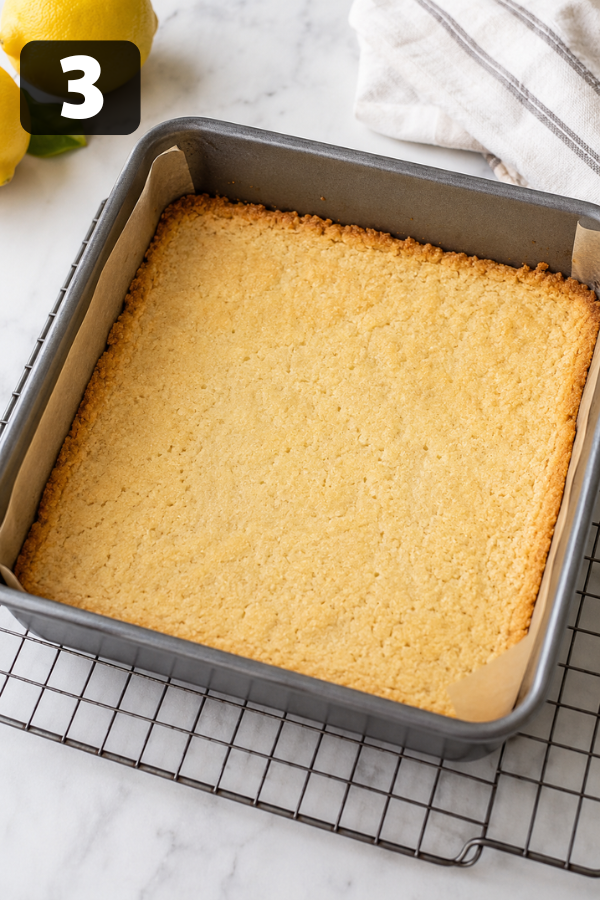
Bake the crust for 18–22 minutes, or until the edges look lightly golden and the top looks dry.
This step keeps the lemon filling from soaking into the base. As a result, you get the contrast a good lemon bar needs: creamy top, tender-crisp bottom. Without the pre-bake, the crust can turn soft and sad.
Step 4: Whisk the Lemon Filling
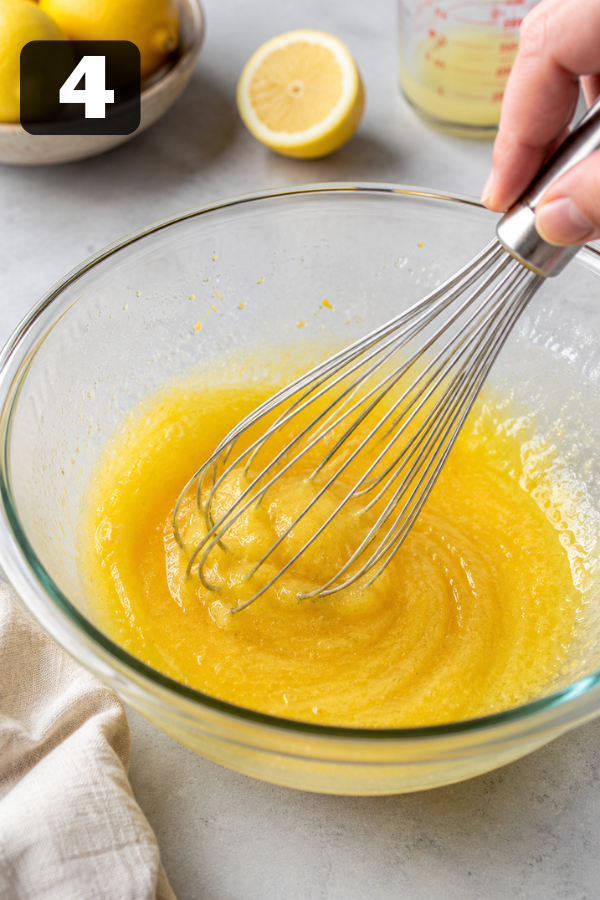
While the crust bakes, whisk the eggs and sugar until smooth. Then, add the fresh lemon juice, lemon zest, gluten-free flour, and a small pinch of salt.
Whisk gently. You want the filling smooth, not foamy. Too much air can create bubbles on top. However, that is not a disaster, just less pretty.
For an extra-smooth filling, pour it through a fine-mesh strainer before baking. Bojon Gourmet uses a more detailed lemon curd method and strains the curd for a silky finish, which is helpful if you want a more polished texture.
Step 5: Pour and Bake Again
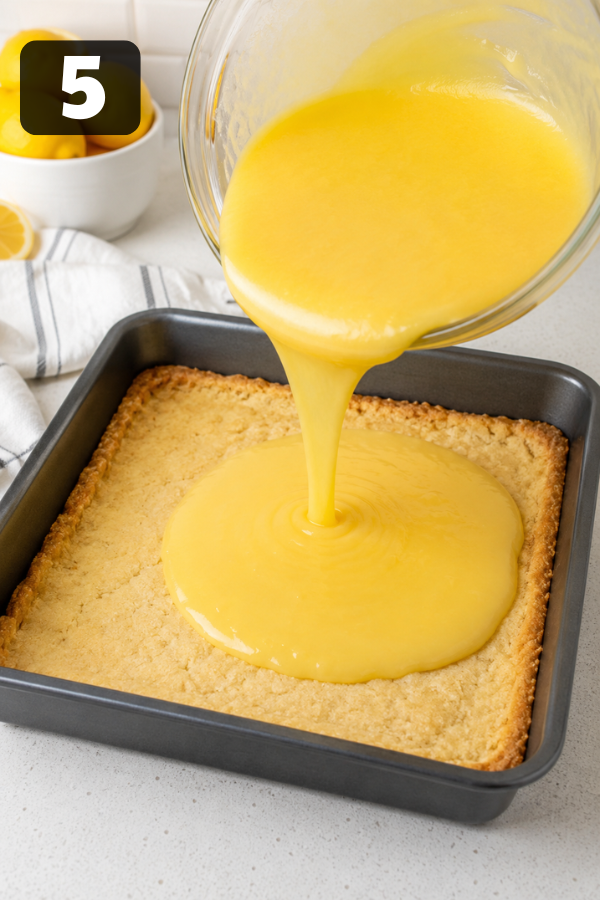
When the crust comes out of the oven, slowly pour the lemon filling over it. After that, return the pan to the oven and bake for 20–25 minutes, or until the edges are set and the center has just a slight wobble.
Meaningful Eats recommends baking lemon bars until the filling is shiny, opaque, and slightly jiggly in the center, then chilling for at least 3 hours before slicing.
Don’t overbake. A firm, rubbery lemon layer is not the dream. Instead, you want it set, but still smooth and soft.
Step 6: Cool, Chill, and Slice
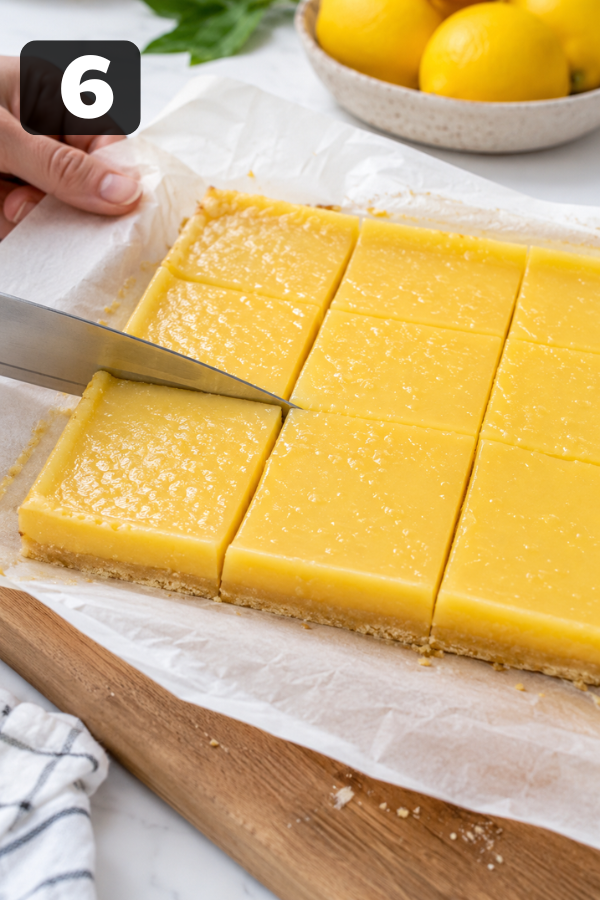
Let the bars cool at room temperature for about 1 hour. Then, move them to the fridge and chill for at least 3 hours, or overnight if you want very clean cuts.
Lift the bars out using the parchment. Next, dust with powdered sugar right before serving. Use a sharp knife, wipe it clean between cuts, and slice into 16 squares.
It sounds fussy. It isn’t. Actually, it’s just the difference between “homemade dessert” and “oh wow, you made these?”
Tips for Success
Gluten-free lemon bars are forgiving, but a few small choices make a big difference.
Use the Right Gluten-Free Flour
A 1:1 gluten-free baking flour is the easiest pick because it’s already blended for structure. However, single flours, like rice flour or coconut flour, won’t behave the same way on their own.
Don’t Skip the Parchment Paper
Parchment paper helps you lift the whole slab out of the pan, which makes slicing much easier.
Chill the Bars Fully
Since the lemon filling contains eggs, sugar, and juice, it needs time to firm up after baking. Mama Knows Gluten Free recommends cooling the bars first, then refrigerating them for a couple of hours before serving.
Dust With Powdered Sugar at the End
If you add powdered sugar too early, it can melt into the filling. As a result, the bars will still taste great, but you’ll lose that classic snow-dusted look.
Common Problems and Easy Fixes
Why Are My Lemon Bars Runny?
They may be underbaked, under-chilled, or measured with too much lemon juice. For best results, bake until the center is set with only a slight wobble, then chill for at least 3 hours.
Why Did the Crust Turn Soggy?
The crust probably needed more time in the oven before the filling was added. Therefore, always par-bake until the surface looks dry and the edges are lightly golden.
Why Does the Filling Taste Eggy?
It may have baked too long or at too high a heat. Lemon bars should be baked gently until just set. In addition, fresh zest helps balance the egg flavor.
Why Did the Top Crack?
A cracked top usually means the filling was overbaked. Luckily, powdered sugar covers small cracks like a charm.
Why Did the Powdered Sugar Disappear?
The bars were likely still warm, or the filling surface was moist. So, dust right before serving for the prettiest finish.
Storage and Make-Ahead Tips
These Gluten-Free Lemon Bars are a make-ahead dream. In fact, they slice better after a night in the fridge.
How to Store Gluten-Free Lemon Bars
Store them in an airtight container in the refrigerator. Because the filling is made with eggs, lemon bars should be refrigerated for food safety. Allrecipes notes that lemon bars should be kept airtight in the fridge and can last up to 7 days; for longer storage, they can be frozen, though powdered sugar should be added after thawing.
For best flavor and texture, enjoy them within 4–5 days.
How to Freeze Gluten-Free Lemon Bars
To freeze them, chill the bars first, slice them, then freeze the squares on a tray until firm. Afterward, wrap them well and store in a freezer-safe container for up to 3 months.
Thaw overnight in the fridge, then dust with powdered sugar before serving.
How to Make Them Ahead for Parties
For parties, bake them the day before and slice them the day of. It’s calmer that way, and calmer is good.
What to Serve With Gluten-Free Lemon Bars
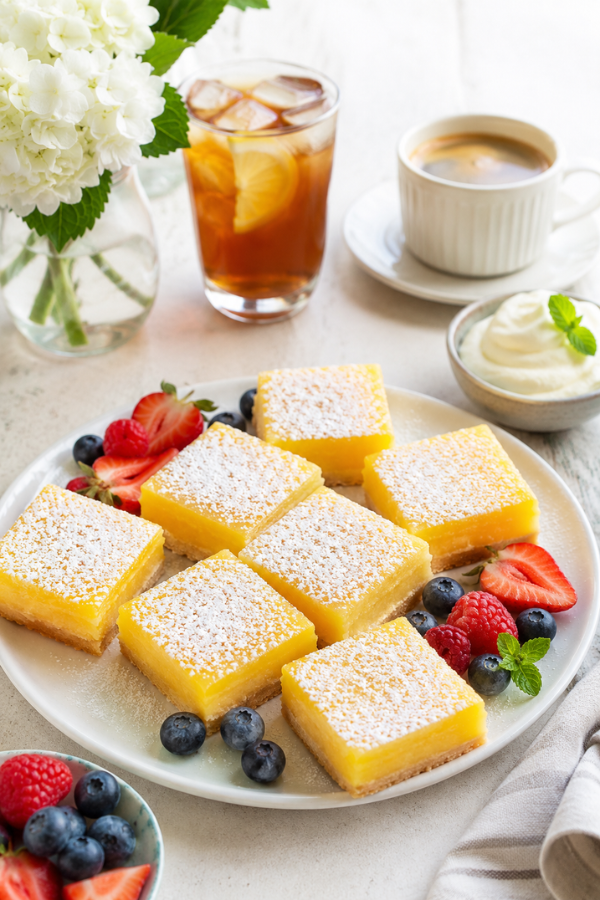
Lemon bars love simple pairings. They don’t need a grand entrance.
Serve them with:
- Hot coffee or iced coffee
- Earl Grey tea
- Unsweetened iced tea
- Sparkling water with berries
- Fresh strawberries or blueberries
- Lightly sweet whipped cream
- Vanilla ice cream for a richer dessert plate
They’re especially good after heavier meals, like grilled chicken, BBQ, pasta salad, or a creamy brunch casserole. That bright lemon flavor cuts through richness in the nicest way.
Recipe Variations
Want to play around a little? These bars can handle it.
Dairy-Free Gluten-Free Lemon Bars
Use plant-based butter sticks in the crust. However, avoid soft tub spreads if possible because they can make the crust greasy or too soft.
Almond Flour Lemon Bars
For a richer, slightly nutty crust, use a tested almond flour crust. Don’t swap almond flour directly for gluten-free flour in this recipe unless you adjust the full crust formula.
Lemon Blueberry Bars
Scatter a small handful of blueberries over the crust before adding the filling. However, keep it light; too many berries release juice and can affect the set.
Extra-Tart Lemon Bars
Add more lemon zest instead of a lot more juice. That way, you get big lemon flavor without making the filling too loose.
Sweeter Lemon Bars
Add a little extra powdered sugar on top or serve with whipped cream. It’s easier than changing the filling balance.
FAQs About Gluten-Free Lemon Bars
1. Are Lemon Bars Usually Gluten-Free?
No. Traditional lemon bars usually use wheat flour in the crust and sometimes in the filling. These Gluten-Free Lemon Bars use gluten-free baking flour instead.
2. Can I Make These Ahead of Time?
Yes. They’re actually better when made ahead because they need time to chill. Bake them the day before, refrigerate overnight, then slice and dust with powdered sugar before serving.
3. Can I Use Bottled Lemon Juice?
You can, but fresh lemon juice tastes better. In addition, fresh zest is key because it adds natural lemon oil and fragrance.
4. Can I Make These Dairy-Free?
Yes. Use dairy-free butter sticks in the crust. The texture may be slightly softer, so chill the bars well before slicing.
5. Can I Freeze Gluten-Free Lemon Bars?
Yes. Freeze them without powdered sugar. Then, thaw them in the fridge and dust before serving.
6. How Do I Cut Lemon Bars Cleanly?
Chill them fully, lift them out with parchment, use a sharp knife, and wipe the blade after each cut. It’s a small step, but it works.
7. Do Gluten-Free Lemon Bars Need to Be Refrigerated?
Yes. Since the filling contains eggs, store them in an airtight container in the fridge.
Nutrition Info
Nutrition will vary based on your flour blend, butter, bar size, and sugar amount. As a general estimate, one lemon bar may have around 170–240 calories if cut into 16 squares.
Approximate per serving:
- Calories: 200
- Carbohydrates: 30g
- Fat: 8g
- Protein: 3g
- Sugar: 20g
These bars are gluten-free and vegetarian. They can also be dairy-free if made with plant-based butter, and nut-free if you use a nut-free gluten-free flour blend.
Final Thoughts
These Gluten-Free Lemon Bars are simple, sunny, and dependable—the kind of dessert that feels cheerful without being loud about it. They’re easy enough for a normal week, pretty enough for a holiday table, and bright enough to make the whole kitchen smell like spring.
Keep them cold, cut them clean, and don’t be shy with the powdered sugar.
Don’t Miss: Mile High Lemon Meringue Pie
Don’t Miss: Flourless Chocolate Cake
Also Try: Cherry Pie Bars
Ingredients
Method
- Step 1: Prep the PanPreheat the oven to 350°F. Line an 8x8-inch pan with parchment paper, leaving overhang on two sides. Lightly grease the parchment and corners.

- Step 2: Make the CrustMix gluten-free flour, sugar, salt, melted butter, vanilla, and lemon zest until crumbly but pressable. Press the crust firmly and evenly into the pan, keeping the corners level with the center.
- Step 3: Par-Bake the CrustBake for 18–22 minutes, until the edges are lightly golden and the surface looks dry. This helps keep the crust tender-crisp instead of soggy.
- Step 4: Whisk the Lemon FillingWhile the crust bakes, whisk eggs and sugar until smooth. Then add lemon juice, lemon zest, gluten-free flour, and salt. Whisk gently, and strain if you want a smoother filling.
- Step 5: Pour and Bake AgainPour the lemon filling over the warm crust. Bake for 20–25 minutes, until the edges are set and the center has a slight wobble. Avoid overbaking so the filling stays soft and smooth.
- Step 6: Cool, Chill, and SliceCool at room temperature for 1 hour, then chill for at least 3 hours. Lift out with parchment, dust with powdered sugar, and slice into 16 bars.
