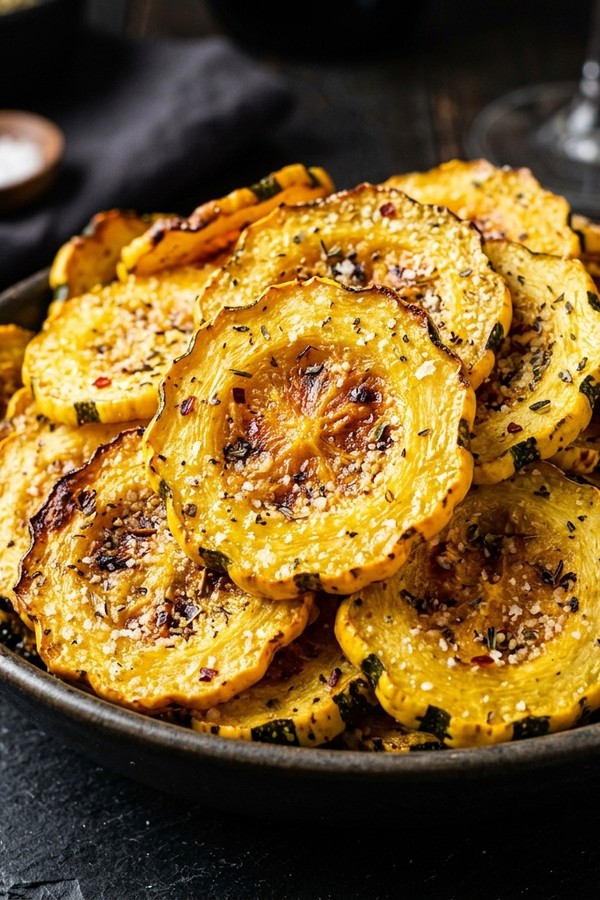
Crispy oven baked yellow squash is one of those simple side dishes that sounds easy—but often turns out soft and disappointing.
You’ve probably pulled yellow squash out of the oven before, expecting a golden, crunchy bite, only to end up with something pale and soggy. However, that problem has nothing to do with your oven—it’s all about moisture control and technique.
In fact, with the right method, you can transform basic squash into a perfectly crispy, golden parmesan-crusted dish in just 25 minutes. Even better, this guide shows you exactly how to avoid sogginess and get consistent, restaurant-quality results every time.
Why Crispy Oven Baked Yellow Squash Gets Soggy — And How to Stop It
Most recipes skip a critical detail: yellow squash is made up mostly of water.
When exposed to heat, that moisture doesn’t disappear instantly. Instead, it releases steam from the inside before the outside has time to crisp. As a result, you end up with soft, watery slices that collapse under pressure.
To put it simply, it’s like trying to sear a steak on a wet pan—browning becomes nearly impossible. The same principle applies here. Moisture surrounds each slice, preventing proper roasting.
So, what’s the solution? Remove as much water as possible before cooking. Once you do that, everything else becomes much easier.
Three Rules for Crispy Squash Every Time
Follow these three rules, and you’ll consistently get golden, crispy squash:
First, remove moisture before cooking. This is the most important step, whether you use salt drawing, pressing, or pre-roasting.
Next, use high heat. Ideally, 425°F is the sweet spot. At lower temperatures, the squash tends to steam rather than roast.
Finally, avoid overcrowding. When slices overlap, steam gets trapped between them. Therefore, always arrange them in a single layer—even if that means using two baking sheets.
The 3 Moisture Removal Methods (Compared)
Pick the one that fits your schedule. All three work. However, they’re not equal.
Method 1 — Salt Draw (Best Results, 15 Minutes)
Lay your squash rounds in a single layer on a paper towel-lined tray. Sprinkle evenly with kosher salt. Then wait 15 minutes. You’ll see actual water beads forming on the surface — that’s exactly what you want happening. Blot them completely dry with fresh paper towels before doing anything else. (This step makes all the difference — don’t skip it.)
The salt pulls water out from the inside of the squash, not just the surface. So it’s the most thorough method of the three.
Method 2 — Paper Towel Press (2 Minutes, Good Enough)
Press squash rounds firmly between two layers of paper towels for about 2 minutes. This removes surface moisture only, so it’s not as thorough as the salt draw. However, it works well when you’re short on time and need dinner on the table fast.
Method 3 — Pre-Roast Dry (No Salt, 10 Minutes)
Arrange unseasoned squash on a sheet pan and roast at 400°F for 8 to 10 minutes before adding any oil or coating. The heat forces moisture out quickly. Then let them cool slightly, blot dry, and proceed with the rest of the recipe as normal.
| Method | Time | Effectiveness | Best For |
|---|---|---|---|
| Salt Draw | 15 min | Best | Weeknight cooking with a little planning |
| Paper Towel Press | 2 min | Good | When you’re in a hurry |
| Pre-Roast Dry | 10 min | Very good | No-salt preference |
4 Coating Options — From Classic to Keto
Classic Parmesan (Recommended)
Freshly grated parmesan melts into a golden, lacy crust that’s hard to beat. Use a microplane or fine grater — never pre-shredded, which has an anti-caking powder that prevents proper browning. Simply grate it yourself and the difference is obvious.
Panko Breadcrumbs
Panko gives the crunchiest texture of all four options. It doesn’t have the savory depth of parmesan, so season it well with garlic powder and Italian seasoning. Note that it’s not suitable for keto or gluten-free diets.
Cornmeal Crust
Cornmeal creates a slightly gritty, Southern-style crust with a satisfying crunch. It also holds up well to dipping sauces. Plus, it’s naturally gluten-free if you use certified GF cornmeal — though it’s not keto-friendly.
Crushed Pork Rinds (Keto)
This is the one that surprises people. Crushed pork rinds create a genuinely crispy crust with zero carbs. Use unflavored rinds and crush them finely. Combined with parmesan, the result is nearly indistinguishable from a panko crust — and it’s completely keto.
| Coating | Carbs | Crunch | Keto | GF |
|---|---|---|---|---|
| Parmesan | ~1g | High | Yes | Yes |
| Panko | ~8g | Highest | No | No |
| Cornmeal | ~10g | High | No | Yes* |
| Pork Rinds | 0g | High | Yes | Yes |
How to Make Crispy Oven Baked Yellow Squash
This is the master recipe using the Classic Garlic Parmesan coating. Serves 4 as a side dish.
Ingredients:
- 2 medium yellow squash (about 1 lb / 500g), sliced into ½-inch rounds
- 1 tsp kosher salt (for the moisture draw)
- 2 tbsp olive oil
- ½ tsp garlic powder
- ½ tsp onion powder
- ¼ tsp black pepper
- ½ tsp Italian seasoning
- ½ cup freshly grated parmesan (50g)
- ¼ cup panko breadcrumbs (30g) — skip for keto, replace with crushed pork rinds
- Fresh parsley and lemon zest for garnish
Step 1: Draw Out the Moisture
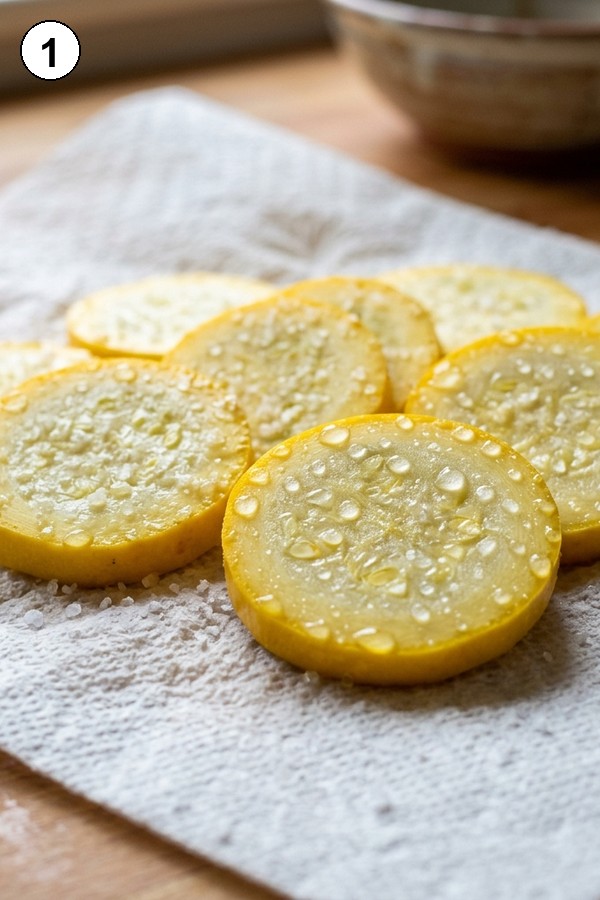
Start by slicing the squash into even ½-inch rounds so they cook evenly.
Next, arrange the slices in a single layer on paper towels to allow moisture to escape.
Then, sprinkle them evenly with kosher salt and let them sit for about 15 minutes.
During this time, you’ll notice water beading up on the surface—this is exactly what you want.
Once the moisture is released, gently pat each slice completely dry with fresh paper towels.
Step 2: Preheat and Prep
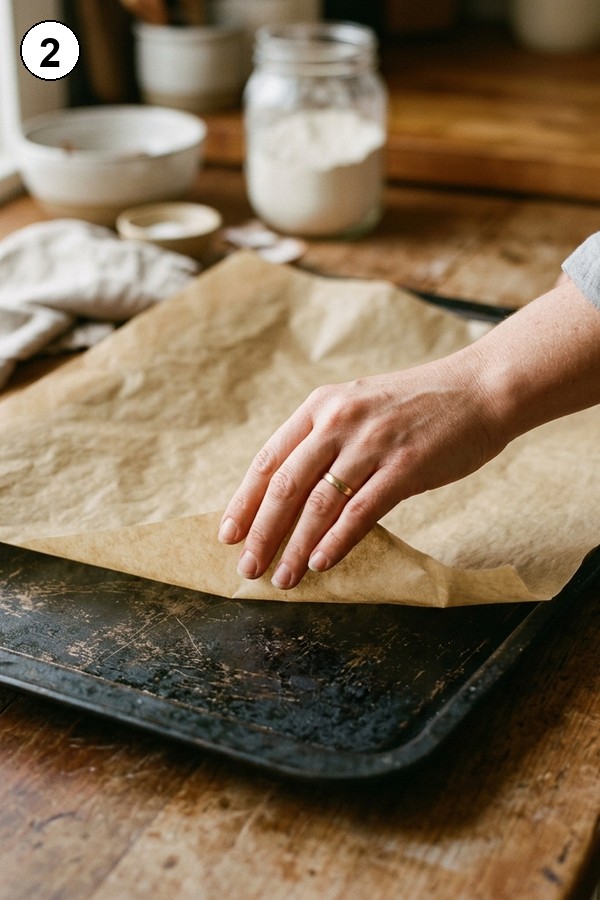
While the squash is resting, preheat your oven to 425°F (220°C).
At the same time, line a large baking sheet with parchment paper for easy cleanup.
For best results, use a dark, heavy-gauge sheet pan since it distributes heat more evenly and helps create better browning.
Step 3: Season the Squash
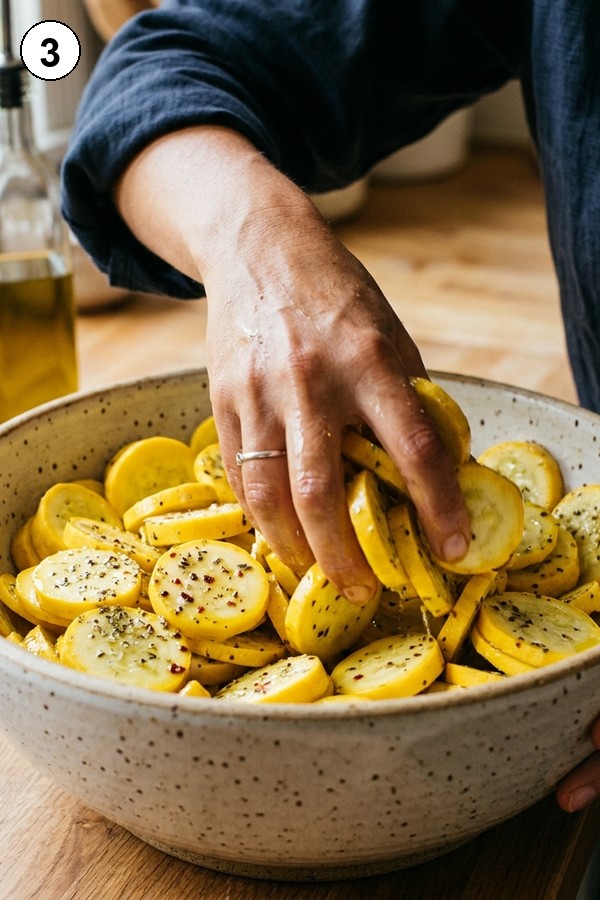
Once the squash is fully dried, transfer it to a large mixing bowl.
Then, drizzle with olive oil and toss gently to coat each piece evenly.
After that, add garlic powder, onion powder, black pepper, and Italian seasoning.
As a result, every slice will be well-seasoned without becoming overly heavy or greasy.
Step 4: Apply the Coating
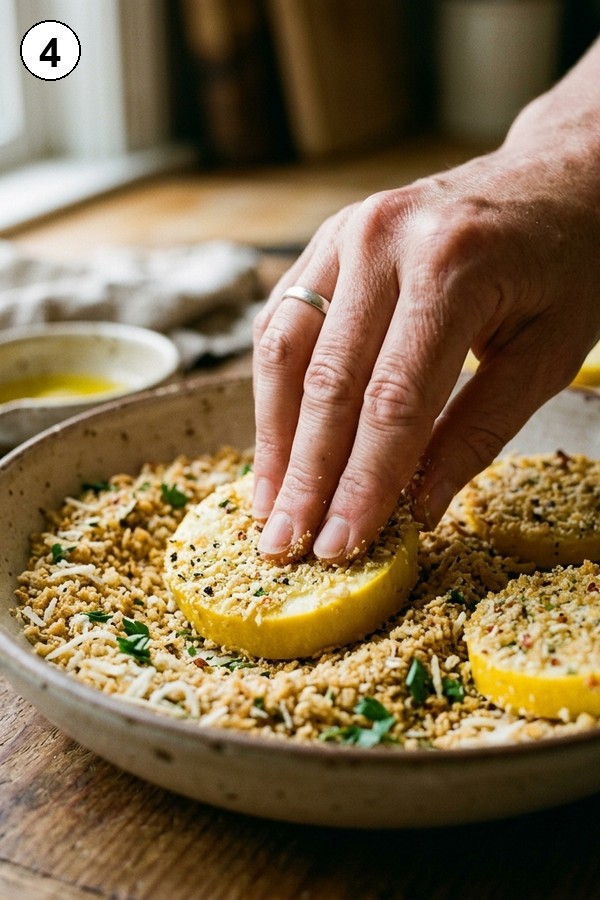
In a separate shallow bowl, combine the parmesan and panko breadcrumbs.
Next, press each squash round firmly into the mixture on both sides.
Instead of sprinkling lightly, make sure to press the coating so it adheres properly.
This step is important because a well-pressed coating creates a crisp, golden crust that stays intact during baking.
Step 5: Arrange and Bake

Carefully place the coated squash rounds onto the prepared baking sheet.
Make sure they are arranged in a single layer with space between each slice.
If needed, use two pans rather than overcrowding one.
Then, bake for 15 to 18 minutes until the edges turn deep golden brown and crispy.
Step 6: Optional Broil Finish
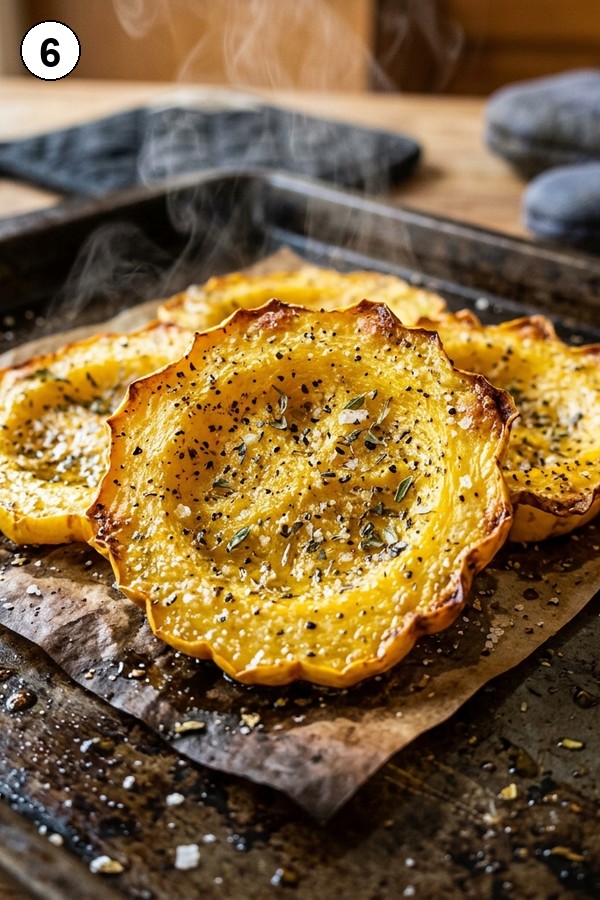
For extra crunch, switch the oven to broil during the final 1 to 2 minutes.
However, keep a close eye on the squash since it can go from golden to burnt very quickly.
Step 7: Rest and Serve
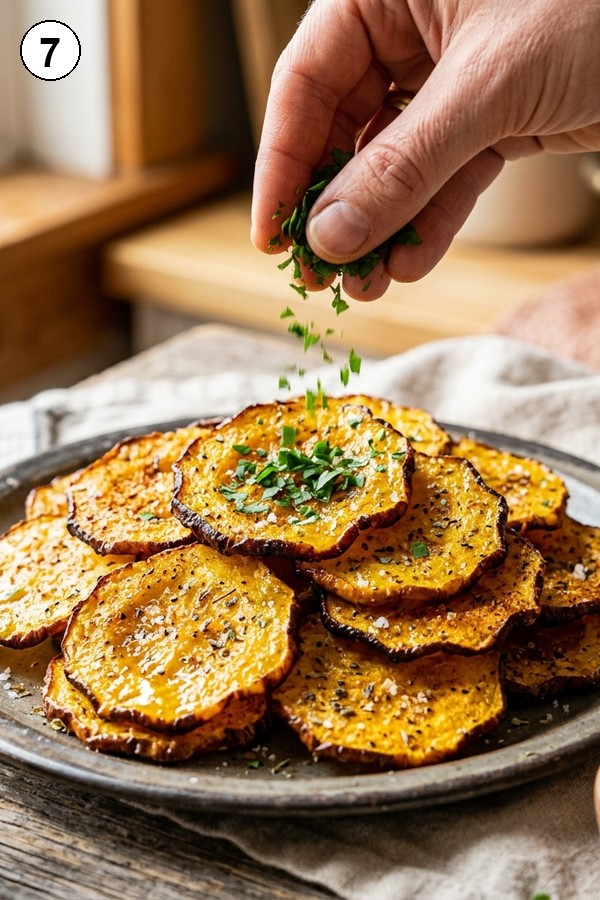
Once baked, remove the squash from the oven and let it rest briefly.
After about 2 minutes, garnish with fresh parsley and a touch of lemon zest.
Finally, serve immediately for the best texture and flavor.
5 Flavor Profiles to Try
Once you’ve got the base recipe down, switching up the flavor takes about 10 seconds.
Classic Garlic Parmesan — The base recipe above. Savory, golden, crowd-pleasing every time.
Cajun Spiced — Swap Italian seasoning for 1 tsp Cajun seasoning and add ¼ tsp cayenne. Bold and slightly smoky.
Ranch Herb — Add 1 tsp ranch seasoning powder to the oil mixture. Creamy herb flavor that kids genuinely love.
Italian — Double the Italian seasoning, add a pinch of red pepper flakes, and finish with a drizzle of good olive oil after baking.
Lemon Herb — Add 1 tsp lemon zest and 1 tsp fresh thyme to the coating. Bright and fresh — great alongside fish or grilled chicken.
Dietary Variation for Crispy Oven Baked Yellow Squashs
for Crispy Oven Baked Yellow Squash
| Variation | Swap | Flags | Approx. Macros |
|---|---|---|---|
| Keto / Low-Carb | Replace panko with crushed pork rinds | Keto, GF | ~80 kcal, 2g net carbs |
| Gluten-Free | Use cornmeal or parmesan only | GF | ~90 kcal, 5g net carbs |
| Vegan | Nutritional yeast (3 tbsp) + panko | Vegan | ~95 kcal, 8g net carbs |
| Dairy-Free | Panko + olive oil only, no cheese | Dairy-Free | ~85 kcal, 7g net carbs |
Tips for Getting It Right Every Time
A few hard-won lessons from making this recipe more times than I can count:
- Always grate your own parmesan. Pre-shredded cheese has a coating that stops it from melting properly. Freshly grated parmesan forms a real, lacy crust. Pre-shredded just sits there and eventually burns without ever getting golden.
- Use two pans instead of crowding one. This is non-negotiable. Crowded squash steams. Spaced squash crisps. So if your batch is large, split it across two sheet pans — no compromise.
- Pull them before they look done. Squash continues cooking on the hot pan for a couple of minutes after you take it out. If they look perfectly golden in the oven, they’ll be slightly overdone by the time they hit the table.
- Add oil right before baking, not earlier. Oil on wet squash just slides off. Dry squash absorbs it properly and holds the coating much better.
- Skip the glass baking dish. Glass retains moisture and doesn’t conduct heat the same way metal does. Always use a metal rimmed baking sheet.
Storage and Reheating
Crispy oven baked yellow squash is best eaten right away. However, if you have leftovers, store them in an airtight container in the fridge for up to 2 to 3 days. They will soften overnight — that’s normal.
To reheat and restore crispiness: spread on a baking sheet and bake at 400°F for 8 to 10 minutes. Or use an air fryer at 375°F for 4 to 5 minutes — that’s actually even better. Do not microwave them. The microwave turns them completely soft with no recovery.
Make-ahead tip: you can do the salt draw and prep the coating mixture up to a day in advance. Store the dried squash rounds and the coating separately in the fridge. Then combine and bake right before serving.
What to Serve With Crispy Baked Yellow Squash
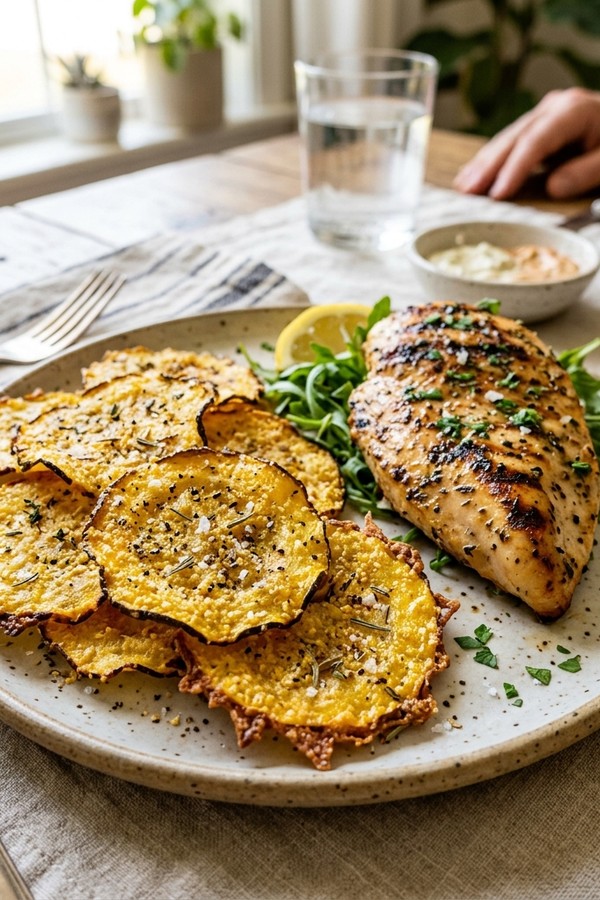
This side dish fits naturally into a weeknight dinner or a summer cookout spread. It plays well with bold mains and light salads alike.
Main Dishes
- Grilled Lemon Chicken — bright citrus flavor that pairs perfectly with the golden squash
- Parmesan Crusted Chicken Sheet Pan Dinner — same parmesan profile, one cohesive oven dinner
- One Pan Balsamic Glazed Chicken and Veggies — add the squash alongside for a full tray bake
Light Sides and Salads
- Summer Corn Salad with Avocado — fresh and colorful next to the warm golden squash
- A simple green salad with lemon vinaigrette
Dipping Sauces
- Ranch dressing — classic and always works
- Garlic aioli — rich and savory
- Marinara — great with the Italian seasoning variation
This squash is also honestly great on its own, right off the pan. Also try tucking it into grain bowls or wraps for a quick lunch.
Nutrition Info
These are estimates based on 1 serving (¼ of the full batch, Classic Garlic Parmesan with panko). Actual values will vary depending on brands used.
| Calories | ~110 kcal |
|---|---|
| Carbohydrates | ~7g |
| Fat | ~7g |
| Protein | ~5g |
| Sugar | ~3g |
| Fiber | ~1g |
| Sodium | ~280mg |
Common Questions and Easy Fixes
1. Why does my oven-baked yellow squash always come out soggy?
Too much water is still inside when it goes into the oven. Always use the salt draw or paper towel press first — that single step is the difference.
2. What temperature is best for crispy baked squash?
425°F. Lower temperatures don’t evaporate moisture fast enough, so the squash steams instead of roasting.
3. Do I need to peel yellow squash before baking?
No. The skin is thin, edible, and helps the rounds hold their shape while baking.
4. Can I make this recipe keto-friendly?
Yes — swap the panko for crushed pork rinds. The result is just as crispy and has essentially zero carbs.
5. How do I reheat baked squash and keep it crispy?
Use the oven at 400°F for 8 to 10 minutes, or an air fryer at 375°F for 4 to 5 minutes. Avoid the microwave.
6. Can I use zucchini instead of yellow squash?
Yes — they’re interchangeable here. Zucchini has a slightly firmer texture, so it holds up even a little better to high-heat roasting.
With the right technique — moisture removal, high heat, and a little spacing on the pan — crispy oven baked yellow squash is one of the easiest and most satisfying side dishes you can make. It goes with almost everything, it’s naturally low-carb, and once you’ve tasted it golden and fresh from the oven, you’ll find yourself making it on repeat.
More Recipes You’ll Love
🔥 Don’t Miss: Easy Crispy Baked Parmesan Zucchini — same technique, same crispy magic — try it next
🔥 Don’t Miss: Grilled Lemon Chicken — the perfect main to serve alongside crispy squash
🔥 Don’t Miss: Parmesan Crusted Chicken Sheet Pan Dinner — same parmesan flavor, one cohesive oven dinner
🔥 Also Try: One Pan Balsamic Glazed Chicken and Veggies — add the squash alongside for a complete tray bake
Ingredients
Method
- Slice squash into even 1/2-inch rounds. Lay in a single layer on paper towels. Sprinkle with kosher salt and let sit for 15 minutes. You will see water beading up on each round. Pat completely dry with fresh paper towels.

- Preheat oven to 425F (220C). Line a large rimmed baking sheet with parchment paper.
- In a large bowl, toss the dried squash rounds with olive oil, garlic powder, onion powder, black pepper, and Italian seasoning until evenly coated.
- Mix parmesan and panko in a shallow bowl. Press each round firmly into the mixture on both sides so the coating adheres well.
- Place coated rounds in a single layer on the baking sheet, no overlapping. Bake 15 to 18 minutes until edges are golden and the coating is crispy.
- For extra crunch, switch the oven to broil for the final 1 to 2 minutes. Watch closely to avoid burning.
- Let rest 2 minutes. Garnish with fresh parsley and lemon zest. Serve immediately for best crispiness.