If you love chicken Parmesan but hate the mess (and the greasy smell that hangs around), this Crispy Air Fryer Chicken Parmesan Recipe is about to become your weeknight “save.” You get a crunchy, cheesy, marinara-topped comfort meal—without deep frying, without a splattered stovetop, and without a mountain of dishes.
Here’s the thing: chicken parm gets soggy fast if you treat it like a casserole. This version doesn’t. We crisp the chicken first, then add sauce and cheese at the very end. Simple. A little stubborn. Very worth it.
Why You’ll Love This Recipe
You’re busy. You want dinner to taste like you tried… without actually needing to try that hard.
- Crispy, not soggy: we air-fry the breaded chicken first, then add sauce + cheese in the last few minutes.
- Fast weeknight timing: thin cutlets cook quickly, and the air fryer heats faster than most ovens.
- Less mess: no pan-frying oil, no splatter, no greasy cleanup.
- Meal-prep friendly: leftovers reheat surprisingly well in the air fryer (crunch comes back).
- Flexible: you can keep it classic, go a little lighter, or lean more comfort-food depending on the night.
Ingredients
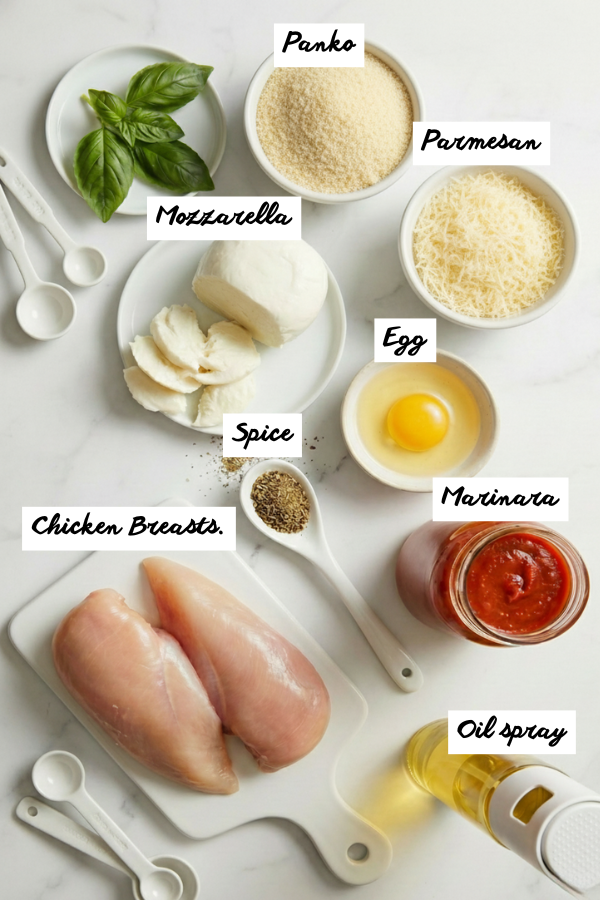
Chicken
- 2 boneless, skinless chicken breasts (you’ll slice into thinner cutlets)
- Salt and black pepper
Crispy Coating
- Panko breadcrumbs (this is the crunch-maker)
- Grated Parmesan (for flavor and crisp edges)
- Garlic powder
- Italian seasoning (or dried oregano)
- Optional: pinch of red pepper flakes (gentle heat)
Dredge Station (Choose Your Method)
Option A: “I want the crust to stay put” (3 bowls)
- All-purpose flour
- 2 eggs (beaten)
- Panko-Parmesan mixture
Option B: “I’m tired, keep it easy” (2 bowls)
- 2 eggs (beaten)
- Panko-Parmesan mixture
Topping
- Marinara sauce (thicker is better so it doesn’t soak the crust)
- Mozzarella (shredded melts fast; slices also work)
- Optional garnish: chopped parsley or basil
- Optional: extra Parmesan for finishing
For the Basket
- Olive oil spray or avocado oil spray
One Important Safety Note
- Chicken is done when it reaches 165°F at the thickest part.
Step-by-Step Instructions
Step 1: Make Thin Cutlets
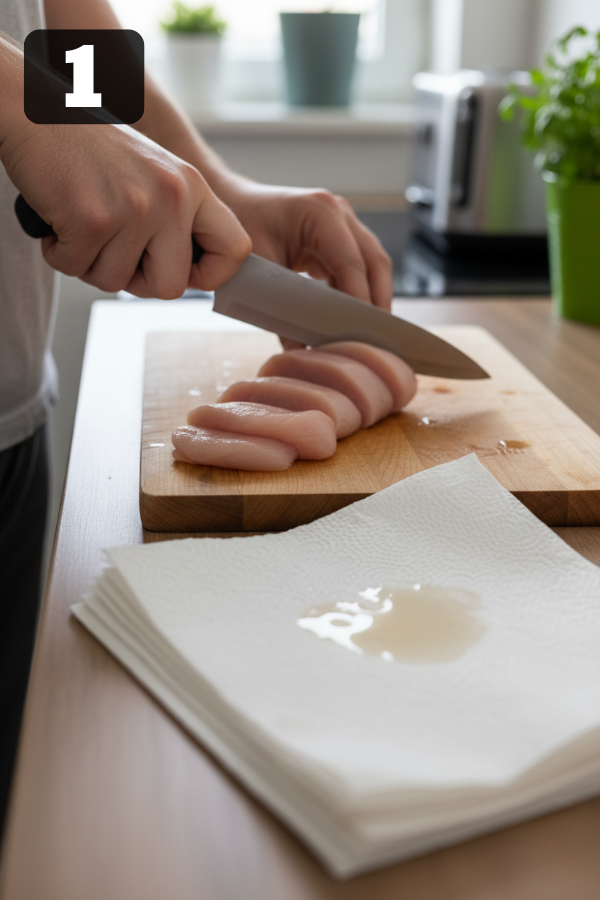
- Slice each chicken breast horizontally to create thinner cutlets.
- If you’ve never done this: place your hand on top of the chicken, use a sharp knife, and carefully slice through the middle like you’re opening a book.
- Pat the cutlets dry with paper towels.
- Season both sides with salt and pepper.
Why this matters: Thin chicken cooks fast and evenly. That means your coating has time to turn golden without you overcooking the chicken. It also makes the whole dish feel more “restaurant” and less “random chicken slab.”
Step 2: Mix the Coating
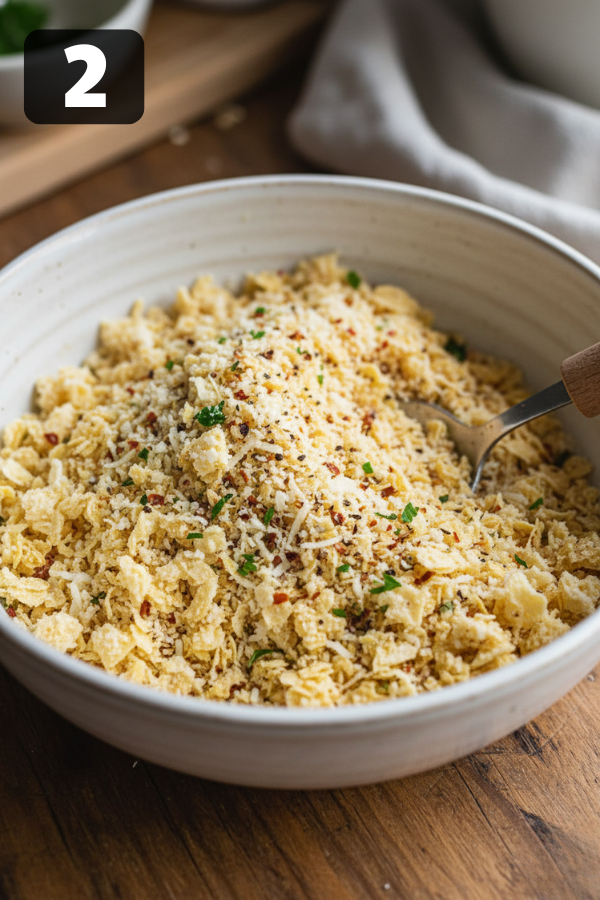
In a shallow bowl, combine:
- panko
- grated Parmesan
- garlic powder
- Italian seasoning (or oregano)
- optional red pepper flakes
Give it a quick stir. Smell it. If it smells like nothing, it’s missing something. A pinch more salt in the crumb mix can be the difference between “fine” and “wow.”
Step 3: Bread the Chicken
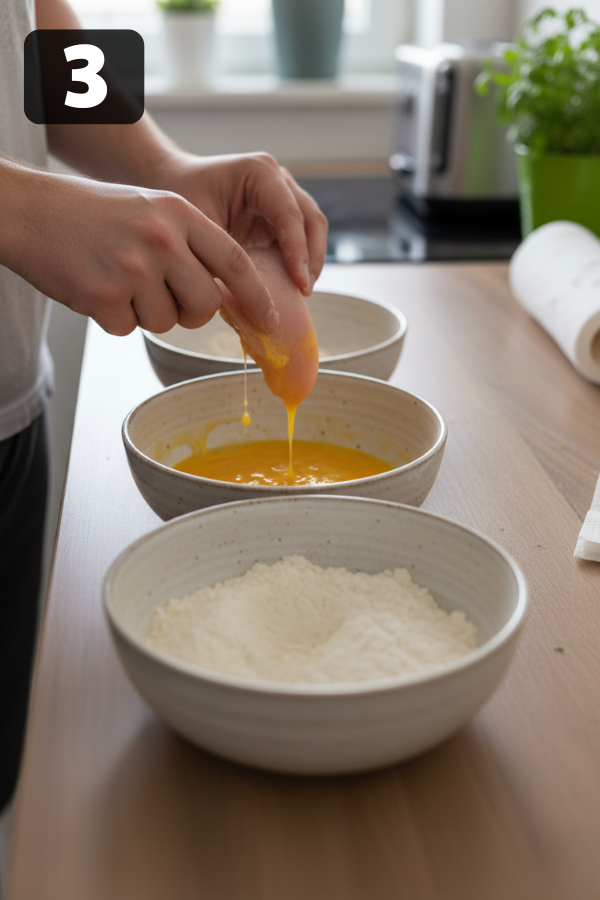
Option A: Extra-Secure Crust (3 bowls)
- Put flour in the first bowl. Lightly season it (a pinch of salt and pepper helps).
- Beat eggs in the second bowl.
- Put the panko-Parmesan mix in the third bowl.
- Coat each chicken cutlet:
- flour → egg → panko mix
- Press the crumbs on firmly with your hands.
That pressing step? It’s not optional if you want a coating that stays on when you slice it.
Option B: Fast Setup (2 bowls)
- Beat eggs in the first bowl.
- Put the panko-Parmesan mix in the second bowl.
- Dip chicken in egg, then press into crumbs.
This method is quick and still gets you great crunch. Just be generous with the pressing.
Step 4: Air Fry Until Golden
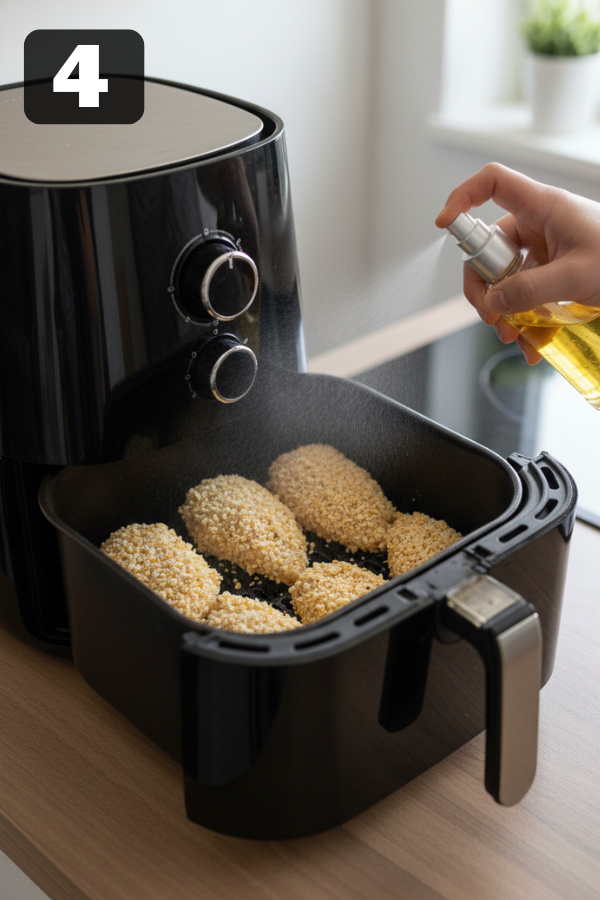
- Preheat your air fryer if you like (optional, but it helps with even browning).
- Lightly spray the basket.
- Place chicken in a single layer.
- Don’t overlap. If you need two batches, do two batches. Your future self will thank you.
- Spray the top of the chicken lightly with oil.
Temperature + time guidelines (use as a starting point):
- At 350°F: about 8–11 minutes total, flipping halfway.
- At 400°F: about 10–12 minutes total, often around 5–6 minutes per side.
Air fryers vary. Chicken thickness varies. So use the timing as a guide, then check doneness with a thermometer.
Flip halfway so both sides brown evenly. That flip is what turns “one side crunchy” into “fully crunchy.”
Step 5: Add Sauce + Cheese
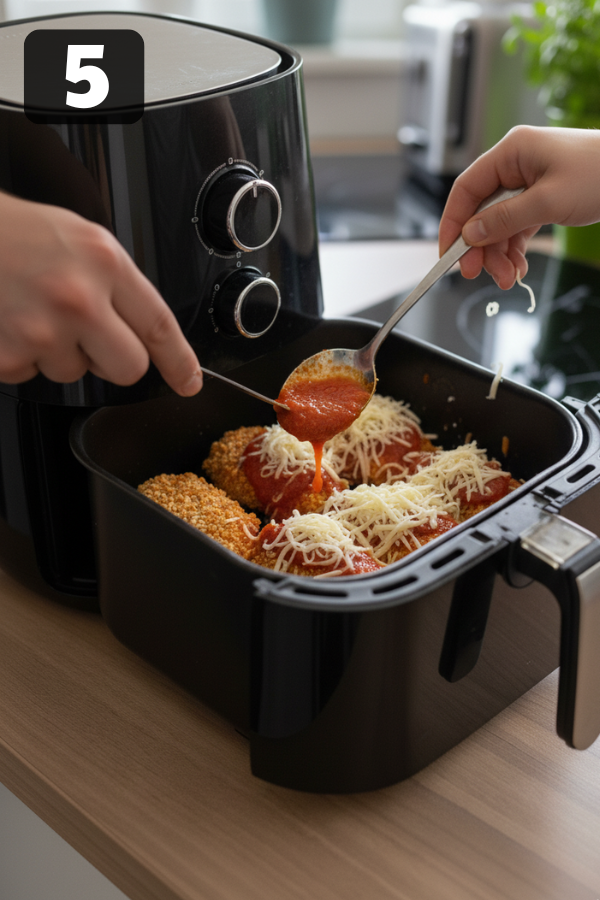
- Spoon marinara onto each chicken cutlet.
- A good amount is around 2 tablespoons per piece.
- Too much sauce turns the crust soft.
- Add mozzarella on top.
- Air fry 2–3 minutes more, just until cheese is melted and bubbly.
- Check the thickest part of the chicken: 165°F.
Let it sit for about a minute before cutting. Not long—just enough to keep the cheese from sliding off like it’s trying to escape.
Tips for Success
Crispier Coating, On Purpose
- Pat chicken dry before breading. Moisture makes crumbs slip.
- Use oil spray on the top. Panko browns better with a light mist.
- Single layer only. Crowding traps steam. Steam is the enemy of crunch.
- Sauce goes on late. If you sauce too early, you basically steam your crust.
Juicy Chicken
- Thin cutlets cook quickly and stay tender.
- Use a thermometer. It removes the guesswork. Pull at 165°F and you’ll stop accidentally overcooking it.
Tiny Flavor Upgrades
- Add a pinch of salt to the crumb mix.
- Add a little extra Parmesan to the coating for deeper savory flavor.
- Use a thicker marinara (watery sauce makes soggy crust).
Storage & Leftover Notes
Leftovers are great. Crispy leftovers are even better. The trick is reheating the right way.
- Fridge: Store in an airtight container for up to 3–4 days.
- Freezer: Freeze for up to 2–3 months (best quality if eaten sooner).
- Best reheat method: Air fryer at 350°F for about 4–6 minutes.
Real-life tip: If you’re planning leftovers, keep extra marinara on the side. Reheat the chicken first so it crisps, then add warm sauce after.
What to Serve With It
Comfort Plate
- Spaghetti or linguine with extra marinara
- Garlic bread or toasted bread
- A simple side salad to make you feel balanced
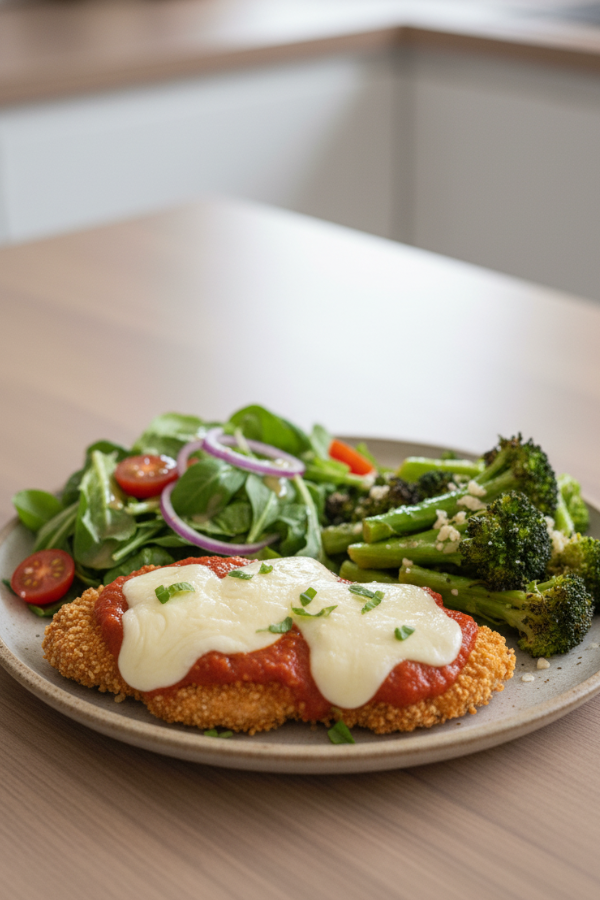
Fresh, Lighter Plate
- Big green salad (Caesar, arugula, mixed greens—whatever you’ll actually eat)
- Roasted broccoli or zucchini
- Steamed green beans with lemon
Drinks
- Sparkling water with lemon
- Iced tea
- If you want wine: a crisp white or a light red pairs well without overpowering the dish
FAQs
- Can I make this ahead of time?
Yes—mostly.
- You can bread the chicken and refrigerate it for a few hours.
- For best crunch, air fry right before serving.
- What temperature should I use?
Most people land between 350°F and 400°F.
- Lower temp can give you a slightly gentler cook.
- Higher temp gives you faster browning.
Your air fryer’s personality matters here. (Some run hot. Some run shy.)
- How do I know it’s fully cooked?
Use a thermometer and look for 165°F at the thickest part.
- Can I use chicken thighs?
Yes, but expect a little more cook time because thighs are thicker and fattier. Still pull at 165°F.
- What if I don’t have panko?
Regular breadcrumbs work. The texture will be a bit softer.
A simple fix: add a touch more Parmesan for a slightly crispier bite.
- Is this spicy?
Not unless you add red pepper flakes or use spicy marinara.
Nutrition Info
Nutrition depends heavily on:
- how much cheese you use
- which marinara brand you choose
- how thick the chicken is
- how much oil spray you use
If you want it lighter:
- choose part-skim mozzarella
- keep sauce measured
- use a light mist of oil (you don’t need a heavy coat)
If you want it more comfort-style:
- add extra mozzarella
- serve over pasta
- don’t apologize for it
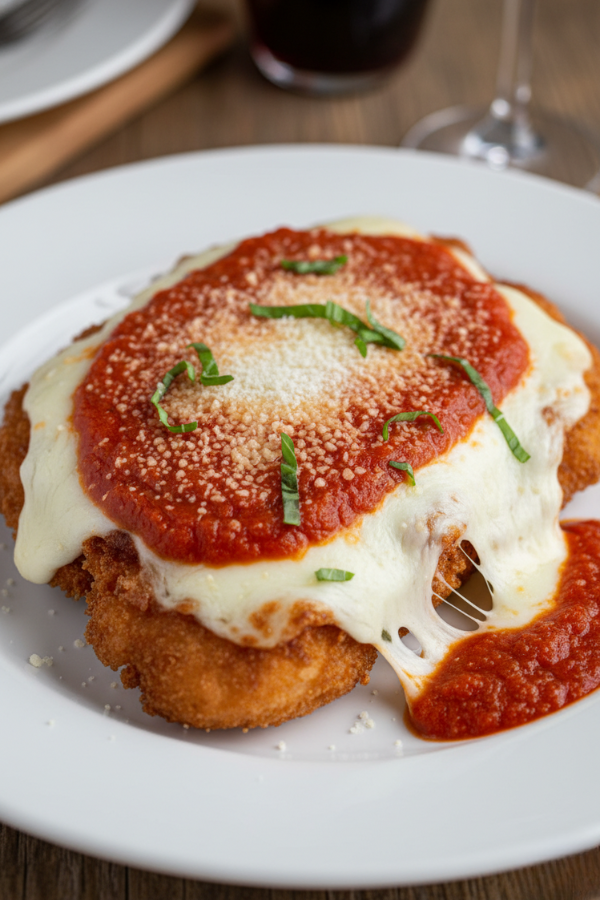
Conclusion
This is one of those dinners that feels cozy and “real,” but doesn’t demand your whole evening. Crispy crust, warm marinara, melty cheese—done. If you make it, what’s your side: salad, pasta, or something fun like air-fryer garlic toast?
Don’t Miss: CROCKPOT CHICKEN ONION OLIVE GARLIC
Ingredients
Method
- Step 1: Make Thin Cutlets Slice each chicken breast horizontally to create thinner cutlets. If you’ve never done this: place your hand on top of the chicken, use a sharp knife, and carefully slice through the middle like you’re opening a book. Pat the cutlets dry with paper towels. Season both sides with salt and pepper. Why this matters: Thin chicken cooks fast and evenly. That means your coating has time to turn golden without you overcooking the chicken. It also makes the whole dish feel more “restaurant” and less “random chicken slab.”

- Step 2: Mix the Coating In a shallow bowl, combine: panko grated Parmesan garlic powder Italian seasoning (or oregano) optional red pepper flakes Give it a quick stir. Smell it. If it smells like nothing, it’s missing something. A pinch more salt in the crumb mix can be the difference between “fine” and “wow.”
- Step 3: Bread the Chicken Option A: Extra-Secure Crust (3 bowls) Put flour in the first bowl. Lightly season it (a pinch of salt and pepper helps). Beat eggs in the second bowl. Put the panko-Parmesan mix in the third bowl. Coat each chicken cutlet: flour → egg → panko mix Press the crumbs on firmly with your hands. That pressing step? It’s not optional if you want a coating that stays on when you slice it. Option B: Fast Setup (2 bowls) Beat eggs in the first bowl. Put the panko-Parmesan mix in the second bowl. Dip chicken in egg, then press into crumbs. This method is quick and still gets you great crunch. Just be generous with the pressing.
- Step 4: Air Fry Until Golden Preheat your air fryer if you like (optional, but it helps with even browning). Lightly spray the basket. Place chicken in a single layer. Don’t overlap. If you need two batches, do two batches. Your future self will thank you. Spray the top of the chicken lightly with oil. Temperature + time guidelines (use as a starting point): At 350°F: about 8–11 minutes total, flipping halfway. At 400°F: about 10–12 minutes total, often around 5–6 minutes per side. Air fryers vary. Chicken thickness varies. So use the timing as a guide, then check doneness with a thermometer. Flip halfway so both sides brown evenly. That flip is what turns “one side crunchy” into “fully crunchy.”
- Step 5: Add Sauce + Cheese Spoon marinara onto each chicken cutlet. A good amount is around 2 tablespoons per piece. Too much sauce turns the crust soft. Add mozzarella on top. Air fry 2–3 minutes more, just until cheese is melted and bubbly. Check the thickest part of the chicken: 165°F. Let it sit for about a minute before cutting. Not long—just enough to keep the cheese from sliding off like it’s trying to escape.


