
This homemade Apple Pie Recipe brings the comforting flavors of sweet-tart apples, warm cinnamon, and a golden flaky crust to your kitchen. It’s the kind of classic dessert families have loved for generations.
Made with simple ingredients and easy techniques, this apple pie is perfect for Thanksgiving, Christmas, family gatherings, or a cozy weekend treat. Serve it warm with vanilla ice cream, or prepare it ahead to make dessert time stress-free.
Why You’ll Love This Apple Pie Recipe
This classic apple pie keeps things simple, reliable, and perfect for everyday home baking.
- Beginner-friendly: Easy steps help anyone create a delicious homemade pie, even without much baking experience.
- Make-ahead friendly: Prepare the dough, bake ahead, or save leftovers for later.
- Simple ingredients: Uses everyday pantry staples without special baking products.
- Customizable: Adjust sweetness, mix apple varieties, or add spices to match your taste.
- Perfect for sharing: A crowd-pleasing dessert for holidays, family dinners, and weekend gatherings.
Short on time? Use refrigerated pie crust for a quicker version while still enjoying a homemade apple pie experience.
Ingredients
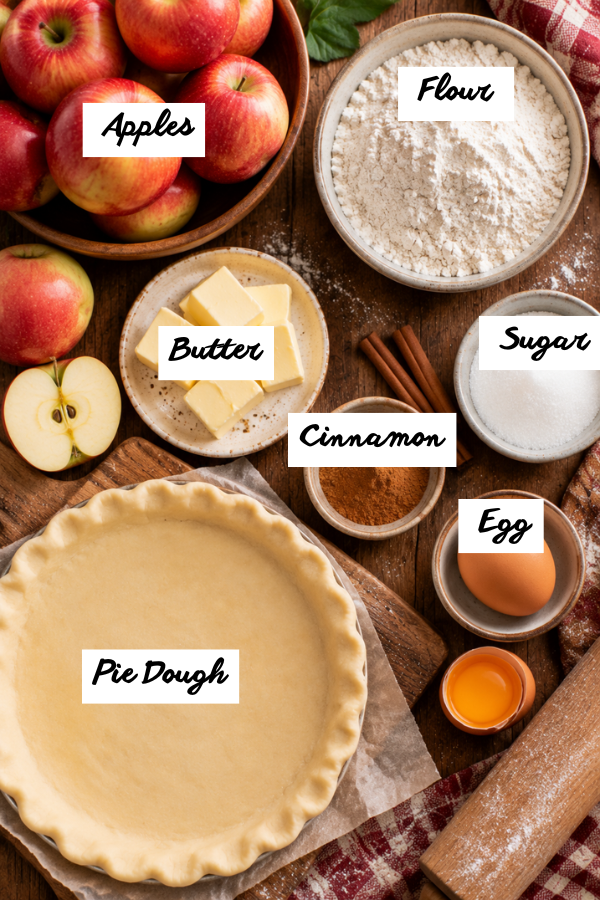
This recipe makes one 9-inch double-crust apple pie, about 8 servings.
For the Pie
- 2 disks pie dough for a double-crust 9-inch pie
- 2¼ pounds firm baking apples, about 6–7 medium apples
- 1½ teaspoons ground cinnamon
- 8 tablespoons unsalted butter
- 3 tablespoons all-purpose flour
- ¼ cup water
- 1 cup granulated sugar
For the Egg Wash
- 1 large egg
- 1 tablespoon water
The egg wash isn’t essential to the flavor, but it gives the top crust that glossy, golden bakery-style finish.
Easy Ingredient Swaps
Apples: Granny Smith is a reliable starting point because it stays firm and brings enough tartness to balance the sugar. Honeycrisp, Pink Lady, Braeburn, Fuji, and Golden Delicious are good alternatives.
Sugar: If your apples are naturally sweet, you can reduce the sugar slightly.
Spices: Add a small pinch of nutmeg or allspice if you want a warmer fall flavor. Don’t go overboard, though. Apple should still be the star.
Pie crust: Homemade dough gives you more control over flavor and texture, but refrigerated crust makes this recipe much faster.
Step-by-Step Instructions
Step 1: Prepare and Chill the Pie Dough
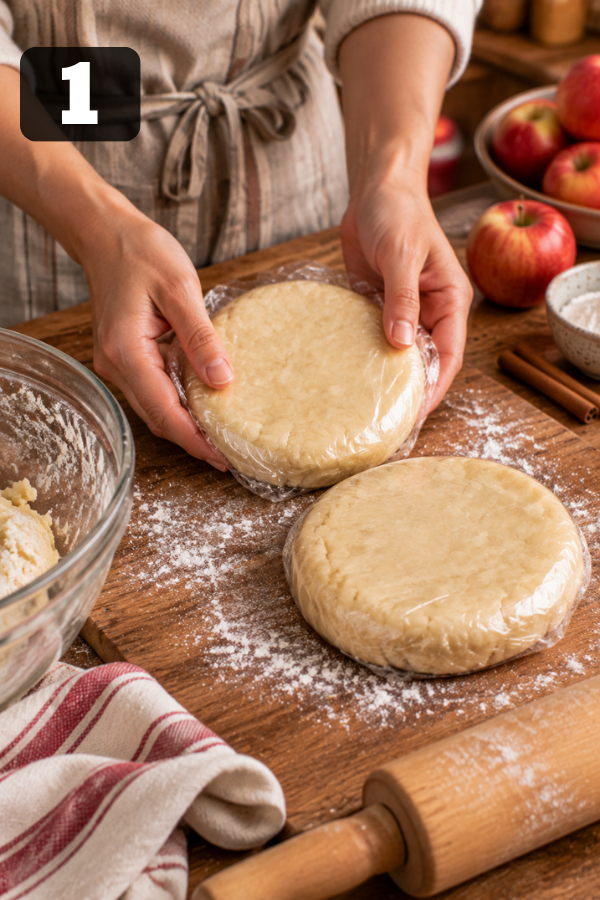
Prepare enough dough for a double-crust 9-inch pie. Divide it into two disks, wrap them, and refrigerate until firm.
Preheat your oven to 425°F.
Cold dough matters. When small pieces of cold butter enter a hot oven, the water in the butter turns to steam and helps create flaky layers.
If your dough becomes soft while you’re working with it, put it back in the refrigerator for 10–15 minutes. There’s no prize for wrestling with sticky pie dough.
Step 2: Make the Filling Sauce
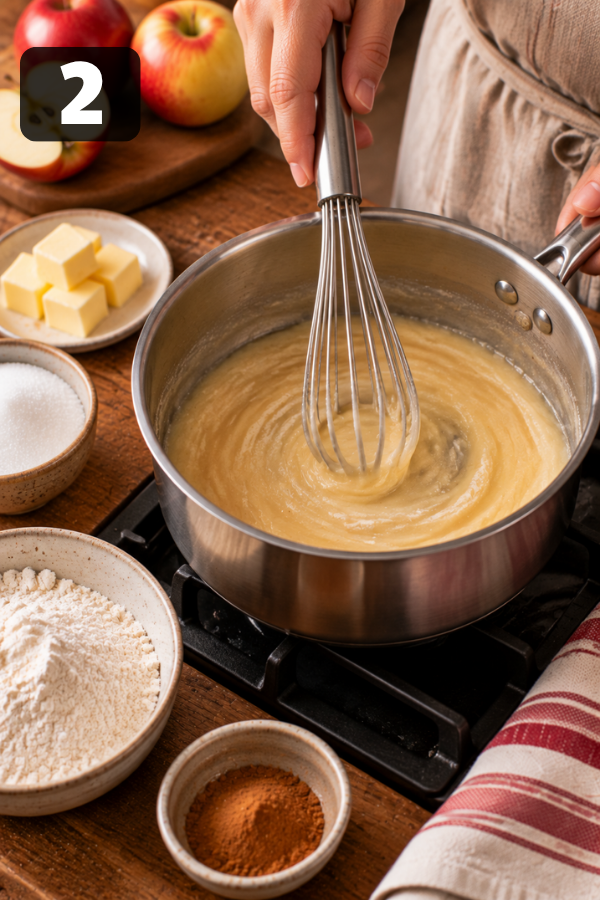
Melt 8 tablespoons unsalted butter in a medium saucepan over medium heat.
Whisk in 3 tablespoons all-purpose flour and cook for about 1 minute, stirring constantly.
Add:
- ¼ cup water
- 1 cup granulated sugar
Bring the mixture to a gentle boil. Reduce the heat and simmer for about 3 minutes, then remove it from the heat.
The sauce should look smooth and slightly thickened, but still be easy to pour.
Don’t keep cooking until it becomes extremely thick. It still has plenty of oven time ahead.
Step 3: Peel and Slice the Apples
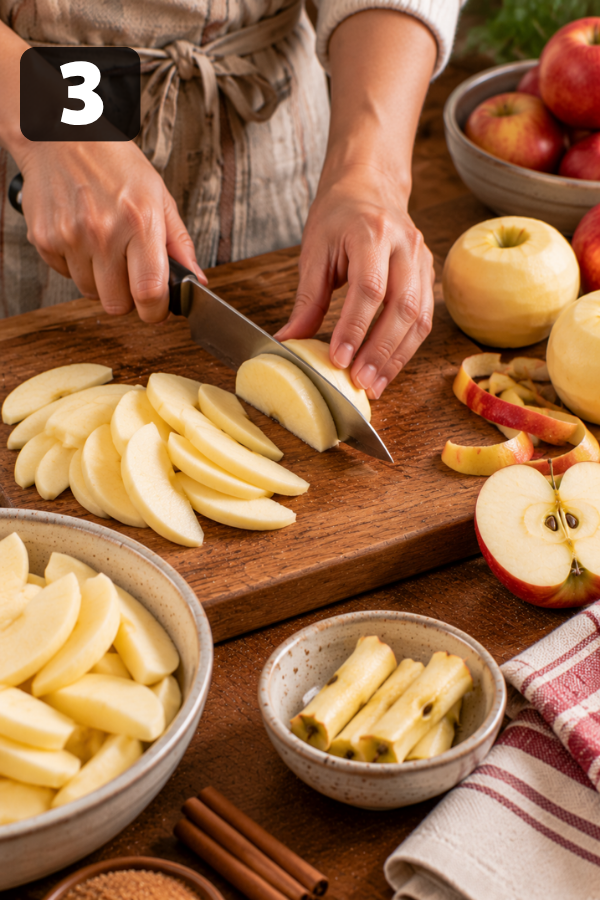
Peel and core about 2¼ pounds of apples.
Cut them into slices about ¼ inch thick. Try to keep the pieces similar in size.
Why fuss over that little detail? Because a bowl filled with paper-thin pieces and chunky wedges will never cook evenly. The thin slices turn soft while the thick ones stay crunchy.
Place the apples in a large bowl and toss with 1½ teaspoons cinnamon.
Pour the warm filling sauce over the apples and gently toss until every slice is coated.
Step 4: Roll Out the Bottom Crust
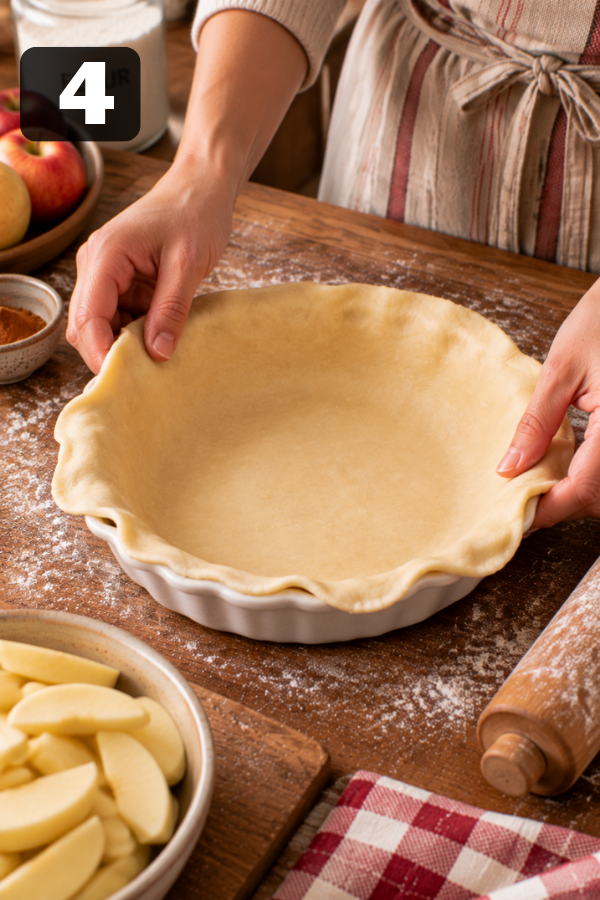
Lightly flour your counter and rolling pin.
Roll one disk of chilled dough into roughly a 12-inch circle. It should be large enough to cover the bottom and sides of a 9-inch pie plate with some overhang.
Transfer the dough to the pie plate.
Rather than stretching it into the corners, gently lower and press it into place. Stretching dough can encourage it to shrink as it bakes.
Keep the rim fairly clean. Filling smeared along the edge can make the top and bottom crust harder to seal.
Step 5: Fill the Pie
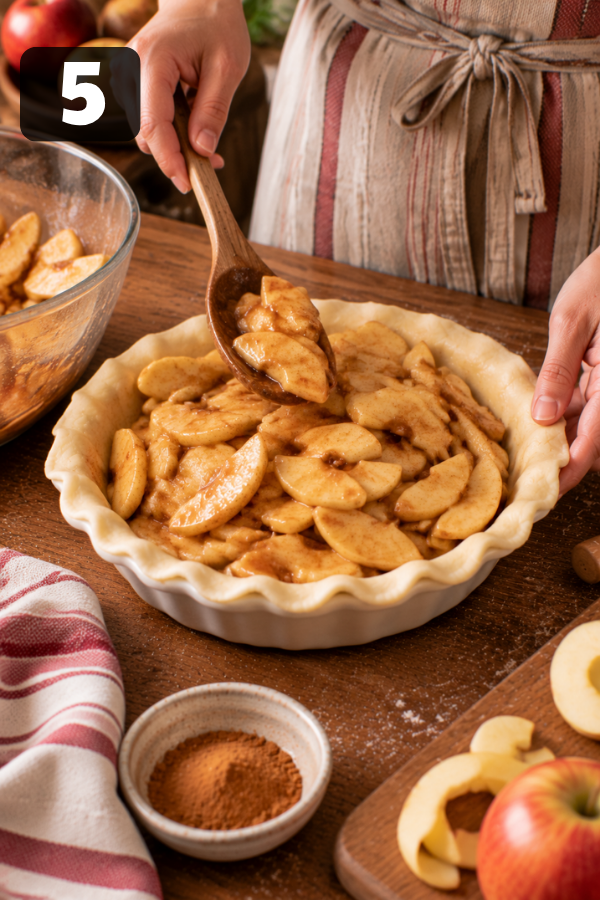
Spoon the apple mixture into the crust.
Arrange the apples evenly and mound them slightly higher toward the center. The pie may look almost too full at this stage. That’s okay. Apples lose volume as they bake.
Pour any remaining sauce from the bowl over the apples.
Just don’t leave large empty pockets between the slices. A loosely filled pie can sink dramatically as it cools, leaving a big gap under the top crust.
Step 6: Make the Lattice Top
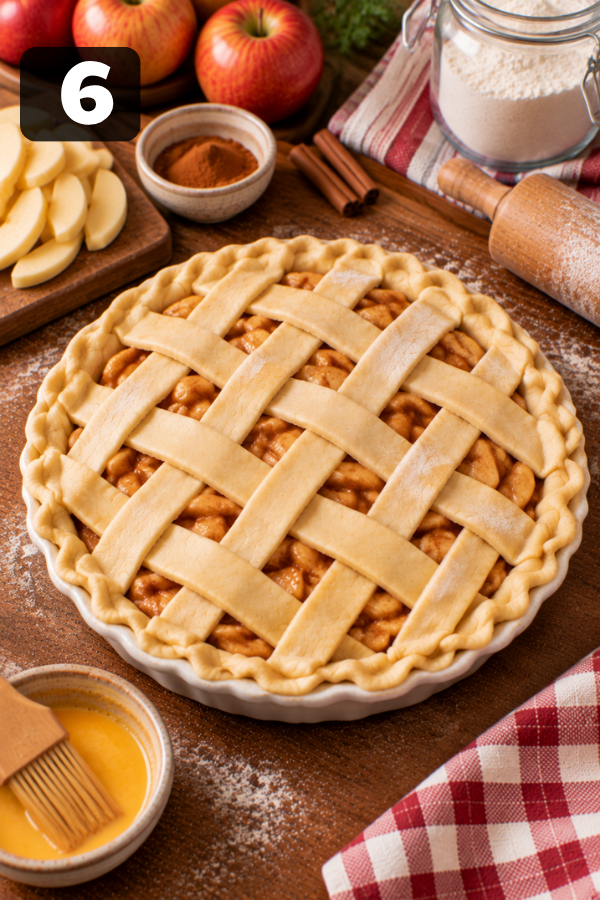
Roll the second disk into roughly an 11-inch circle.
Cut it into about 10 strips of similar width.
Lay five strips across the pie. Fold alternating strips back, lay one new strip across them, then unfold the first strips. Repeat, switching which strips you fold back each time.
That creates the woven lattice pattern.
Trim excess dough and pinch the top and bottom crust together around the rim. Crimp with your fingers or a fork.
Whisk 1 egg with 1 tablespoon water, then brush a thin layer over the exposed pastry.
The lattice isn’t just there to look pretty. Those openings give steam somewhere to go while the apples cook.
And if your lattice isn’t bakery-window perfect? Good. Homemade pie is allowed to look homemade.
Step 7: Bake Until Golden and Bubbling
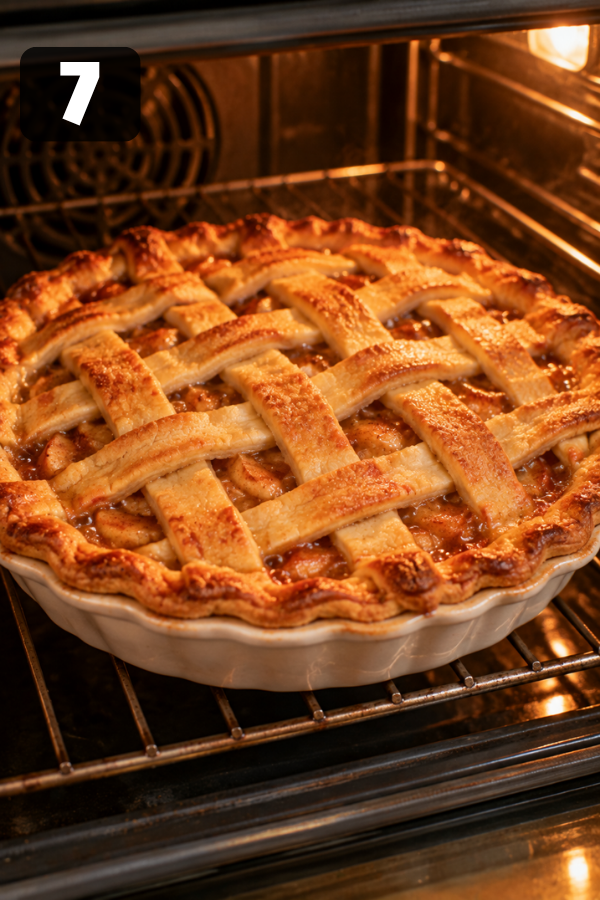
Place the pie on a baking sheet to catch any drips.
Bake at 425°F for 15 minutes.
Without removing the pie, reduce the oven temperature to 350°F and continue baking for about 45 minutes, or until:
- The crust is deeply golden.
- The apple filling is bubbling through the openings.
- The apples are tender when tested carefully.
If the outer crust starts getting too dark before the center is ready, cover the rim loosely with aluminum foil or a pie shield.
Don’t rely on color alone. A beautifully browned pie can still have undercooked filling.
Look for bubbles.
That bubbling tells you the apple juices and thickener have reached the temperature they need to form a proper filling.
Step 8: Cool Before Slicing
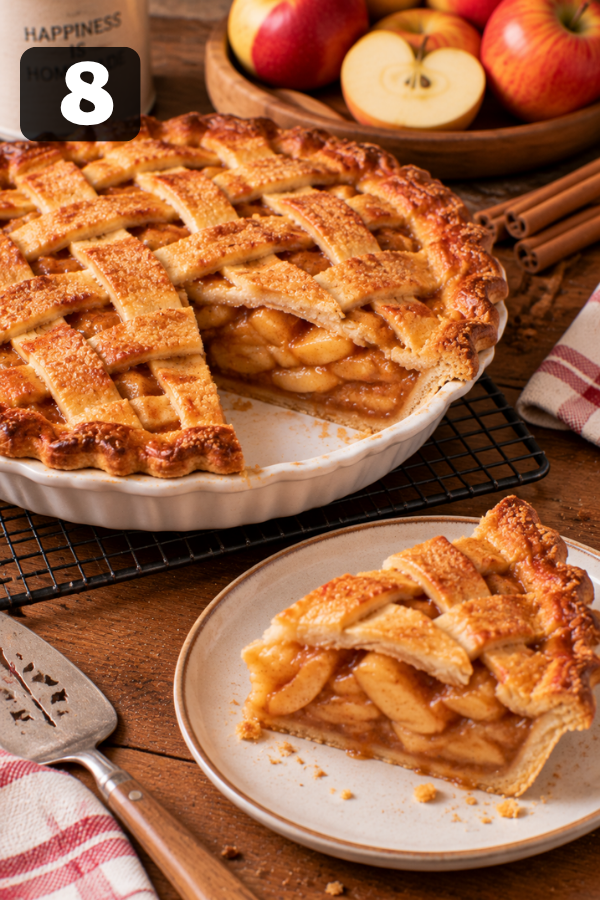
Here comes the hardest part: waiting.
Transfer the pie to a wire rack and let it cool for at least 1 hour. For neat, bakery-style slices, give it 2–4 hours.
Fresh from the oven, the filling is extremely hot and loose. As it cools, those juices thicken and settle around the apples.
Cut too soon and you’ll probably get a delicious puddle.
Still delicious, yes. Just not quite the slice you pictured.
Tips for the Best Apple Pie
Keep Everything Cold
Your pie dough should stay cool until it reaches the oven.
If the butter melts while you’re rolling the dough, you lose some of the little pockets that create flaky pastry.
On a warm day, chill the assembled pie for 10–15 minutes before baking if the crust has become noticeably soft.
Slice the Apples Evenly
Aim for slices around ¼ inch thick.
They don’t need to be measured with a ruler, of course. Just avoid mixing giant wedges with paper-thin pieces.
Uniform pieces give you tender apples with a little structure instead of a mix of crunchy and mushy fruit.
Don’t Underbake the Pie
This is one of the most common apple pie mistakes.
If the crust is getting dark but the filling isn’t bubbling, don’t immediately pull the pie from the oven. Shield the crust and let the center continue cooking.
Give It Time to Cool
Cooling isn’t dead time. It’s part of the recipe.
For the cleanest slices, bake the pie several hours before you plan to serve it. You can always warm individual slices later.
Put a Baking Sheet Underneath
Apple filling can bubble enthusiastically.
A baking sheet saves you from scrubbing burnt sugar off the bottom of your oven later. Small step, big quality-of-life improvement.
Common Apple Pie Problems and How to Fix Them
Why Is My Apple Pie Filling Watery?
A watery filling usually comes down to one of four things:
- The pie was sliced while hot.
- The apples released more liquid than expected.
- The filling didn’t cook long enough.
- There wasn’t enough thickener.
First, let the pie cool fully. A filling that seems runny straight from the oven can become much thicker after a few hours.
Also make sure the filling is visibly bubbling before you remove the pie from the oven.
Why Are My Apples Still Hard?
The slices may be too thick, or the pie simply needs more time.
If the crust is already browned, protect it with foil and continue baking until the apples become tender.
Next time, aim for consistent ¼-inch slices.
Why Is My Bottom Crust Soggy?
Too much liquid and too little baking time are common causes.
Use firm baking apples, measure the thickener carefully, and bake until the filling bubbles well.
Most importantly, don’t slice the pie immediately.
Why Did My Crust Burn?
The exposed edges cook faster than the center.
Once they’re nicely browned, loosely cover them with foil or add a pie shield while the rest of the pie finishes baking.
Why Did My Crust Shrink?
Pie dough tends to shrink when it’s stretched, overworked, or allowed to become too warm.
Press the dough gently into the pie plate instead of pulling it to fit. Chilling it also helps the crust hold its shape.
Storage & Leftover Notes
Apple pie is wonderfully forgiving when it comes to leftovers—which is useful during the holidays when the refrigerator is already doing overtime.
Room Temperature
Let the pie cool completely.
Cover it and store at room temperature for up to 2 days.
Keep it somewhere cool and dry rather than beside the stove or in direct sunlight.
Refrigerator
For longer storage, cover the pie well and refrigerate it for up to 4 days.
You can eat a chilled slice straight from the refrigerator, but the crust and filling are better when gently reheated.
Freezer
Apple pie freezes surprisingly well.
Wrap the completely cooled pie tightly in plastic wrap, then add a layer of foil. Freeze for up to 3 months.
You can also freeze individual slices. That’s handy when you want dessert for one without thawing an entire pie.
How to Reheat Apple Pie
For the best texture, use the oven.
Warm the pie or individual slices at 350°F until heated through.
The microwave works when you’re in a hurry, but it tends to soften the pastry. If that doesn’t bother you, go for it.
What to Serve With Apple Pie
Apple pie doesn’t really need help, but a few simple additions can turn it into a proper dessert moment.
Vanilla Ice Cream
This is the classic.
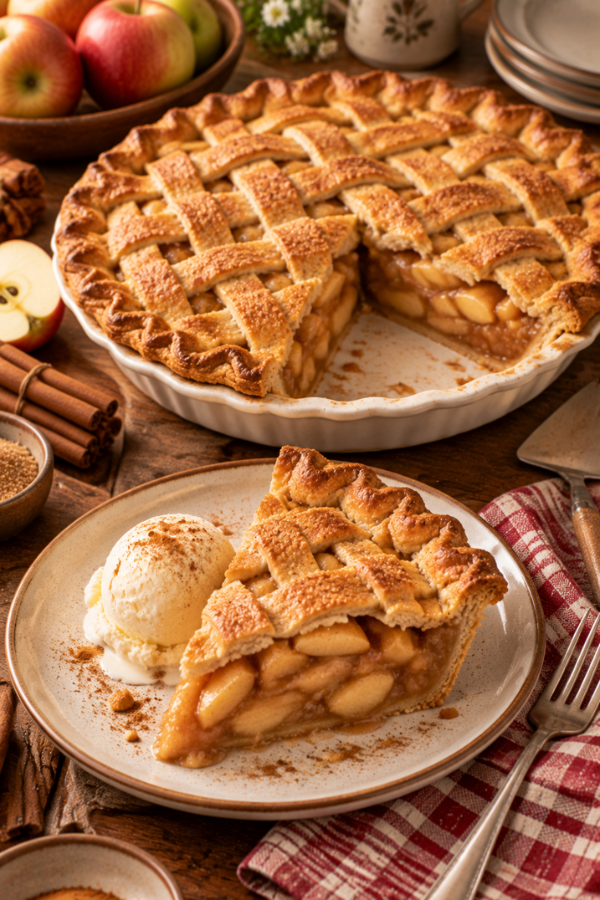
Put a cold scoop of vanilla ice cream over a slightly warm slice and let the edges melt into the cinnamon filling.
Hot, cold. Crisp, creamy. There’s a reason people keep coming back to this combination.
Other Easy Toppings
Try:
- Fresh whipped cream
- Salted caramel sauce
- Cinnamon whipped cream
- Chopped toasted pecans
- A light dusting of cinnamon
Drinks
Apple pie pairs well with:
- Fresh coffee
- Black tea
- Chai
- Warm apple cider
- Cold milk
For fall gatherings, warm apple cider and apple pie make an especially cozy pair.
Easy Apple Pie Variations
Dutch Apple Pie
Skip the lattice and cover the apples with a crumb topping made from flour, butter, sugar, and cinnamon.
You’ll get a crunchy, buttery top with a more rustic feel.
Caramel Apple Pie
Drizzle caramel sauce over the filling before adding the top crust, or simply add it when serving.
A little salted caramel with vanilla ice cream works especially well.
Mixed-Apple Pie
Instead of using only Granny Smith, combine two varieties.
Try:
- Granny Smith + Honeycrisp
- Granny Smith + Pink Lady
- Granny Smith + Fuji
The tart apple keeps the filling balanced while the sweeter apple adds a rounder, fruitier flavor.
Easy Shortcut Apple Pie
Busy day? Use refrigerated pie crust.
You’ll cut out one of the most time-consuming parts of the recipe while still making the filling from fresh apples.
A shortcut is still homemade when you’re the one standing in the kitchen peeling six apples.
FAQs
1. Can I Make Apple Pie Ahead of Time?
Yes. Bake it a day ahead, then cover and store once completely cooled.
2. Do I Need to Cook the Apples First?
No. The apples cook directly in the pie with the cinnamon-spiced filling while baking.
3. What Is the Best Apple for Apple Pie?
Granny Smith is a reliable choice. Mixing it with sweeter apples like Honeycrisp or Pink Lady adds more flavor.
4. Should I Peel Apples for Apple Pie?
Yes. Peeled apples create a softer filling and prevent chewy skin texture.
5. How Do I Know When Apple Pie Is Done?
The pie is ready when the crust is golden brown, the filling is bubbling, and the apples are tender.
6. Can I Freeze Apple Pie?
Yes. Wrap the cooled pie tightly and freeze it for up to 3 months. You can freeze the whole pie or individual slices.
Nutrition Info
Nutrition values may vary depending on the crust, apple variety, and serving size.
Per serving (1 slice, about 1/8 pie):
- Calories: ~380 kcal
- Carbohydrates: ~55g
- Fat: ~18g
- Protein: ~3g
- Fiber: ~4g
Apple pie is a classic dessert best enjoyed as part of a balanced meal. For a lighter option, reduce the sugar slightly or serve smaller slices with fresh fruit instead of extra toppings.
Final Thoughts
This classic Apple Pie Recipe is proof that simple ingredients can create something truly special. With a flaky crust, cinnamon-spiced apples, and a few easy techniques, you can make a homemade dessert that feels perfect for any occasion.
Whether you bake it for a holiday gathering or a cozy weekend treat, this apple pie is the kind of recipe worth keeping and sharing for years to come.
Don’t Miss: Apple Pie Cupcakes
Don’t Miss: Salted Caramel Apple Pie Cookies
Also Try: Easy Homemade Blueberry Pie
Ingredients
Method
- Prepare the Dough Divide the pie dough into two disks and chill until firm. Preheat the oven to 425°F. Keeping the dough cold helps create a flaky crust.

- Make the Apple Filling Sauce Melt butter, whisk in flour, then add water and sugar. Simmer for about 3 minutes until smooth and slightly thickened.
- Prepare the Apples Peel, core, and slice apples into even ¼-inch pieces. Toss with cinnamon, then coat with the warm filling sauce.
- Add the Bottom Crust Roll out one dough disk into a 12-inch circle and place it into a 9-inch pie plate. Gently press it into place without stretching.
- Fill the Pie Add the apple mixture evenly, slightly mounding the filling in the center. Avoid large gaps between apple slices.
- Create the Lattice Top Cut the second dough disk into strips and weave them over the apples. Seal the edges, then brush with egg wash for a golden finish.
- Bake Until Golden Bake at 425°F for 15 minutes, then reduce to 350°F and bake for about 45 minutes until the crust is golden and the filling is bubbling.
- Cool Before Serving Let the pie cool for at least 1 hour before slicing. Cooling helps the filling set and creates cleaner slices.
