
These Pickled Red Onions are one of those tiny kitchen upgrades that make simple meals feel instantly more interesting. Thin slices of red onion soak in a quick vinegar brine until they become bright pink, crisp-tender, tangy, and pleasantly mellow. You only need five basic ingredients and about 5 minutes of hands-on prep.
Give them about 30 minutes when you need a quick topping for dinner, or let them sit for several hours or overnight for deeper flavor. Keep a jar in the fridge and spoon them onto tacos, burgers, salads, grain bowls, sandwiches, eggs, or anything that needs a fresh pop of acidity.
Why You’ll Love This Pickled Red Onions Recipe
There’s a reason pickled onions seem to show up on everything from taco-shop plates to colorful grain bowls. They bring acidity, crunch, color, and a little sweetness without requiring another sauce or pan.
- Quick: About 5 minutes of active prep.
- Simple: Just red onion, vinegar, water, sugar, and salt.
- Meal-prep friendly: Make one jar and use it through the week.
- Easy to customize: Make them sweeter, sharper, spicy, garlicky, or extra crunchy.
They’re naturally vegan, vegetarian, dairy-free, and easy to fit into all kinds of everyday meals.
And maybe the best part? They make leftovers taste less like leftovers.
Ingredients
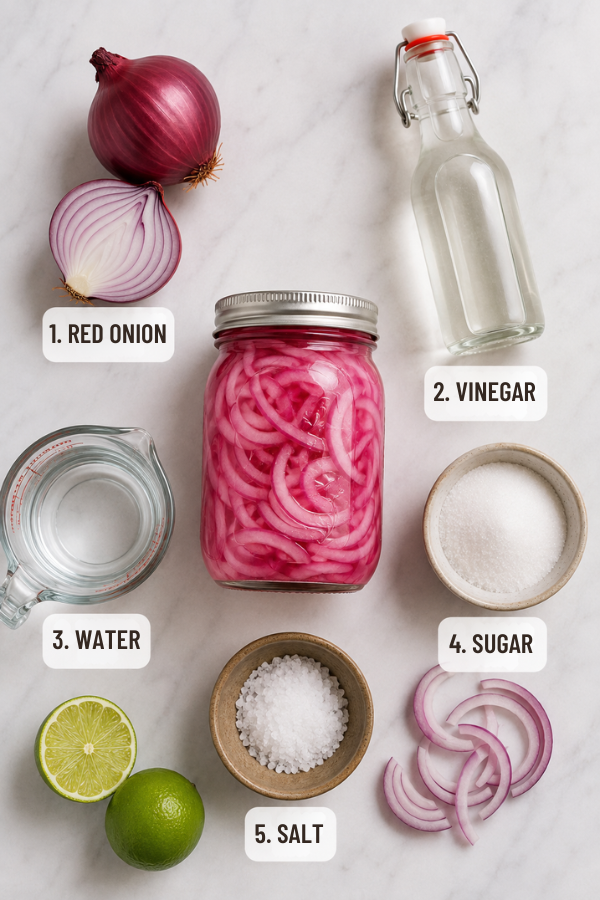
This is one of those recipes where five plain ingredients somehow turn into something much more exciting.
For the Pickled Red Onions
- 1 small to medium red onion, about 5–7 ounces
- ½ cup distilled white vinegar or apple cider vinegar
- ½ cup very hot water
- 1 tablespoon granulated sugar
- 1 teaspoon kosher or pickling salt
That’s the basic recipe.
Optional Flavor Add-Ins
Once you know you like the classic version, add one or two extras:
- 1 small garlic clove
- ½ teaspoon whole black peppercorns
- ¼ teaspoon crushed red pepper flakes
- A few thin jalapeño slices
- A small thyme or oregano sprig
- A pinch of coriander seeds
- A pinch of mustard seeds
Don’t feel like you need to add everything. A good pickle jar doesn’t need to taste like the entire spice cabinet fell into it.
Which Vinegar Should You Use?
The vinegar changes the flavor more than you might expect.
White Vinegar
Distilled white vinegar gives you the cleanest, sharpest pickle flavor.
It’s a great all-purpose choice for tacos, burgers, sandwiches, and meal-prep bowls. It also keeps the brine clear, so that bright pink onion color really stands out.
Apple Cider Vinegar
Apple cider vinegar tastes a little softer and fruitier.
Use it if you find white vinegar too sharp. It works especially well with pulled pork, salads, grilled chicken, and sandwiches.
Red Wine Vinegar
Red wine vinegar brings a deeper, more rounded tang.
It’s a natural match for burgers, Mediterranean-style bowls, roasted meats, gyros, and hearty salads.
Rice Vinegar
Rice vinegar is mild and smooth.
It’s especially good for rice bowls, cucumber salads, noodle dishes, and lighter meals. If you use seasoned rice vinegar, check the label first because it may already contain sugar and salt.
For your first batch, white vinegar or apple cider vinegar is the easiest place to start.
Step-by-Step Instructions
Step 1: Slice the Red Onion Thinly
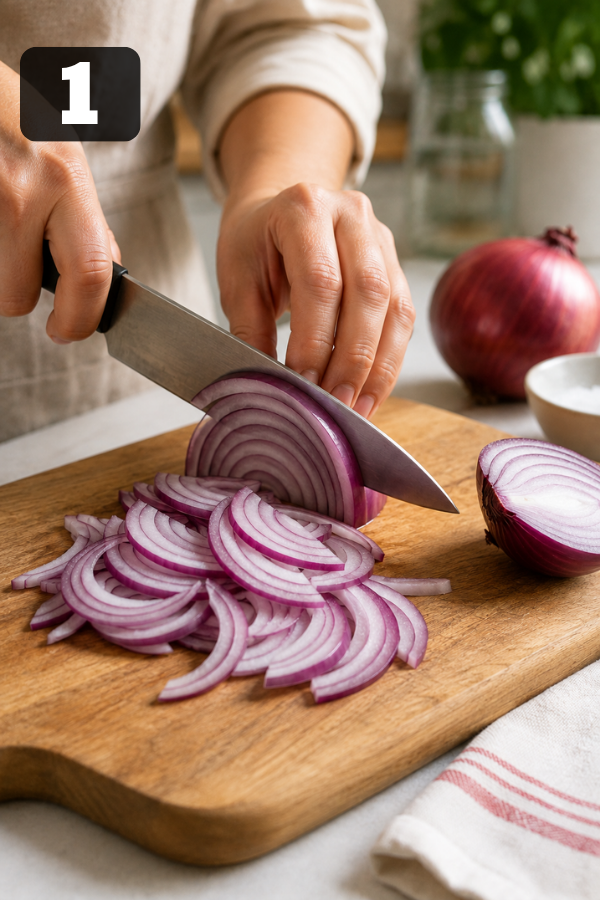
Peel the onion and cut it in half from root to stem.
Slice it into thin half-moons, aiming for about ⅛-inch thickness.
Why that thin?
Because thinner onion slices have more surface area touching the brine, so they pickle faster and soften more evenly.
If you want very crisp onions, slice them slightly thicker. If you want them softer and ready sooner, go thinner.
A mandoline makes beautifully even slices, but a sharp chef’s knife works perfectly well.
One small note: use the safety guard if you’re using a mandoline. Pickled onions are worth five minutes of prep, not a trip for bandages.
Step 2: Pack the Onion Into a Jar
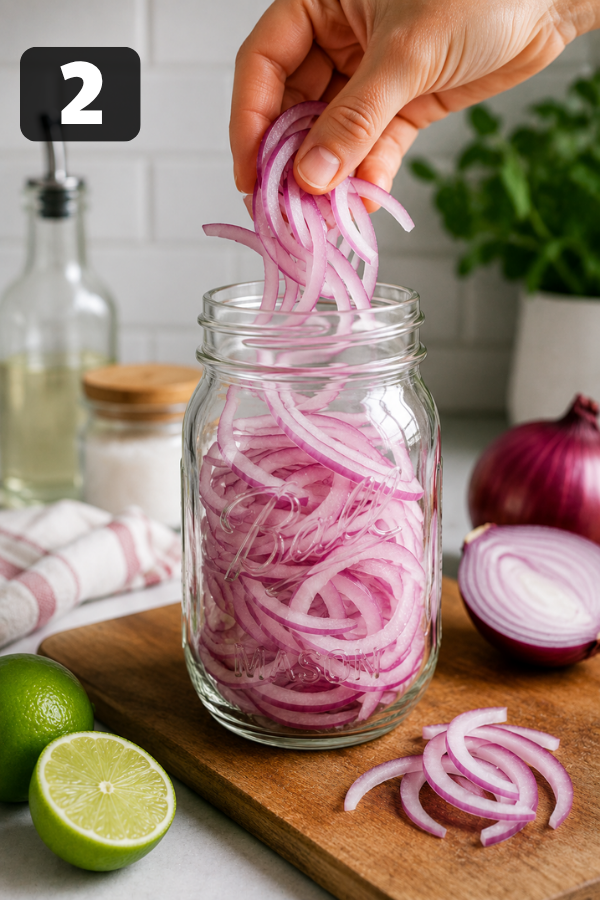
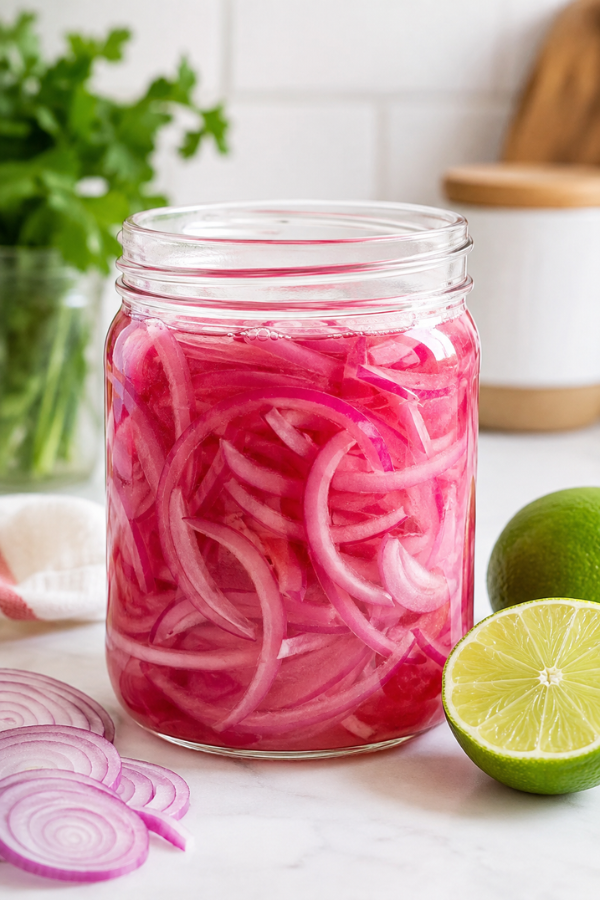
Place the sliced onion loosely into a clean glass jar.
A 16-ounce jar usually works well for a small batch, though a larger onion may need a bigger container.
Don’t mash the onion tightly into the jar. You want enough space for the brine to flow between the slices.
If you’re adding garlic, peppercorns, chile flakes, or herbs, tuck them into the jar now.
Step 3: Make the Brine
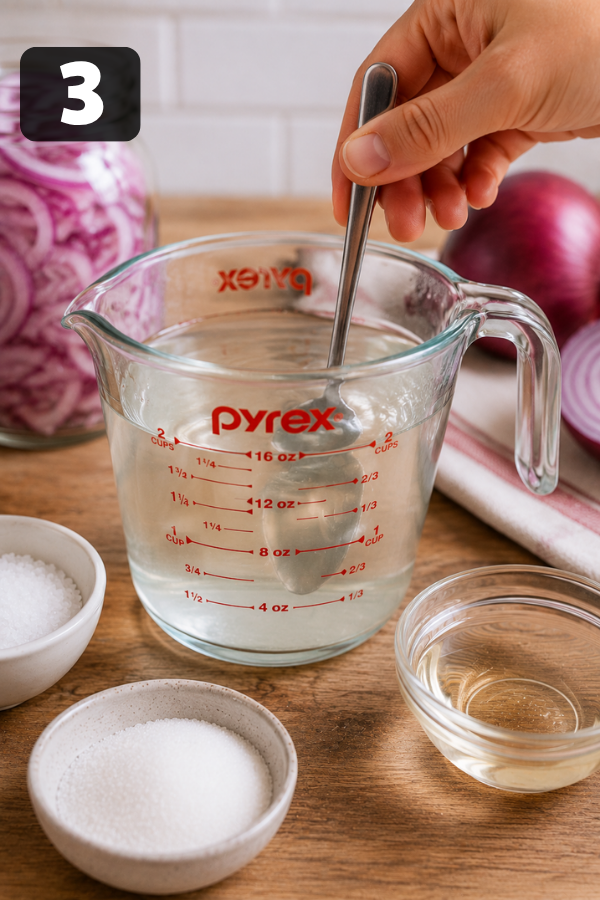
Combine the vinegar, very hot water, sugar, and salt.
Stir until the sugar and salt dissolve.
The brine should taste bright, tangy, and well seasoned. The sugar shouldn’t make it taste like syrup; it’s simply there to soften the sharp edge of the vinegar.
Prefer a more tart pickle? Use slightly less sugar next time.
Like that sweeter taco-shop style? Add another teaspoon or two.
Step 4: Pour the Brine Over the Onions
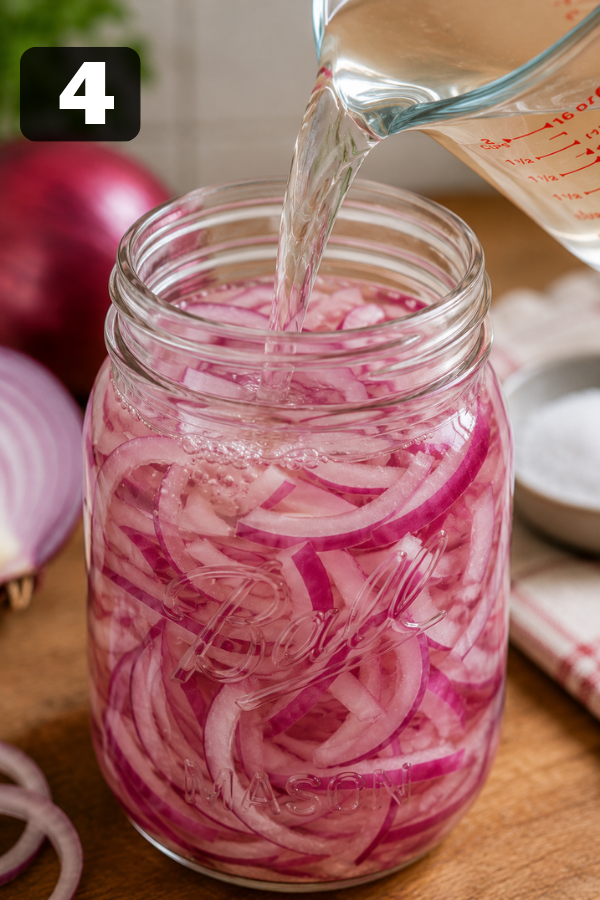
Pour the warm brine into the jar.
The onion slices may float at first. Gently press them down with a clean spoon or fork so most of the onion is sitting in the liquid.
If your brine doesn’t quite cover everything, switch to a smaller jar or make a little more brine using the same proportions.
Avoid simply topping the jar with a large amount of plain water, which can make the flavor weak.
Step 5: Let Them Pickle
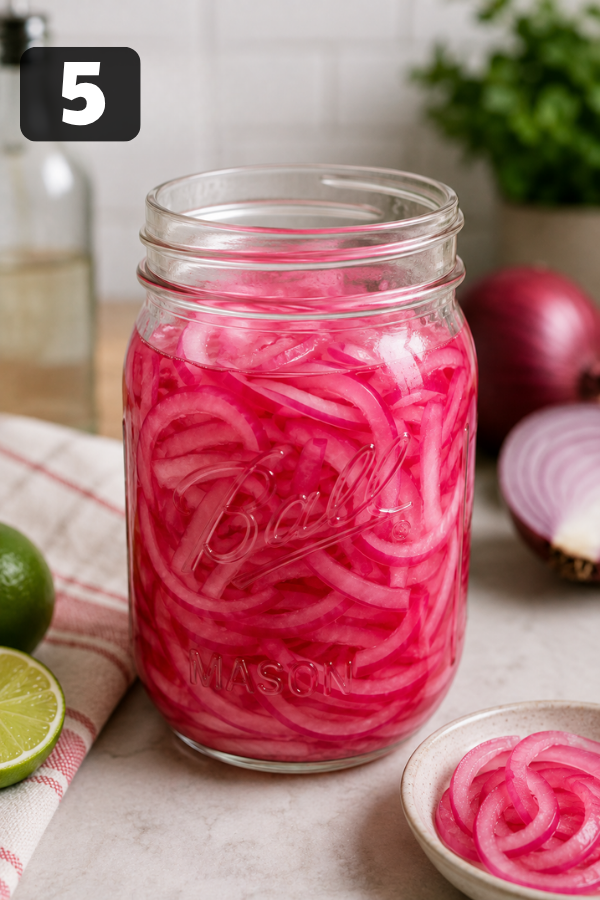
Now comes the only hard part: waiting.
Well, sort of.
You can start eating the onions after about 30 minutes, especially if they’re sliced thinly. They’ll still have plenty of crunch and a little raw-onion bite.
Here’s an easy texture guide:
- 30 minutes: Crisp, bright, lightly pickled.
- 1 hour: More tangy and noticeably more mellow.
- 4 hours: Deeper pink color and more even flavor.
- Overnight: Well pickled, balanced, and still pleasantly crisp.
So which time is best?
For a last-minute taco dinner, 30 minutes is great. For meal prep, make the jar the night before and forget about it until you need it.
Step 6: Serve
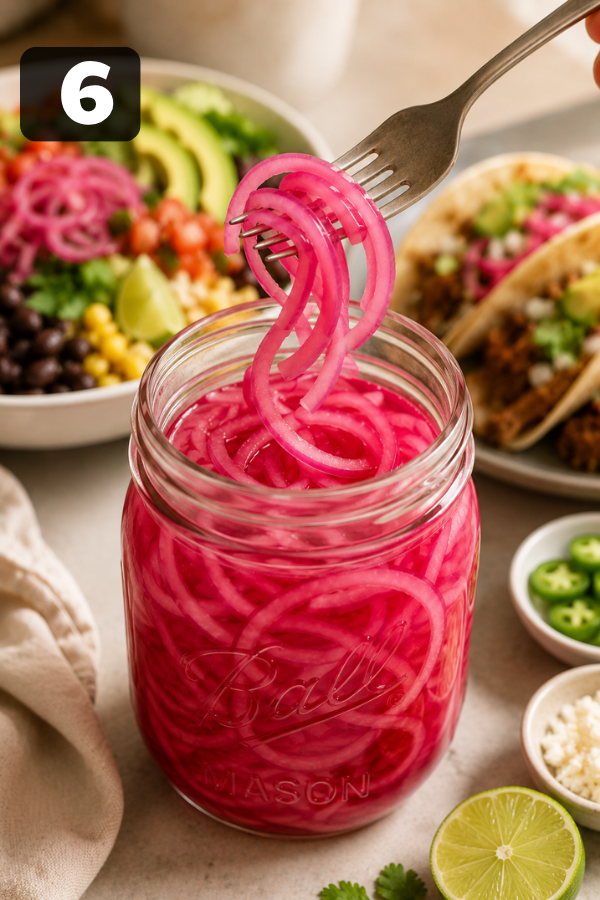
Use a clean fork or small pair of tongs to lift the onions from the brine.
Let the excess liquid drip back into the jar before adding them to sandwiches, salads, or toast. Too much brine can make bread soggy or wilt greens.
Then pile them on.
A little goes a long way.
Tips for the Best Pickled Red Onions
Keep the Slices Even
Consistent thickness matters.
If half the onion is paper-thin and the other half is chunky, some pieces will become soft while others still taste almost raw.
Don’t Cook the Onion
Pouring warm brine over raw onion helps soften it while keeping some crunch.
Cooking the onion directly in boiling brine will give you a noticeably softer texture.
If crunchy pickled onions are the goal, keep the onion raw.
Measure Your Salt
Salt is one ingredient worth measuring carefully.
Fine salt, kosher salt, and coarse salt don’t fill a teaspoon the same way. Too much can make the entire jar taste harsh.
Start with the measured amount, then adjust the next batch if needed.
Give Them Time
Yes, these are quick pickled onions.
But “quick” doesn’t mean they stop getting better after 30 minutes.
The flavor becomes more rounded after several hours. If you know you’re having tacos tomorrow, make the onions tonight. Your future self gets a better dinner for about five minutes of work.
Easy Flavor Variations
The basic recipe is flexible enough to change with whatever you’re cooking.
Spicy Pickled Red Onions
Add:
- ¼ teaspoon red pepper flakes
- Or a few thin jalapeño slices
These are perfect for tacos, nachos, breakfast burritos, carnitas, or black bean bowls.
Garlic Pickled Red Onions
Add one lightly crushed garlic clove.
The garlic gives the brine a savory edge that works beautifully on burgers, grilled chicken, sandwiches, and shawarma-style bowls.
Sweeter BBQ-Style Pickled Onions
Add another 1–2 teaspoons of sugar.
The extra sweetness pairs nicely with smoky pulled pork, barbecue chicken, ribs, or spicy sandwiches.
Pickled Red Onions Without Sugar
You can leave the sugar out.
Just know that the vinegar will taste sharper without that little bit of sweetness to balance it.
For a sugar-free batch, apple cider vinegar or rice vinegar usually gives a softer flavor than plain white vinegar.
Extra-Crunchy Pickled Red Onions
Slice the onion a little thicker and let it sit longer.
You trade speed for texture, but if crunch is your favorite part, it’s worth it.
How to Use Pickled Red Onions
Tacos might be the obvious answer, but these onions deserve more fridge time than one taco night.
Try them with:
- Chicken tacos
- Fish tacos
- Ground beef tacos
- Burritos and burrito bowls
- Nachos
- Burgers
- Veggie burgers
- Turkey sandwiches
- Pulled pork
- Grain bowls
- Avocado toast
- Fried eggs
- Scrambled eggs
- Salads
- Loaded baked potatoes
- Pizza
- Hummus wraps
- Grilled chicken
One of my favorite lazy-lunch combinations is leftover rice, rotisserie chicken, avocado, and a forkful of pickled red onions.
Nothing fancy. But that sharp little burst of vinegar wakes the whole bowl up.
That’s really what this recipe does best. It adds contrast.
Rich food tastes lighter. Creamy food tastes brighter. Bland leftovers suddenly have somewhere to go.
Storage & Leftover Notes
Store Pickled Red Onions in a covered container in the refrigerator.
For the best flavor and texture, plan to use them within about 2 weeks.
Keep the onions in the brine and always use a clean fork or tongs when taking some out.
Discard the onions if you notice:
- Mold
- An unpleasant smell
- Unusual sliminess
- Signs that the jar has spoiled
Freezing isn’t ideal if you want to keep the onions crisp. Once frozen and thawed, the texture can become soft.
These are much happier living in the fridge.
What to Serve With Pickled Red Onions
For an easy dinner, try them with:
- Chicken tacos
- Black bean bowls
- Burgers
- Grilled chicken
- Roasted sweet potatoes
- Pulled pork
- BBQ chicken
- Sheet-pan dinners
For lunch, they’re excellent on avocado toast, turkey wraps, chickpea bowls, salads, and sandwiches.
And breakfast? Don’t overlook it.
A fried egg, avocado toast, and a few pink onion slices is a very good five-minute breakfast.
For drinks, sparkling water with lime, iced tea, or lemonade works well with lighter meals. Margaritas pair naturally with taco night, while a crisp beer is a good match for burgers and BBQ.
Common Issues and Easy Fixes
My Pickled Onions Taste Too Sharp
They probably need more time.
Let them sit for several more hours. You can also stir a small amount of extra sugar into the brine.
Next time, try apple cider vinegar for a softer flavor.
My Onions Are Too Soft
They may have been sliced extremely thin or exposed to too much heat.
Next time, slice them a little thicker and pour warm brine over raw onions instead of cooking them.
My Onions Are Still Too Crunchy
Give them more time.
Thicker slices often need several hours or overnight before the flavor fully moves through the onion.
The Brine Doesn’t Cover the Onion
Use a smaller jar, gently press the onions down, or make more brine using the same ratio of vinegar, water, sugar, and salt.
My Onions Taste Too Salty
Add a little more vinegar and water in the same basic ratio to dilute the brine.
For your next batch, double-check the salt type and measurement.
FAQs
1. How long does it take to pickle red onions?
Thinly sliced onions can be served after about 30 minutes. For a more mellow flavor, wait 1–4 hours. Overnight gives you deeper flavor while keeping some crunch.
2. Do I need to boil the vinegar?
No. Very hot water is enough to dissolve the sugar and salt and help the pickling process along.
3. Can I make Pickled Red Onions without sugar?
Yes. They’ll taste sharper and more acidic, but a milder vinegar can help balance the flavor.
4. Can I make them ahead?
Absolutely. Making them the night before gives the onions more time to mellow and develop better flavor.
5. Can I store them in the pantry?
No. This is a refrigerator pickle recipe, not a shelf-stable canning recipe. Keep the jar refrigerated.
Final Thoughts
These Pickled Red Onions are quick, simple, and surprisingly useful. With just a few basic ingredients, you get a bright, tangy topping that can make tacos, burgers, salads, bowls, and sandwiches taste fresher with almost no extra effort. Make a jar once, keep it chilled, and you’ll likely find plenty of reasons to use it.
Don’t Miss: Bread and Butter Pickles Canning Recipe
Don’t Miss: The Best Shrimp Tacos
Also Try: Avocado Toast with Egg
Ingredients
Method
- Slice the Onion:Peel and halve the red onion, then slice it into thin ⅛-inch half-moons. Use a sharp knife or mandoline for even slices.

- Pack the Jar:Place the sliced onion loosely in a clean 16-ounce glass jar. Add garlic, peppercorns, chile flakes, or herbs if desired.
- Make the Brine:Stir together the vinegar, very hot water, sugar, and salt until fully dissolved.
- Add the Brine:Pour the warm brine over the onions. Gently press the slices down so they are mostly covered with liquid.
- Let Them Pickle:Let the onions pickle for at least 30 minutes. For a more mellow flavor and deeper pink color, refrigerate for several hours or overnight.
- Serve:Remove the onions with a clean fork or tongs and let excess brine drain off before adding them to tacos, burgers, salads, sandwiches, or bowls.
