The easy way to can peaches at home starts with ripe yellow peaches, clean jars, and a simple boiling-water bath. At first, the process may sound a little old-fashioned. You might picture a sunny farmhouse kitchen, a huge apron, a wooden spoon, and an entire free afternoon.
It is a lovely image. However, it is not always real life.
Most of us are fitting kitchen projects between work, errands, dinner, laundry, and perhaps one quiet cup of coffee if the day is kind. Fortunately, canning peaches does not have to become a major production.
To can peaches at home, simply peel ripe yellow peaches, pack them into hot jars, cover them with hot syrup, juice, or water, and process the jars in a boiling-water bath. That is the core method. Once you understand the rhythm, the process feels less like a complicated canning project and more like a cozy kitchen routine.
In the end, the reward is simple but lovely: golden peaches preserved at their summer best and ready to brighten cold mornings, busy weeknights, and last-minute desserts.
Why You’ll Love This Recipe
Beginner-friendly: Once your jars, peaches, and packing liquid are ready, the process is straightforward. Therefore, you do not need advanced canning skills to get started.
Easy to customize: Depending on your preferences, you can use light syrup, fruit juice, honey syrup, or plain water.
Great for everyday meals: Open a jar for quick breakfasts, easy desserts, lunchbox fruit, or a cozy peach cobbler.
A smart way to preserve summer fruit: When peaches are ripe, sweet, and affordable, canning allows you to enjoy them long after peach season ends.
Additionally, there is something deeply satisfying about hearing the jar lids ping as they seal. It is a small kitchen victory.
Ingredients
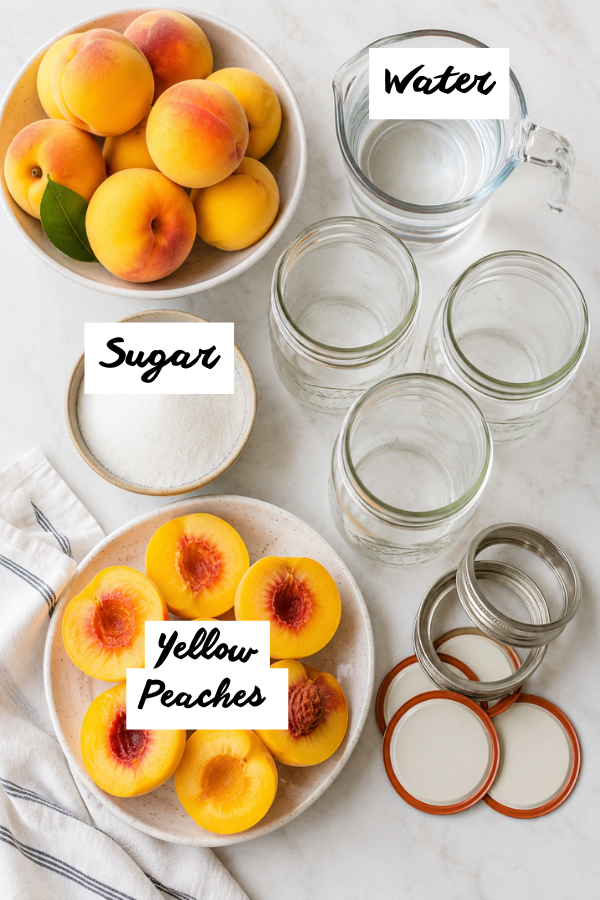
The ingredient list is short. However, choosing high-quality fruit makes all the difference.
Fresh Yellow Peaches
Use ripe yellow peaches that are fragrant, firm, and slightly soft when gently pressed. Ideally, the peaches should smell sweet and noticeably peachy. If they have little aroma, they may also have very little flavor.
Freestone peaches are the easiest choice for canning because the pit separates easily from the flesh. If you are preparing a large batch, this small detail can save a considerable amount of time.
Clingstone peaches can also taste wonderful. Nevertheless, they require more work because the flesh holds tightly to the pit.
Avoid peaches that are bruised, moldy, leaking juice, or excessively soft. After all, canning preserves the quality you begin with. It cannot improve damaged or overripe fruit.
For this recipe, use yellow-flesh peaches rather than white peaches. Yellow peaches are the standard choice for tested boiling-water canning methods.
Water, Sugar, Juice, or Honey
The packing liquid you choose depends on the flavor and sweetness you prefer.
For beginners, light syrup is a dependable place to start. It adds gentle sweetness while still allowing the natural peach flavor to remain the star.
For a canner load of approximately 7 quart jars, use:
- 9 cups water
- 2¼ cups sugar
First, combine the water and sugar in a large saucepan. Then, bring the mixture to a boil and stir until the sugar dissolves. Keep the syrup hot while you prepare and fill the jars.
Alternatively, you may use hot apple juice or white grape juice. Both options provide natural sweetness along with a mild fruity flavor.
Plain hot water also works. Although this is the lowest-sugar option, the peaches may gradually lose more color, flavor, and firmness during storage.
Mild-flavored honey can replace up to half of the sugar in the syrup. However, because honey has a distinctive floral flavor, it will slightly change the taste of the finished peaches.
Most importantly, sugar is not what makes properly canned peaches safe. Instead, it mainly helps preserve their color, flavor, and texture.
Optional Add-Ins
Keep additional flavors simple. Peaches have a delicate, sunny taste, and too much spice can easily overpower them.
Good options include:
- A small cinnamon stick
- A small piece of vanilla bean
- Ascorbic acid solution to reduce browning
If you are canning peaches for the first time, plain light syrup is the easiest place to begin. Later, once you feel comfortable with the process, you can experiment with subtle flavor variations.
Equipment You’ll Need
You do not need a professional canning setup. Nevertheless, a few essential tools will make the process safer and easier.
You will need:
- Canning jars
- New flat canning lids
- Clean bands
- A boiling-water canner or deep stockpot
- A rack for the bottom of the pot
- A jar lifter
- A wide-mouth funnel
- A bubble remover or clean plastic spatula
- Clean kitchen towels
- A large pot for blanching peaches
- A bowl of ice water
- A large saucepan for syrup
The canning pot must be deep enough for the filled jars to remain covered by at least 1 to 2 inches of water. This allows the jars to heat evenly during processing.
Use new flat lids every time you can food. Bands may be reused as long as they are clean, rust-free, and not bent.
A jar lifter is also worth purchasing, even if you only plan to can once or twice a year. Hot jars are slippery and heavy, so regular kitchen tongs are not a safe substitute.
Step-by-Step Instructions
Step 1: Prepare the Jars and Canner
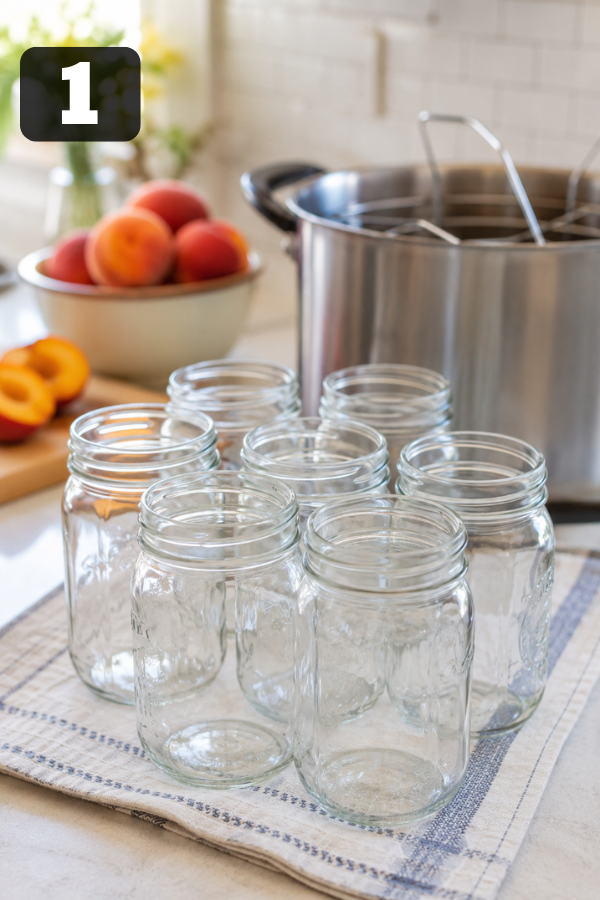
First, wash the jars and bands in hot, soapy water. Rinse them thoroughly.
Prepare the lids according to the manufacturer’s instructions. Some modern canning lids do not need to be simmered before use.
Keep the jars hot until you are ready to fill them. Hot jars are less likely to crack when hot peaches and syrup are added.
Next, place a rack in the bottom of your boiling-water canner or deep stockpot. Add enough water to cover the filled jars by at least 1 to 2 inches.
Begin heating the water while you prepare the fruit. It should be hot but not necessarily boiling while you fill the jars.
This preparation may feel like the least exciting part of the process. However, a clean and organized workspace makes the remaining steps much smoother.
Step 2: Wash and Sort the Peaches
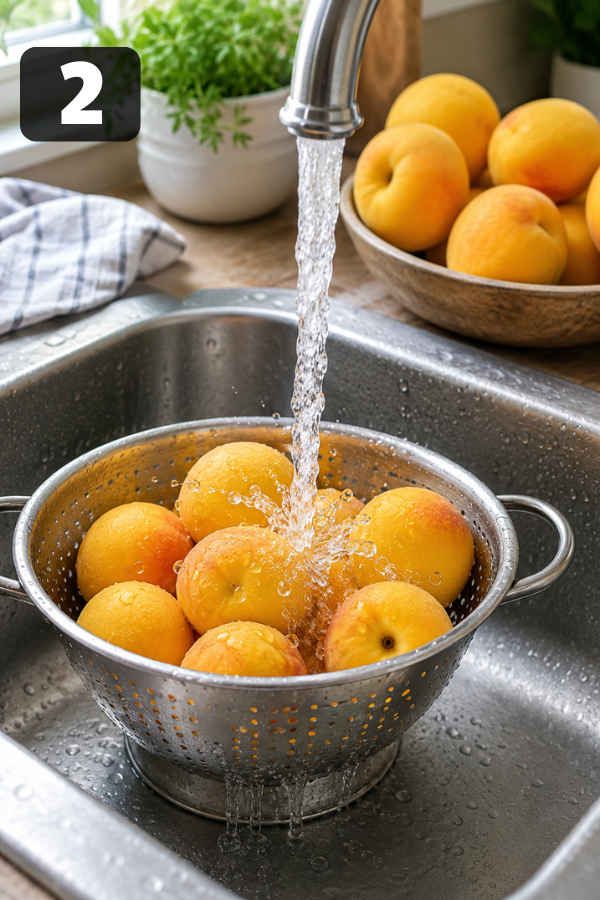
Rinse the peaches thoroughly under cool running water.
As you wash them, sort the fruit according to ripeness and condition. Firm-ripe peaches are best for canning because they are more likely to hold their shape during processing.
Very soft peaches can still be used for smoothies, jam, peach sauce, or quick desserts. However, they may become mushy when canned.
Look for peaches that are:
- Golden yellow
- Sweet-smelling
- Slightly soft but not squishy
- Free from deep bruises, mold, or leaking juice
A good canning peach should feel ripe and full without collapsing under gentle pressure.
Step 3: Blanch and Peel the Peaches
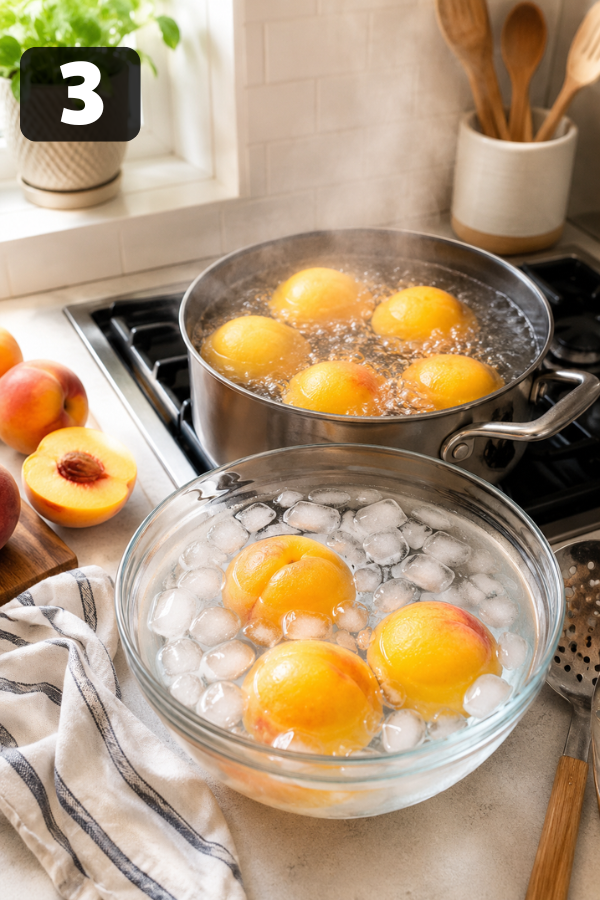
Bring a large pot of water to a boil. Meanwhile, prepare a large bowl filled with ice water.
Using a small knife, cut a shallow X into the bottom of each peach.
Carefully lower a few peaches into the boiling water. Blanch them for approximately 30 to 60 seconds, or until the skins begin to loosen.
Avoid overcrowding the pot. Instead, work in small batches so the water remains hot.
Next, transfer the peaches directly into the ice water. This stops the cooking process and makes the skins easier to remove.
Once the peaches are cool enough to handle, gently slip off the skins. If a few areas remain attached, use a small paring knife to remove them.
This part is surprisingly satisfying. When a ripe peach slips neatly out of its skin, it feels like a small kitchen magic trick.
Step 4: Pit and Slice the Peaches
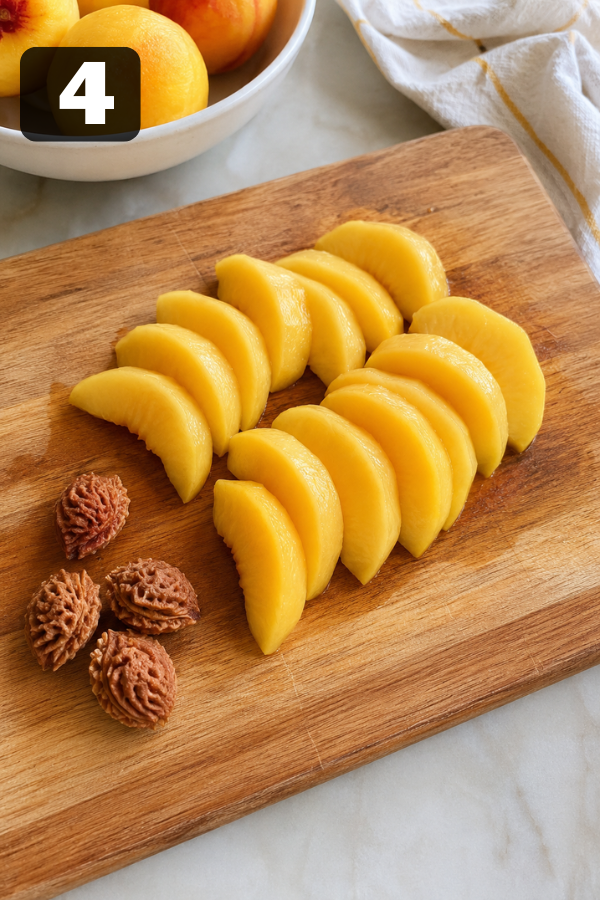
Cut each peeled peach in half and remove the pit.
You may can the peaches as halves or slices. Peach halves look beautiful inside the jars. However, slices are usually more convenient for everyday meals.
Slices work especially well for:
- Oatmeal
- Yogurt bowls
- Pancakes
- Waffles
- Cobblers
- Crisps
- Smoothies
As you prepare the fruit, place the peach halves or slices in an ascorbic acid solution to reduce browning.
Avoid slicing the peaches too thinly. Thicker slices are more likely to retain their shape during processing.
Step 5: Make the Syrup
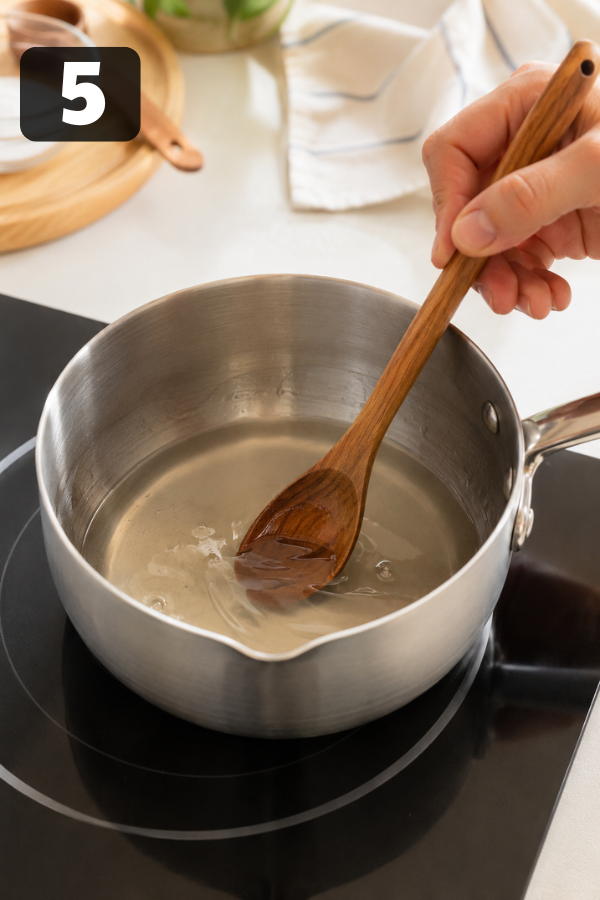
Meanwhile, prepare the canning liquid.
For enough light syrup to fill approximately 7 quart jars, combine:
- 9 cups water
- 2¼ cups sugar
Bring the mixture to a boil, stirring occasionally until the sugar completely dissolves.
Afterward, reduce the heat and keep the syrup hot until you are ready to fill the jars.
Alternatively, heat apple juice, white grape juice, or plain water. Mild honey may also replace up to half of the sugar.
Regardless of which liquid you choose, make sure it is hot before adding it to the jars.
Light syrup is especially useful because it helps maintain the peaches’ color, flavor, and shape without making them excessively sweet.
Step 6: Choose Hot Pack or Raw Pack
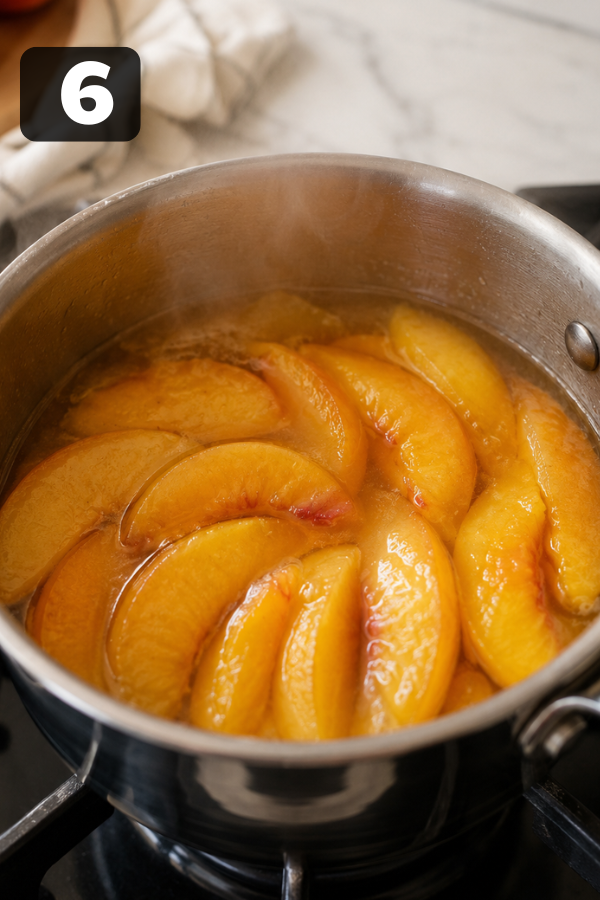
There are two common ways to pack peaches: hot pack and raw pack.
With the raw-pack method, you place uncooked peach halves or slices directly into hot jars before covering them with hot liquid. Although this method is faster, the fruit is more likely to float and may lose quality during storage.
By contrast, the hot-pack method briefly heats the peaches in syrup, juice, or water before they are packed into the jars. It requires a few additional minutes. However, it generally produces better-looking peaches with improved texture.
In particular, hot packing helps:
- Reduce floating fruit
- Remove trapped air
- Improve texture
- Create a more attractive jar
- Keep the peaches evenly packed
Therefore, hot pack is the recommended option for this beginner-friendly recipe.
To hot pack the fruit, add the drained peach halves or slices to the hot syrup. Next, bring the mixture back to a gentle boil.
As soon as the peaches are heated through, begin filling the jars. Avoid simmering them for too long, or they may become overly soft.
Step 7: Fill the Jars
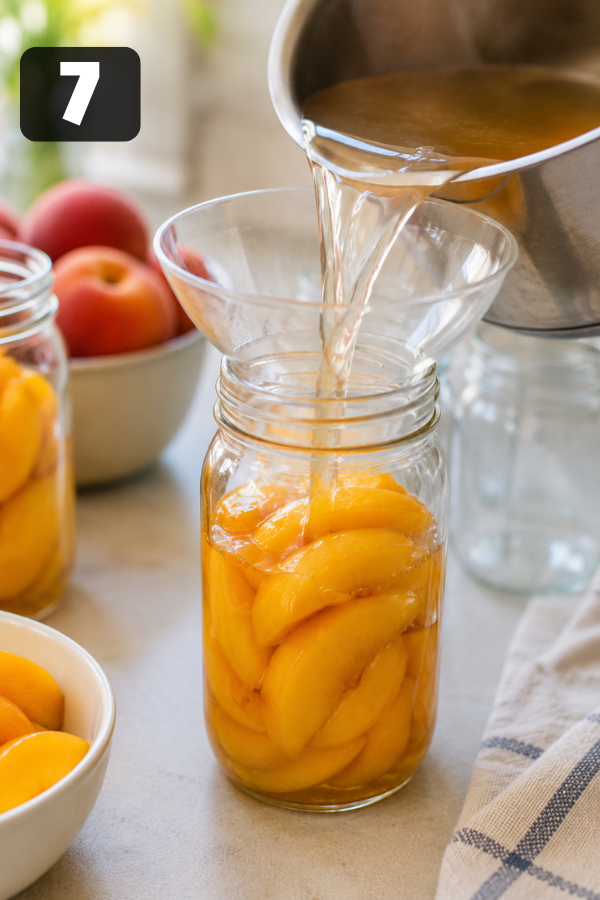
Place the hot jars upright on a clean kitchen towel.
Using a slotted spoon, pack the hot peaches into each jar. Arrange them snugly, but do not press hard enough to crush the fruit.
Next, pour the hot syrup, juice, or water over the peaches. Leave ½ inch of headspace at the top of each jar.
Headspace is the empty area between the surface of the food and the underside of the lid. Maintaining the correct amount is important because it gives the food space to expand during processing.
Slide a bubble remover or clean plastic spatula around the inside edge of each jar to release trapped air bubbles.
After removing the bubbles, check the headspace again. Add more hot liquid if necessary.
Wipe the jar rims with a clean, damp cloth. The rims must be free from syrup, fruit fibers, and other residue.
Center a prepared lid on each jar. Then, screw on the bands until they are fingertip-tight.
Do not overtighten the bands. Air must be able to escape from the jars during processing so a proper vacuum seal can form.
Step 8: Process the Jars
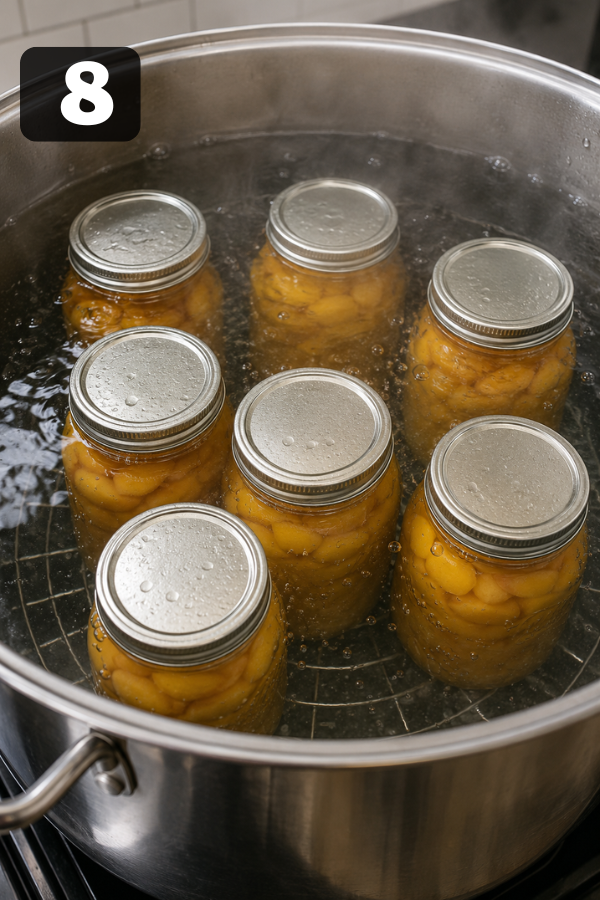
Lower the filled jars into the boiling-water canner. Make sure the jars are covered by 1 to 2 inches of water.
Bring the water back to a full boil. Start timing once the water is boiling.
At 0 to 1,000 feet elevation, use these processing times:
- Hot pack pints: 20 minutes
- Hot pack quarts: 25 minutes
- Raw pack pints: 25 minutes
- Raw pack quarts: 30 minutes
If you live at a higher altitude, increase the processing time. Higher elevations need longer processing because water boils at a lower temperature.
Keep the water at a steady boil. Not a violent splash-fest, just a strong, steady boil.
Step 9: Cool and Check the Seals
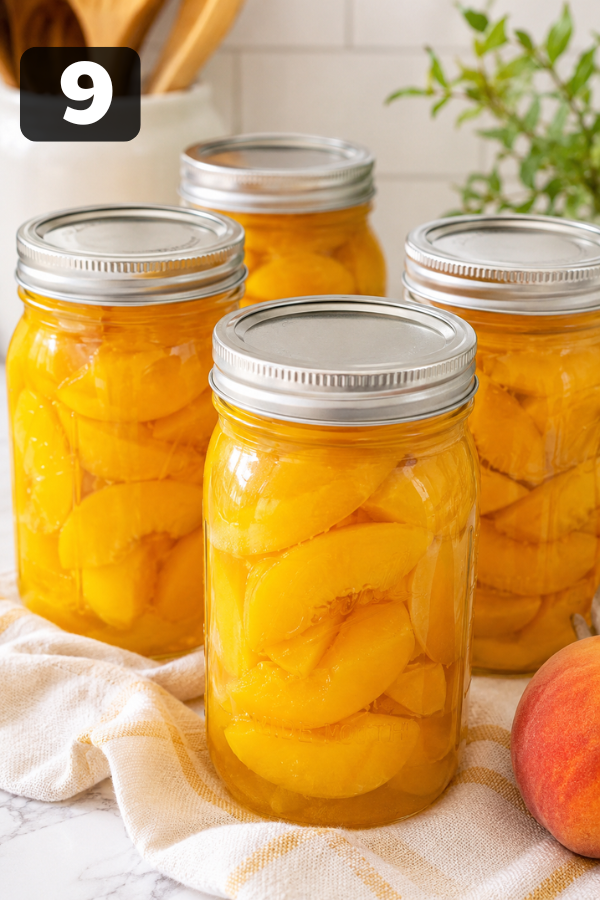
When the processing time is done, turn off the heat. Let the jars rest in the canner for 5 minutes.
Then lift the jars straight up with a jar lifter and place them on a towel. Don’t tilt them. Don’t tighten the bands. Don’t press the lids right away.
Let the jars cool undisturbed for 12 to 24 hours.
As they cool, you may hear a little ping. That sound means the lids are sealing. It’s a small sound, but it feels great.
After the jars are fully cool, check the seals. Press the center of each lid. It should be firm and should not pop up and down.
If a jar didn’t seal, place it in the fridge and use it soon, or reprocess it with a new lid.
Tips for Success
Use firm-ripe peaches. This is the biggest tip. Soft peaches may taste great fresh, but they can turn mushy during canning.
Work in batches. Don’t peel every peach at once if you’re not ready to fill jars. Peeled peaches brown quickly when exposed to air.
Keep everything hot. Hot jars, hot syrup, hot peaches, hot water. This helps prevent jar breakage and keeps the process smooth.
Use hot pack if you want prettier jars. Raw pack is quicker, but hot pack usually gives better texture and less floating.
Don’t skip the 1/2 inch headspace. Too much or too little space can affect the seal.
And maybe the most human tip of all: give yourself more counter space than you think you need. Canning has a way of spreading out.
Common Issues and Easy Fixes
If your peaches float, don’t panic. Floating fruit is common, especially with raw pack. Next time, use hot pack and pack the fruit a little more snugly.
If the peaches turn brown, they may have been exposed to air too long before processing. Work in smaller batches and use an anti-browning solution.
If the peaches are mushy, they were probably too ripe, sliced too thin, or processed too long. Use firm-ripe peaches and thicker slices next time.
If the jars don’t seal, check a few things. Did you use new lids? Did you wipe the rims? Was the headspace correct? Was the jar rim chipped? Small details matter here.
If syrup leaks out during processing, the bands may have been too tight, the headspace may have been off, or the boil may have been too strong. Keep the boil steady and the bands fingertip-tight.
Canning is not hard, but it is exact in a few places. That’s the balance.
Storage and Leftover Notes
Store sealed jars in a cool, dry, dark place. A pantry, basement shelf, or cabinet works well.
Label each jar with the date and syrup type. You may think you’ll remember, but future you will appreciate the label.
For best quality, use canned peaches within 12 months. They may last longer if sealed and stored well, but the color, flavor, and texture are best within the first year.
Once opened, refrigerate the peaches in their syrup or juice. Use them within about a week.
Before eating any home-canned food, check the jar. If the lid is loose, the jar is leaking, the fruit looks moldy, or the smell seems off, throw it away. Don’t taste questionable canned food.
What to Serve With Canned Peaches
Canned peaches are one of those pantry staples that quietly save the day.
For breakfast, serve them with:
- Greek yogurt
- Granola
- Oatmeal
- Pancakes
- Waffles
- Cottage cheese
For dessert, use them in:
- Peach cobbler
- Peach crisp
- Peach dump cake
- Vanilla ice cream bowls
- Pound cake topping
- Cheesecake topping
They also work in savory meals. Try them with grilled chicken, roast pork, turkey sandwiches, or a summer salad with goat cheese.
For drinks, keep it simple: iced tea, lemonade, sparkling water, or a light white wine if you’re serving peaches with dessert.
FAQs
- Can I can peaches without sugar?
Yes. Sugar helps preserve flavor, color, and texture, but it is not required for safety when you use yellow peaches and follow proper water bath processing times. - Are white peaches safe for canning?
Use yellow peaches for this recipe because standard water bath canning directions are written for yellow peaches. - Is hot pack or raw pack better?
Hot pack is better for quality because it helps reduce floating, removes air from the fruit, and usually gives the peaches a nicer texture. - How many peaches do I need?
For a large batch of about 7 quarts, plan on around 17 to 17.5 pounds of fresh peaches. - How long do canned peaches last?
For best quality, use sealed jars within 12 months; after opening, refrigerate the jar and use the peaches within about a week.
Nutrition Info
Canned peaches are naturally gluten-free, dairy-free, and vegetarian. The nutrition will vary depending on whether you pack them in syrup, juice, honey syrup, or water.
For a lighter option, pack peaches in water or fruit juice. For a sweeter, more dessert-style jar, use light syrup. A typical 1/2-cup serving of canned peaches is a simple fruit serving that works well for breakfasts, snacks, and easy desserts.
Conclusion
Canning peaches at home is one of those kitchen projects that feels bigger than it is. Once you do it, you realize the steps are simple, the rhythm is calming, and the payoff is wonderful.
A jar of golden peaches in the pantry is more than fruit. It’s summer saved for later.
Don’t Miss: Bread and Butter Pickles Canning Recipe
Don’t Miss: Peach Cobbler Cheesecake Recipe
Also Try: Homemade Blackberry Jam
Ingredients
Method
- Prepare jars and canner: Wash jars, lids, and bands. Keep jars hot. Set a rack in a water bath canner and add enough water to cover jars by 1–2 inches.

- Wash peaches: Rinse peaches well. Use firm-ripe yellow peaches and discard any bruised, moldy, or overly soft fruit.
- Blanch and peel: Cut a small X on the bottom of each peach. Boil for 30–60 seconds, then transfer to ice water. Peel once cool enough to handle.
- Pit and slice: Cut peaches in half, remove pits, and slice or leave as halves. Keep cut peaches in lemon water or ascorbic acid solution to reduce browning.
- Make syrup: Heat 4 cups water with 2 cups sugar until dissolved. Keep syrup hot. You can also use hot apple juice, white grape juice, honey syrup, or water.
- Hot pack peaches: For best texture, add sliced peaches to hot syrup and bring just to a gentle boil. Heat through, but don’t overcook.
- Fill jars: Pack hot peaches into hot jars. Cover with hot syrup, leaving 1/2 inch headspace. Remove air bubbles, wipe rims, add lids, and tighten bands fingertip-tight.
- Process jars: Place jars in boiling-water canner, covered by 1–2 inches of water. Process at 0–1,000 ft: hot pack pints 20 minutes, hot pack quarts 25 minutes.
- Cool and check seals: Let jars rest in the canner for 5 minutes, then remove and cool undisturbed for 12–24 hours. Check seals before storing.