
Homemade Blackberry Jam has a way of making a normal morning feel like a small treat. One spoonful on warm toast, and suddenly breakfast feels less rushed. A little more thoughtful. A little more like Saturday, even if it’s Tuesday and someone still can’t find their shoes.
This recipe turns blackberries, sugar, and lemon juice into a glossy, sweet-tart jam with deep berry flavor. You can make it as a quick refrigerator jam, or you can use pectin for a firmer, more classic set. If you have fresh blackberries from the farmers market, lovely. If you have a bag of frozen berries in the freezer, that works too.
Here’s the thing: jam sounds old-fashioned and fussy, but it doesn’t have to be. You don’t need a farmhouse kitchen or a full afternoon. You need a pot, a spoon, clean jars, and about 30 minutes for the simple version. That’s it.
Why You’ll Love This Blackberry Jam
This Blackberry Jam is easy enough for beginners but still tastes like something you’d buy from a roadside farm stand.
You’ll love it because:
- It uses simple ingredients: blackberries, sugar, lemon juice, and optional pectin.
- It works with fresh or frozen berries.
- It’s great for meal prep breakfasts, snacks, and desserts.
- It can be made chunky, smooth, or mostly seedless.
- It makes toast, oatmeal, yogurt, and pancakes taste instantly better.
It’s also naturally gluten-free and dairy-free. If you use fruit pectin, it’s vegan too.
And honestly, it’s nice to have a jar of something homemade in the fridge. Not everything has to be a full meal prep operation with matching containers. Sometimes meal prep is just a jar of jam that makes breakfast easier.
Ingredients
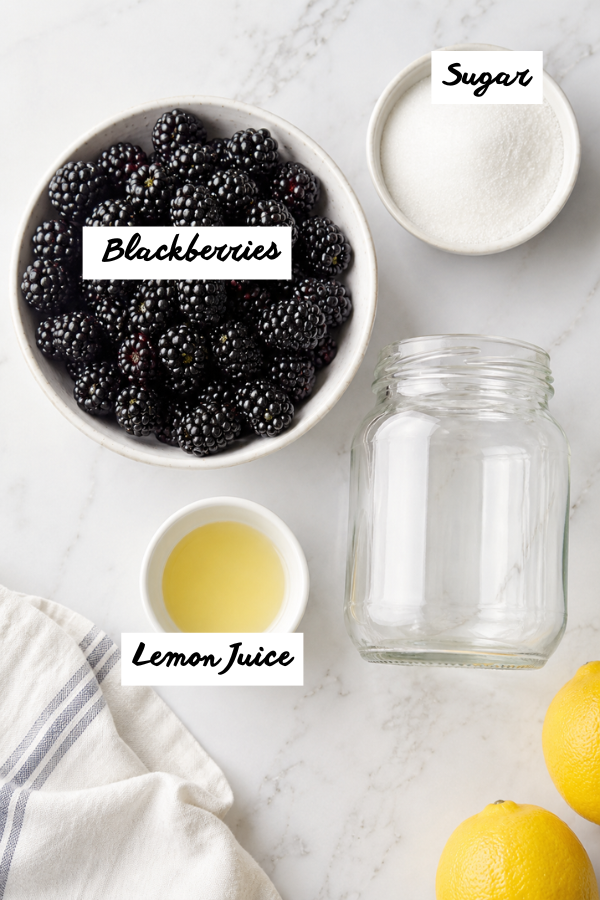
You only need a short list, which is part of the charm.
Blackberries
Use fresh or frozen blackberries. Fresh berries give the brightest flavor, especially when they’re in season from late spring through summer in many parts of the US.
Frozen blackberries are a smart backup. Thaw them first so they cook evenly. If they release a lot of liquid, keep most of it because it has flavor, but you may need a few extra minutes of cooking.
For a small batch, use about 4 cups of blackberries. For a larger batch, use 8 cups or more.
Sugar
Sugar does more than make jam sweet. It helps the jam thicken, gives it that glossy texture, and helps preserve it.
If you’re using regular pectin, don’t cut the sugar too much. That’s where many jam problems start. Less sugar can mean a softer set, or no set at all. If you want a lower-sugar jam, use low-sugar pectin and follow that package’s method.
Lemon Juice
Lemon juice wakes everything up. It balances the sugar and helps the jam set. Without it, blackberry jam can taste a little flat.
Fresh lemon juice is great for refrigerator jam. If you’re canning, use a tested canning recipe and follow the exact acid amount.
Pectin, Optional
Pectin is what helps jam set. Some fruits have lots of natural pectin. Blackberries have some, but not as much as apples or citrus.
You have two good options:
- Use pectin for a faster, more reliable jam.
- Skip pectin and cook the jam longer until it thickens naturally.
Neither option is “better.” They’re just different. Pectin jam tastes a bit fresher because it cooks quickly. No-pectin jam tastes deeper and more cooked down, almost like blackberry pie filling in spreadable form.
Optional Flavor Add-Ins
Keep the first batch simple if you’re new to jam. After that, play a little.
Good add-ins include:
- Lemon zest for a brighter flavor.
- Vanilla for a soft dessert-like note.
- Cinnamon for a cozy fall version.
- Orange zest for a warmer citrus flavor.
- A tiny pinch of allspice for depth.
Go light. Blackberry has a bold, dark fruit flavor, and you don’t want to cover it up.
Step-by-Step Instructions
This is the basic stovetop method. It’s simple, but it does move quickly once the jam starts boiling.
Step 1: Wash and Sort the Berries
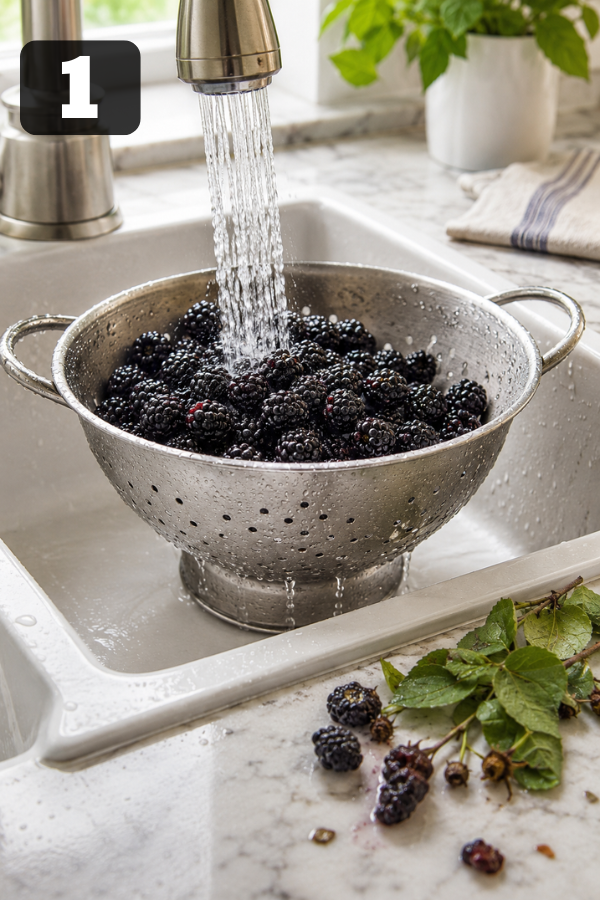
Rinse the blackberries gently under cool water. Remove leaves, stems, and any berries that look moldy or too soft.
If using frozen berries, thaw them first. You can thaw them overnight in the fridge or leave them in a bowl on the counter for a short time.
Pat fresh berries dry if they’re very wet. Too much water can make the jam take longer to thicken.
Step 2: Mash the Blackberries
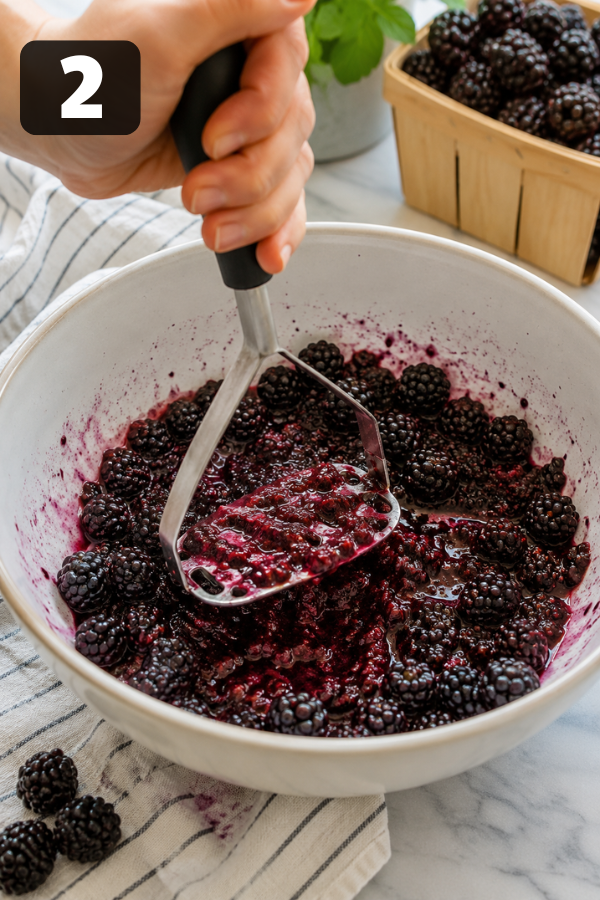
Add the berries to a large pot or bowl and mash them with a potato masher.
For chunky jam, mash lightly. For smoother jam, mash well. If you want a more polished texture, you can pulse the berries briefly in a food processor, but don’t turn them into juice. A little texture is nice.
You know what? This is where homemade jam starts to feel real. The berries break down, the juice turns dark purple, and the kitchen already smells like dessert.
Step 3: Remove Some Seeds, If You Want
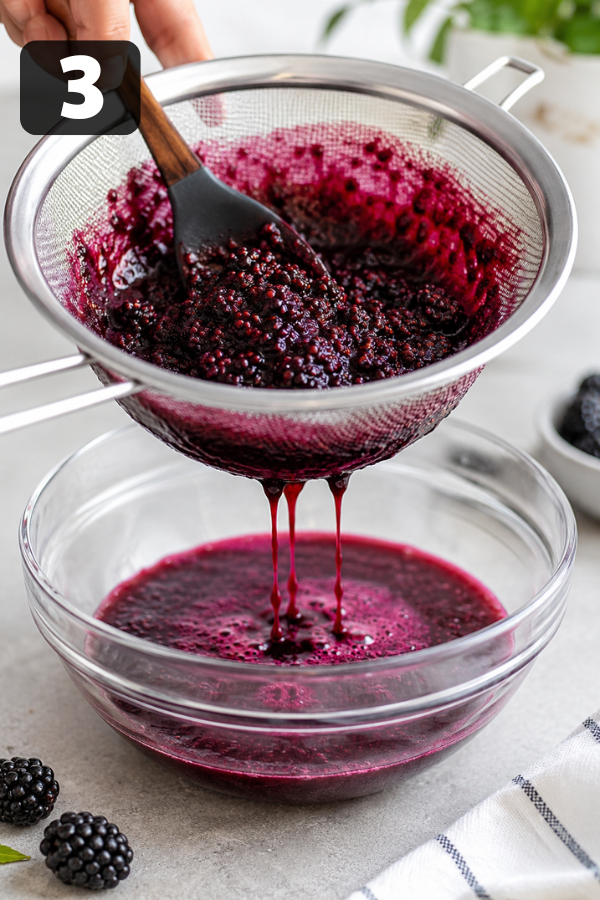
Blackberry seeds are edible, but they can be noticeable. Some people love the rustic texture. Some people absolutely do not.
For less seedy jam, press half of the mashed berries through a fine mesh strainer or food mill. Then add the strained pulp back to the pot with the remaining crushed berries.
For seedless blackberry jam, strain all the mashed berries. It takes more time, but the result is smooth and lovely, especially if you plan to use the jam in cakes, thumbprint cookies, or cheesecake bars.
Step 4: Add Sugar and Lemon Juice
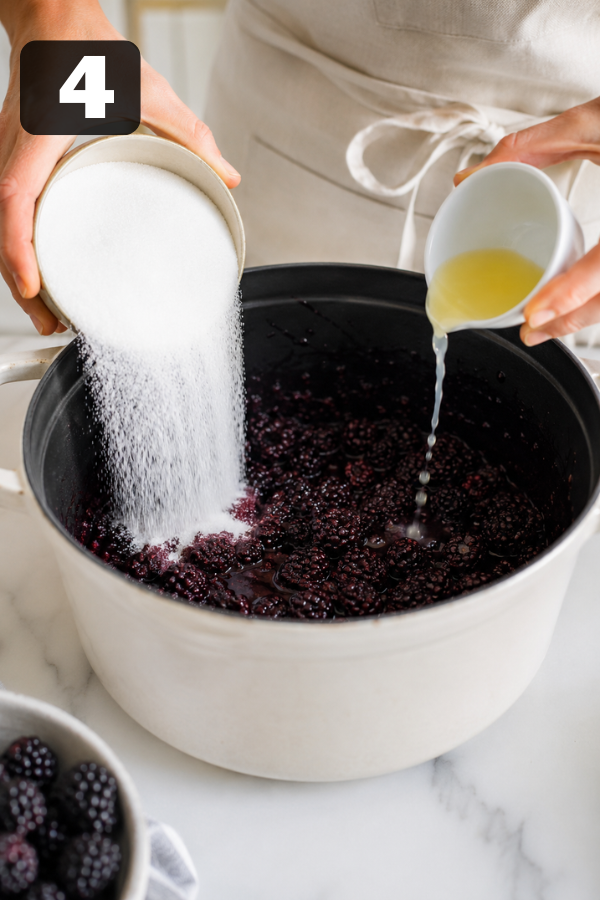
Put the crushed blackberries in a large, heavy-bottomed pot. Add the sugar and lemon juice. Stir well.
Start over medium heat. Let the sugar dissolve before the mixture comes to a full boil. Stir often so the fruit doesn’t stick to the bottom.
A big pot matters here. Jam bubbles up like it has somewhere to be. Give it room.
Step 5: Boil Until Thickened
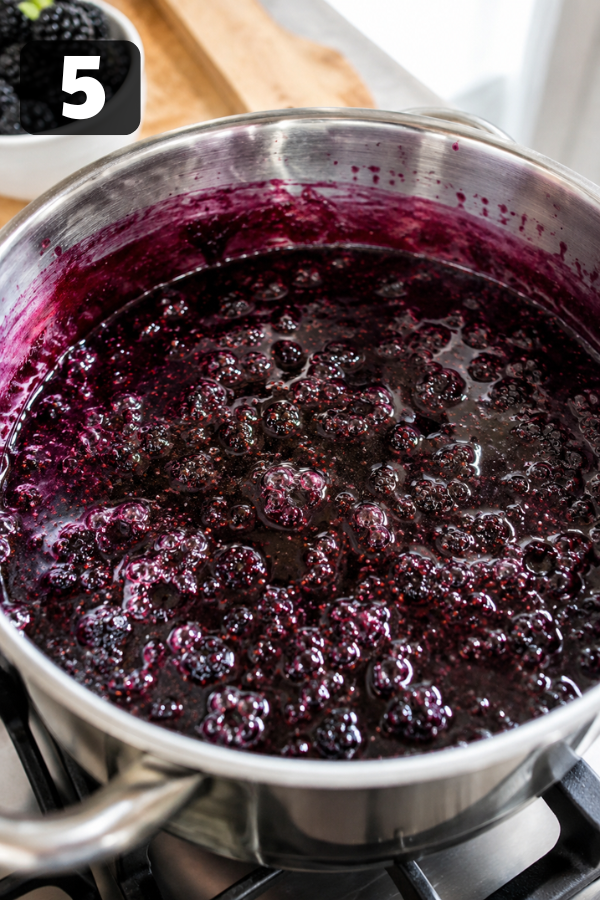
Bring the mixture to a rolling boil. A rolling boil means it keeps bubbling even when you stir.
If you’re using liquid pectin, add it once the fruit and sugar mixture reaches a full boil, then boil hard for about 1 minute, following the pectin package or recipe directions.
If you’re making jam without pectin, keep cooking and stirring until the mixture thickens. This usually takes longer, often 20 to 40 minutes depending on the pot, berry moisture, and heat level.
The jam is ready when it looks glossy, coats the spoon, and falls in thick drops instead of thin streams.
Step 6: Skim the Foam
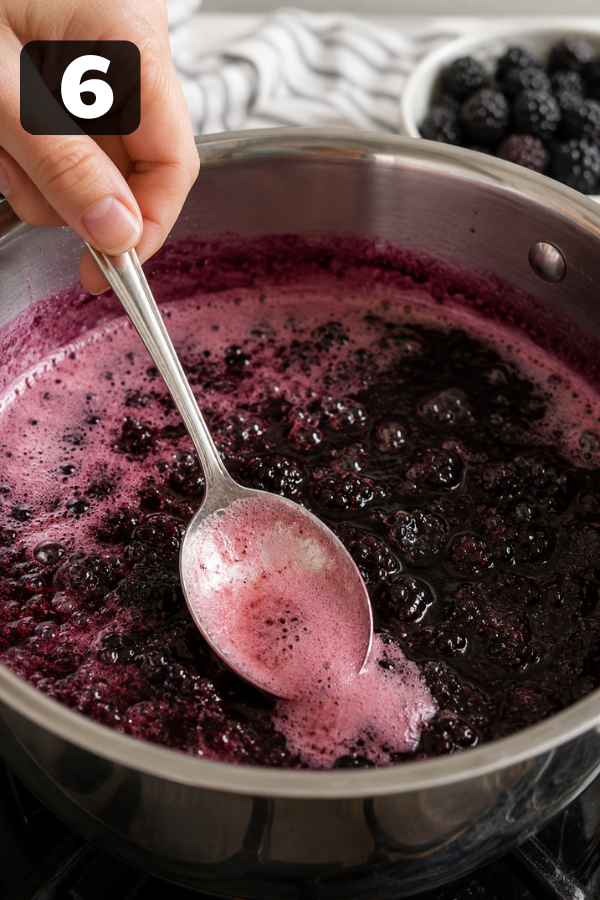
Foam may rise to the top while the jam cooks. It’s safe to eat, but it can make the jars look cloudy.
Use a spoon to skim it off near the end of cooking. No need to obsess over every bubble. Just remove the thick pale foam from the surface.
Step 7: Test the Set
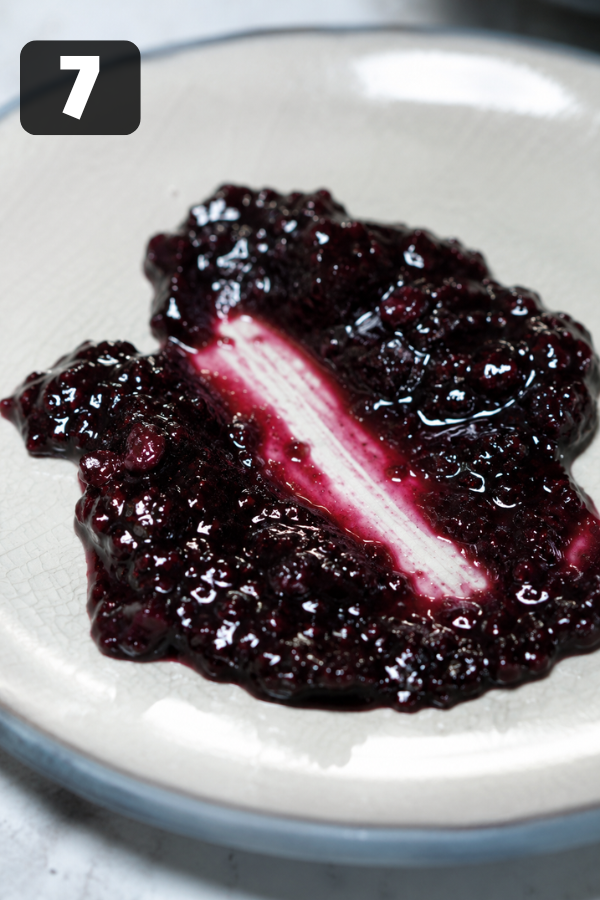
Jam thickens as it cools, so don’t panic if it looks a little loose while hot.
The easiest test is the cold plate test:
- Place a small plate in the freezer before you start cooking.
- Spoon a little hot jam onto the cold plate.
- Wait 30 seconds.
- Push it with your finger.
If the jam wrinkles slightly or holds its shape, it’s ready. If it runs like syrup, cook it a few more minutes and test again.
You can also use a thermometer. Jam usually sets around 220°F at sea level. If you live at a higher altitude, the set point may be slightly lower.
Step 8: Fill the Jars
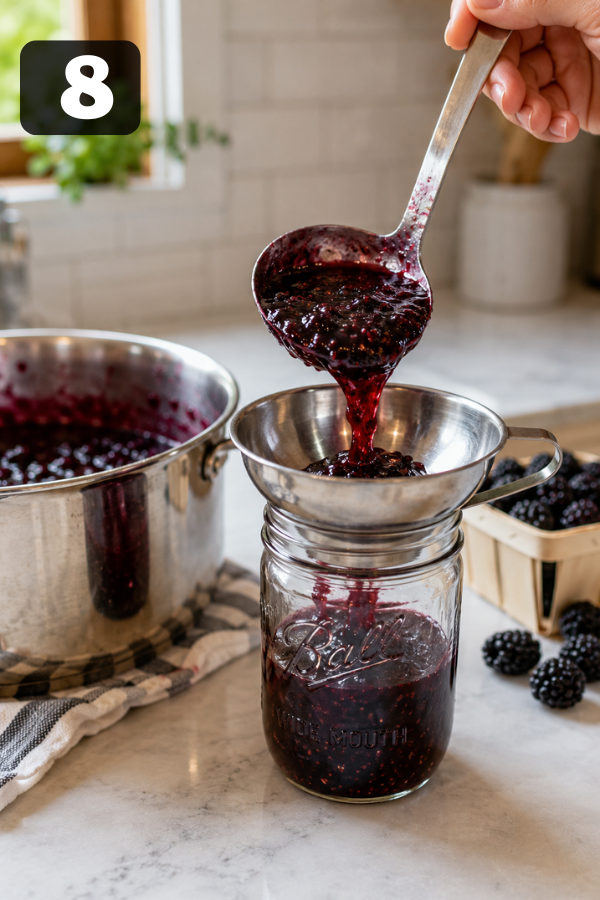
For refrigerator jam, spoon the hot jam into clean jars. Let it cool, then cover and refrigerate.
For freezer jam, leave space at the top of the container because jam expands when frozen.
For canned jam, use sterilized jars, leave 1/4 inch headspace, wipe the rims clean, add lids and bands, and process in a boiling water bath using a tested canning recipe.
If you’re not used to canning, start with refrigerator jam first. It’s easy, low-stress, and still delicious.
Tips for the Best Blackberry Jam
The best jam comes down to timing, texture, and not rushing the boil.
Use ripe berries, but not berries that are falling apart. Very ripe berries taste sweet, but they may have less natural pectin. A mix of ripe and slightly under-ripe berries can help the jam set.
Measure the sugar. It’s tempting to eyeball it, but jam is part recipe, part tiny kitchen science project. Sugar affects texture as much as flavor.
Don’t walk away once the jam starts boiling. It can scorch fast, especially near the end. Stir often and watch the bottom of the pot.
If the jam seems runny, chill it overnight before deciding it failed. Many jams set more after cooling.
And if it still doesn’t set? Call it blackberry syrup. Pour it over pancakes or vanilla ice cream. Nobody needs to know.
Storage and Leftover Notes
Refrigerator Blackberry Jam should be cooled, covered, and stored in the fridge. Use it within about 3 weeks for the best flavor and quality.
Freezer jam can last much longer. Store it in freezer-safe containers with space at the top. Thaw in the fridge before using.
Properly canned blackberry jam can be stored in a cool, dark place for about 1 year if the jars are sealed correctly. Once opened, keep the jar in the refrigerator.
Always use a clean spoon. It sounds fussy, but it helps the jam last longer. If you see mold, smell fermentation, or notice a bulging lid on a canned jar, throw it away. Don’t taste it to check.
What to Serve With Blackberry Jam
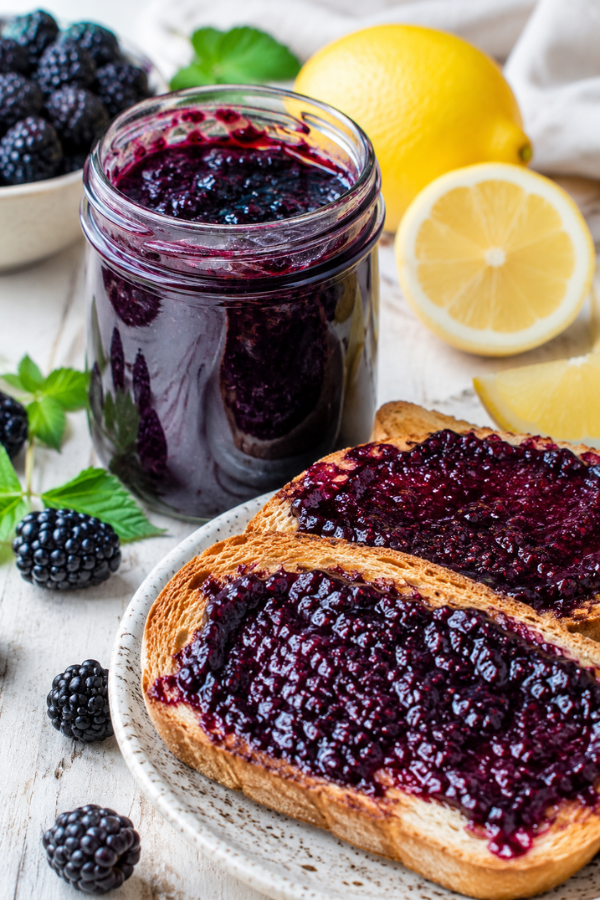
Of course, toast is the classic. Warm toast, cold butter, blackberry jam. Simple and perfect.
But don’t stop there.
Try Blackberry Jam with:
- Buttermilk biscuits.
- English muffins.
- Pancakes or waffles.
- Greek yogurt bowls.
- Overnight oats.
- Peanut butter sandwiches.
- Cream cheese on bagels.
- Baked brie.
- Pound cake.
- Thumbprint cookies.
- Vanilla ice cream.
- Turkey and cheese sandwiches.
It also makes a quick sauce. Warm a few spoonfuls with a splash of water or lemon juice, then drizzle it over pancakes, French toast, or cheesecake.
For a savory twist, whisk a spoonful into balsamic vinaigrette. It’s great with spinach, goat cheese, pecans, and grilled chicken. That little spoonful of jam can pull a salad together like magic.
Easy Blackberry Jam Variations
Seedless Blackberry Jam
Strain all of the mashed berries through a food mill or fine mesh strainer before cooking. This gives you a smooth jam with no gritty seeds.
It’s great for kids, cakes, cookies, and anyone who likes a cleaner texture.
Blackberry Jam Without Pectin
Cook blackberries, sugar, and lemon juice until thick and glossy. Use the cold plate test or a thermometer to check the set.
This version takes more patience, but the flavor is rich and deep.
Low-Sugar Blackberry Jam
Use low-sugar pectin. Don’t just cut the sugar from a regular recipe and hope for the best.
Low-sugar jam tastes more fruit-forward and a little tart. It’s especially good with yogurt, oatmeal, or whole grain toast.
Blackberry Lemon Jam
Add lemon zest after cooking. It makes the jam taste fresh and bright without making it too sour.
Spiced Blackberry Jam
Add a small pinch of cinnamon or allspice. This version feels cozy and works well with biscuits, scones, and holiday breakfast boards.
Common Issues and How to Fix Them
My Jam Is Too Runny
This is the most common jam problem.
Possible causes include undercooking, reducing sugar, using the wrong pectin, or not reaching a full rolling boil.
First, chill the jam overnight. If it’s still too loose, reheat it and cook a little longer. You can also use it as syrup for pancakes, waffles, yogurt, or ice cream.
My Jam Is Too Thick
This usually means it cooked too long or had too much pectin.
Warm it gently before serving. For immediate use, stir in a tiny splash of hot water or lemon juice to loosen it.
Next time, stop cooking as soon as the plate test passes.
My Jam Tastes Too Sweet
Add lemon zest for brightness. Serve it with tangy foods like Greek yogurt, goat cheese, or cream cheese.
For your next batch, use a low-sugar pectin recipe instead of cutting sugar from a regular one.
My Jam Has Too Many Seeds
Warm the jam slightly and press it through a fine mesh strainer. It won’t be quite the same as straining before cooking, but it helps.
Next time, strain half the berries for a nice middle ground.
My Canned Jars Didn’t Seal
If a jar doesn’t seal, refrigerate it and use it first. Don’t store it in the pantry.
Common causes include food on the rim, wrong headspace, old lids, or bands tightened too much before processing.
FAQs
1. Can I make Blackberry Jam with frozen berries?
Yes. Thaw the berries first, then use them as you would fresh berries. Frozen berries may release more liquid, so the jam may need a few extra minutes to thicken.
2. Do I need pectin for Blackberry Jam?
No, but pectin makes the jam set faster and more reliably. No-pectin blackberry jam works too, but it needs a longer cook time.
3. Can I reduce the sugar?
Only if you use a low-sugar pectin recipe. Sugar helps jam set, so reducing it in a regular jam recipe can make the jam runny.
4. How long does homemade Blackberry Jam last?
Refrigerator jam lasts about 3 weeks. Freezer jam can last up to 1 year. Properly canned jam can last about 1 year in a cool, dark place.
5. Is Blackberry Jam healthy?
It’s made with real fruit, but it’s still a sweet spread. Think of it as a condiment. A spoonful can add a lot of flavor to oatmeal, yogurt, or toast.
6. Can I make this ahead of time?
Yes. Blackberry Jam is great for make-ahead breakfasts, brunch boards, gifts, and freezer storage.
7. What’s the difference between blackberry jam and blackberry jelly?
Jam uses crushed fruit or fruit pulp, so it has more texture. Jelly is made from strained juice, so it’s smoother and clearer.
Nutrition Info
Nutrition will vary based on the exact sugar amount, pectin type, and serving size.
As a general guide, 1 tablespoon of Blackberry Jam is a small sweet serving. It adds fruit flavor, but it also adds sugar. For a more balanced snack, pair it with protein or fiber, like Greek yogurt, whole grain toast, nut butter, or cottage cheese.
Final Thoughts
Blackberry Jam is one of those simple homemade recipes that feels special without asking too much from you. With fresh or frozen berries, a little sugar, and lemon juice, you can make a bright, sweet-tart spread that’s ready for toast, yogurt, pancakes, biscuits, or quick breakfasts all week. Start with refrigerator jam if you’re new to this, then try seedless, low-sugar, or canned versions when you’re ready.
Don’t Miss: Homemade Strawberry Rhubarb Jam
Don’t Miss: Easy Mixed Berry Crisp
Also Try: Frozen Yogurt Bark With Berries
Ingredients
Method
- Wash the berries: Rinse blackberries gently, remove stems, leaves, or soft berries, then pat dry. If using frozen berries, thaw them first.

- Mash the berries: Add berries to a large bowl or pot and mash with a potato masher. Mash lightly for chunky jam or more thoroughly for a smoother texture.
- Strain seeds if desired: For less seedy jam, press part or all of the mashed berries through a fine mesh strainer or food mill.
- Add sugar and lemon: Transfer berries to a large heavy-bottomed pot. Stir in sugar and lemon juice until well combined.
- Boil the jam: Cook over medium heat until the sugar dissolves, then bring to a rolling boil. Add pectin if using, and boil until thickened.
- Skim the foam: Remove any pale foam from the surface with a spoon for a clearer, cleaner-looking jam.
- Test the set: Spoon a little jam onto a cold plate. If it wrinkles or holds its shape after 30 seconds, it’s ready.
- Fill the jars: Spoon hot jam into clean jars. Cool and refrigerate, freeze with extra space, or process in a water bath if canning.
