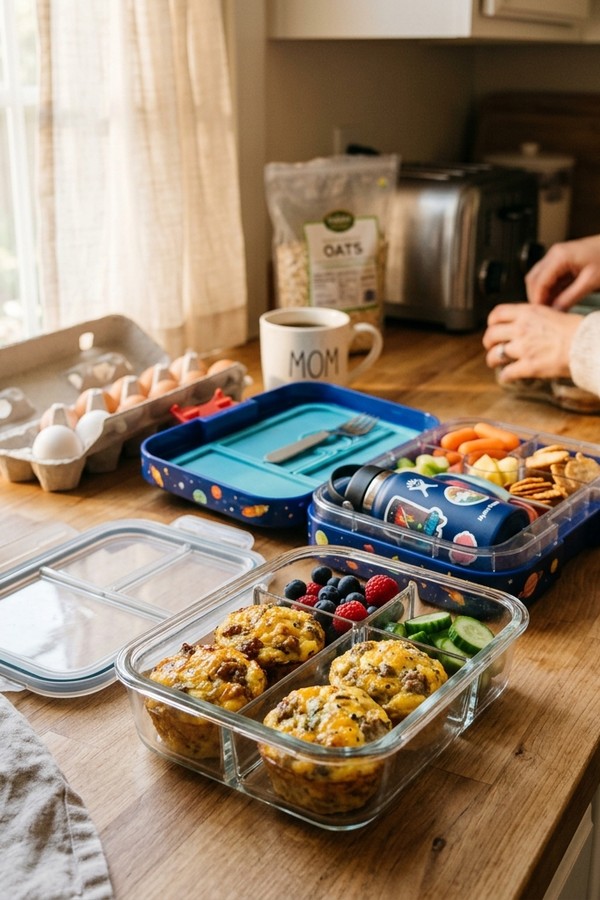
It’s 6:47 on a Tuesday morning, the kids are already yelling, and you haven’t made coffee yet. That moment is why I always keep a batch of these easy sausage muffins in the freezer — hot, cheesy, portable, and ready in 45 seconds. No cereal, no drive-through.
Whether you use Bisquick or prefer to make the batter from scratch, this guide covers both. One batch on Sunday, and a full week of breakfasts is sorted.
- Ready in 25 minutes (10 prep + 15 bake)
- Bisquick OR from-scratch — both methods included
- Freezer-friendly: make a batch on Sunday, eat all week
- Customizable for keto, gluten-free, and high-protein diets
- Kid-approved grab-and-go breakfast
Why These Easy Sausage Muffins Work So Well
One skillet, one bowl, one muffin tin — that’s all you need. No experience required, and even first-time bakers nail these on the first try.
On top of that, these freeze and reheat better than most baked goods. The sausage fat and cheese keep the crumb moist, so a pull from frozen still tastes genuinely fresh — not sad and rubbery.
The recipe is also flexible without being fussy. For example, you can swap spicy or mild sausage, cheddar or pepper jack, even Bisquick for all-purpose flour — all of it works. And a full batch takes less time than a single cup of coffee.
Bisquick vs. From Scratch — Which Should You Choose?
| Bisquick Version | From-Scratch Version | |
|---|---|---|
| Prep time | Faster (no measuring dry ingredients separately) | Slightly longer |
| Texture | Slightly fluffier, lighter | Denser, more biscuit-like |
| Flavor | Mild, neutral | Richer buttery flavor |
| Pantry need | Requires Bisquick on hand | Standard pantry staples |
| Best for | Quick weekday batch | Weekend baking, dietary control |
| GF-friendly? | Yes, with GF Bisquick | Yes, with GF flour + xanthan gum |
Ultimately, both versions are genuinely delicious. If you want speed, go Bisquick. If you want more control — or you don’t keep Bisquick at home — the scratch method is just as easy once you’ve done it once.
The Ingredients You’ll Need
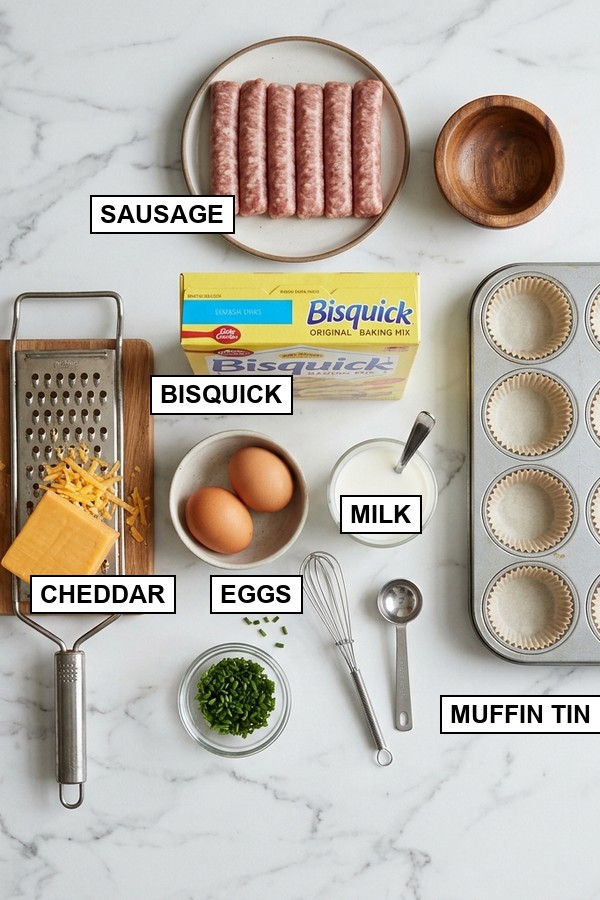
For the Bisquick Version
- 1 lb breakfast sausage (mild or spicy, casings removed) — the star of the show. Use a brand you actually like eating, because you’ll taste it in every bite.
- 2 cups Bisquick baking mix — it’s the shortcut that works. It already contains flour, leavening, and fat, so there’s nothing extra to measure out.
- ⅓ cup whole milk — whole milk gives the batter a richer crumb. You can use 2% in a pinch, but don’t skimp here if you can help it.
- 2 large eggs — they hold everything together and add a bit of protein.
- 1½ cups sharp cheddar cheese, shredded — sharp cheddar melts beautifully and adds a tangy, savory backbone. However, pre-shredded works — block cheese you grate yourself just melts significantly smoother.
- ¼ tsp garlic powder (optional) — just a whisper of it deepens the savoriness without making it taste like garlic bread.
- ¼ tsp black pepper — because it matters.
For the From-Scratch Version
Everything above, minus the Bisquick. Instead, you’ll use:
- 2 cups all-purpose flour — spoon and level it into the cup; don’t scoop directly from the bag or you’ll pack it too tight.
- 1 tbsp baking powder — this is what makes them rise. Fresh baking powder makes a meaningful difference, so check the expiry date.
- ½ tsp salt — Bisquick already has salt built in; the scratch version needs it added separately.
- 3 tbsp unsalted butter, melted — adds richness and that biscuity quality the Bisquick version gets from its built-in fat.
Substitutions and Swaps
Sausage options: Mild breakfast sausage is the classic, but spicy gives a great kick. Italian sausage (sweet or hot) works perfectly too. Turkey sausage is leaner and still delicious — although you should drain it well since it releases less fat. Chorizo adds a smoky, paprika-forward punch that pairs well with pepper jack cheese. If you love exploring bold sausage flavors, you’ll enjoy the same approach we use in our One Pan Cajun Chicken Sausage and Rice.
Cheese options: Sharp cheddar is the go-to, but pepper jack adds heat, Colby-Jack melts creamier, and mozzarella gives a milder pull.
Milk options: Whole milk, 2%, oat milk, or unsweetened almond milk all work. Avoid anything sweetened.
Add-ins that work beautifully: diced jalapeños (fresh or pickled), chopped green onion, diced bell pepper, baby spinach (squeeze it completely dry first), or sun-dried tomatoes.
Step-by-Step Instructions
Step 1: Preheat the Oven and Prep Your Pan
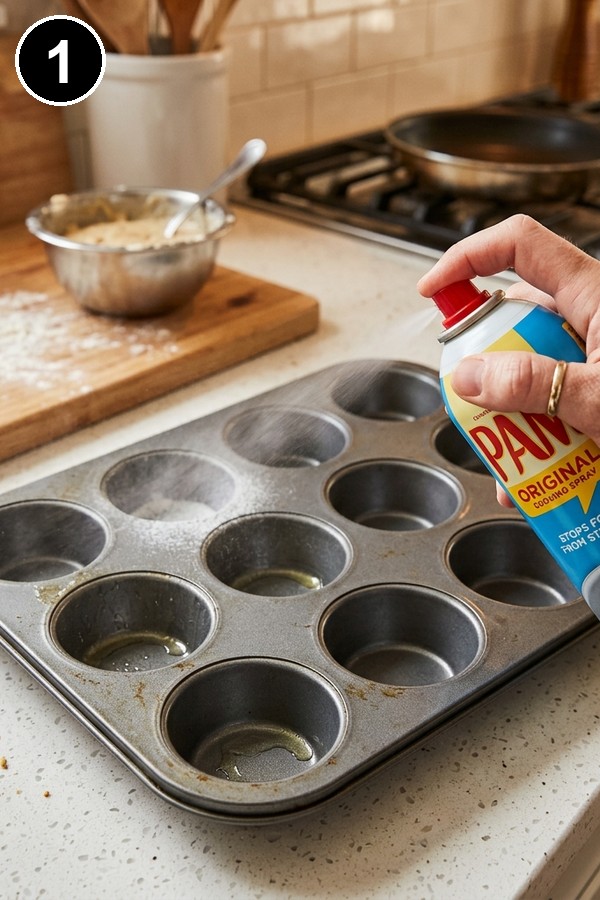
Heat your oven to 375°F (190°C). Ovens take about 10 minutes to properly reach temperature, so start here first — everything else fits within that window. While it preheats, grease your 12-cup muffin tin very generously with cooking spray. If you have a silicone muffin pan, skip the spray entirely. Trust me on this one: silicone is the reason my muffins never stick, no matter what.
Step 2: Brown the Sausage
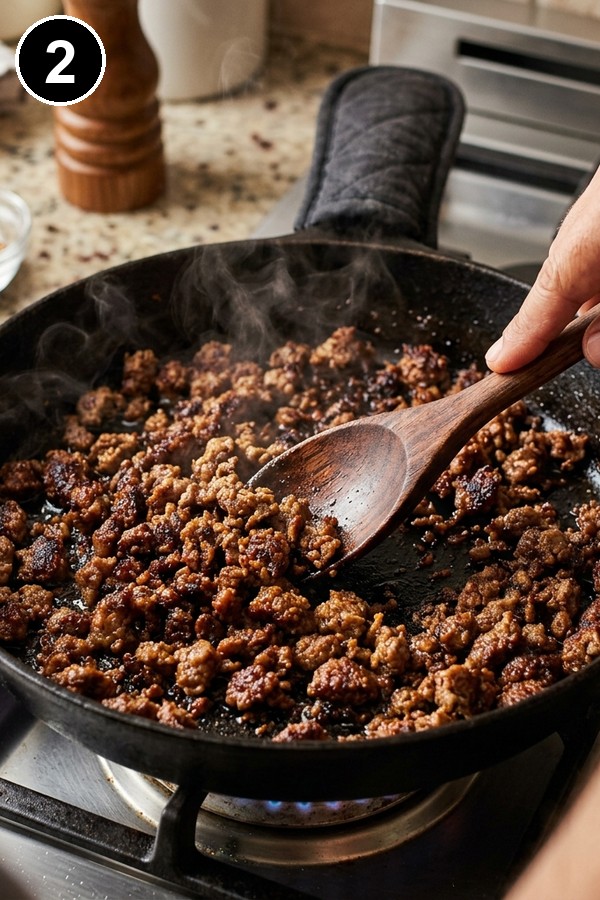
Place a large skillet over medium-high heat. Add the sausage and use a wooden spoon or spatula to break it into small crumbles as it cooks. You’re looking for fully browned crumbles — no pink anywhere — which takes about 6 to 8 minutes. Soon, the kitchen will start smelling like a breakfast diner, and that’s exactly right.
Once it’s cooked, drain any excess fat. Then transfer the sausage to a plate and let it cool for about 5 minutes. Adding hot sausage directly to the batter can partially cook the eggs, so this cooling step matters more than it sounds.
Step 3: Whisk Together the Batter
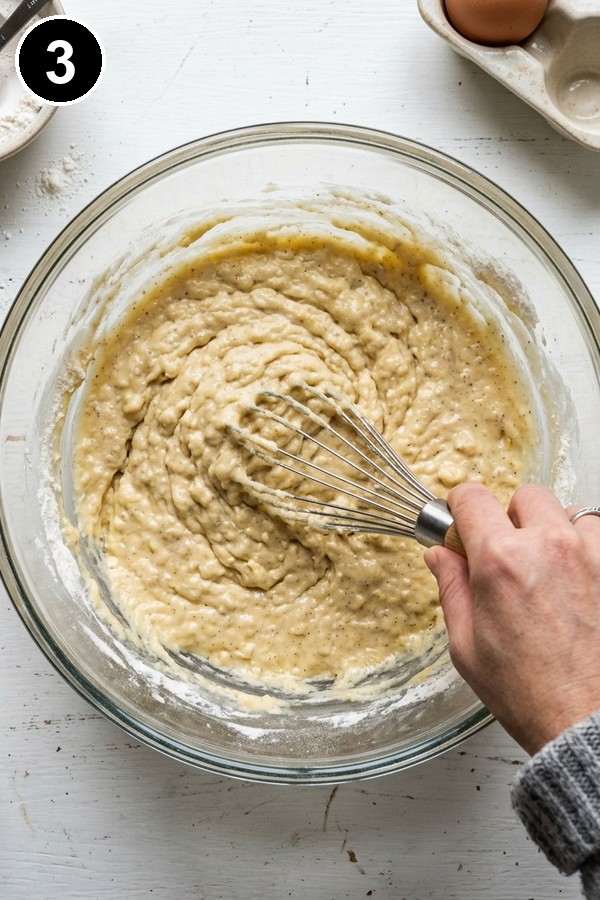
For the Bisquick version: In a large bowl, whisk together the Bisquick, milk, and eggs until just combined. A few lumps are totally fine — actually, they’re desirable.
For the from-scratch version: Whisk together the flour, baking powder, salt, garlic powder, and pepper in the bowl first. Make a small well in the center, then pour in the milk, eggs, and melted butter. Stir until just combined.
Here’s the thing that matters most with either method: stop mixing the moment it comes together. Over-mixing develops the gluten in the flour and collapses the air pockets from the leavening agents. The result? Dense, gummy muffins that feel like hockey pucks. Ten stirs or fewer is your rule.
Step 4: Fold In the Cheese and Sausage
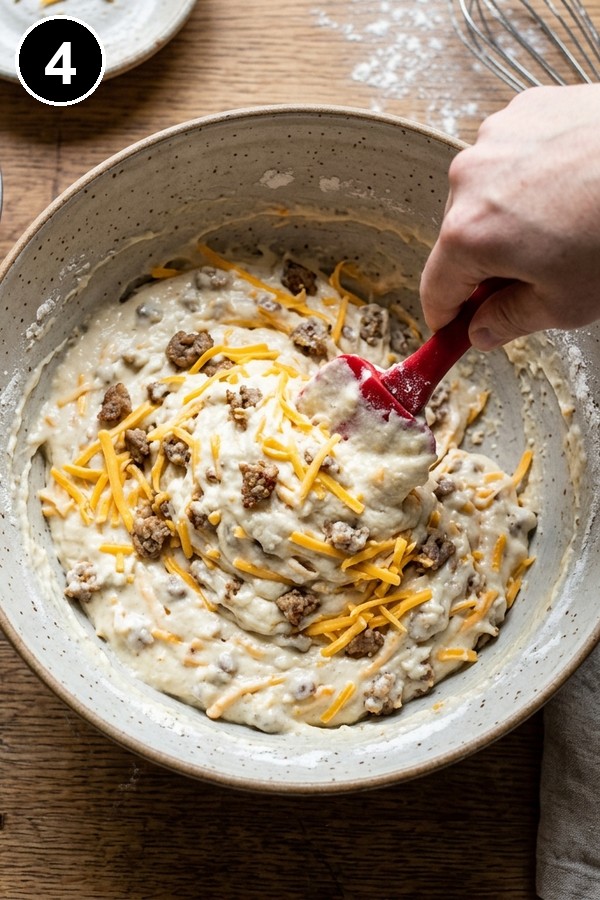
Add the shredded cheddar and cooled sausage crumbles to the bowl. Use a rubber spatula and fold — not stir, fold — everything together with 8 to 10 slow, sweeping strokes. You want the sausage and cheese distributed, not mashed into the batter. The batter should still look a little rough and lumpy, and that roughness is exactly what you want.
Step 5: Fill the Muffin Cups
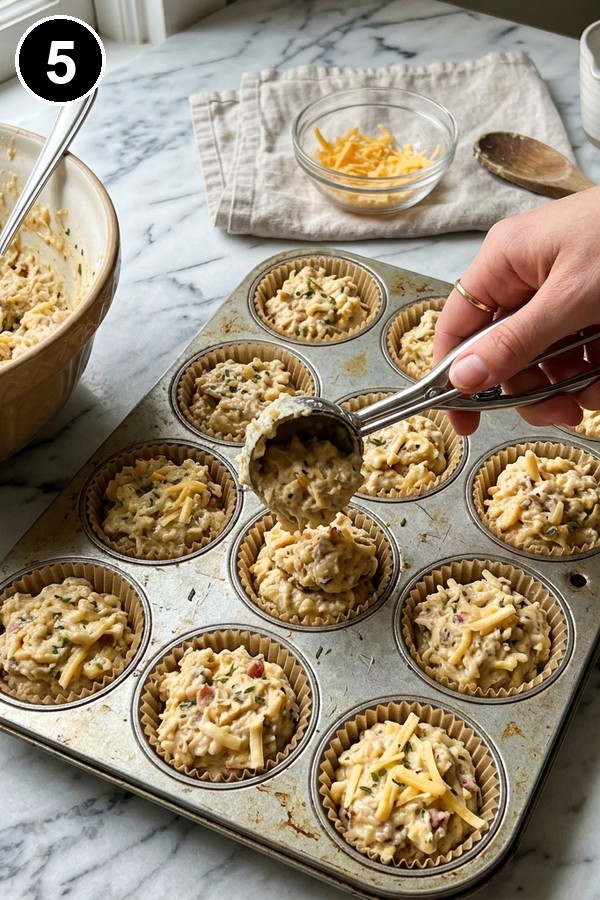
Divide the batter evenly among the 12 muffin cups, filling each about three-quarters of the way up. An ice cream scoop is perfect for this — it portions evenly and keeps the mess contained. The batter should feel thick and just slightly sticky as it drops into each cup. If you see bits of cheese poking out the top, that’s not a problem. That’s a future crispy cheese crust, and it’s the best part.
Step 6: Bake Until Golden
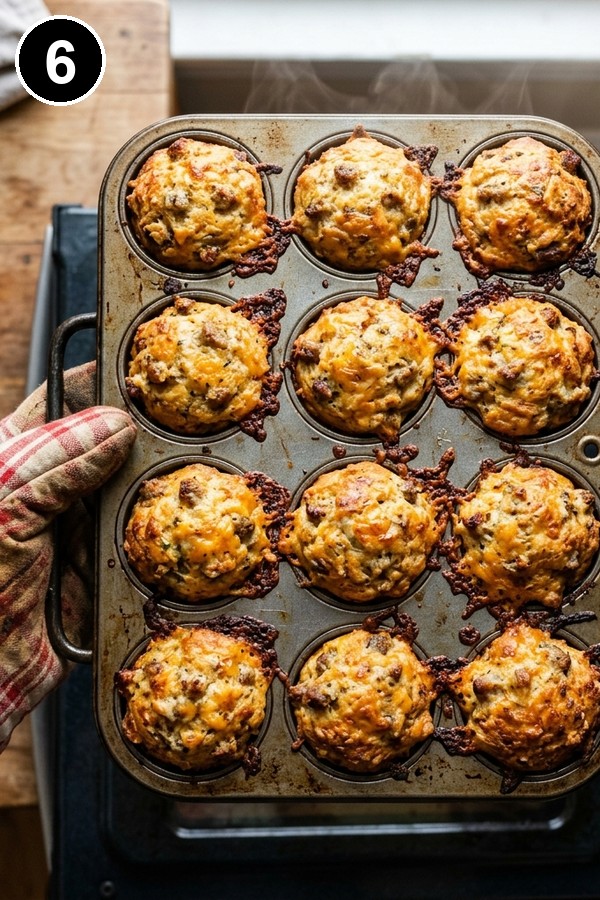
Slide the pan into the preheated oven. Bake for 13 to 16 minutes. At the 13-minute mark, open the oven and look for golden-brown tops with slightly crisped cheese edges. Insert a toothpick into the center of one muffin — if it comes out clean, they’re done. If it comes out wet with batter, give them another 2 minutes.
Step 7: Cool Before Removing
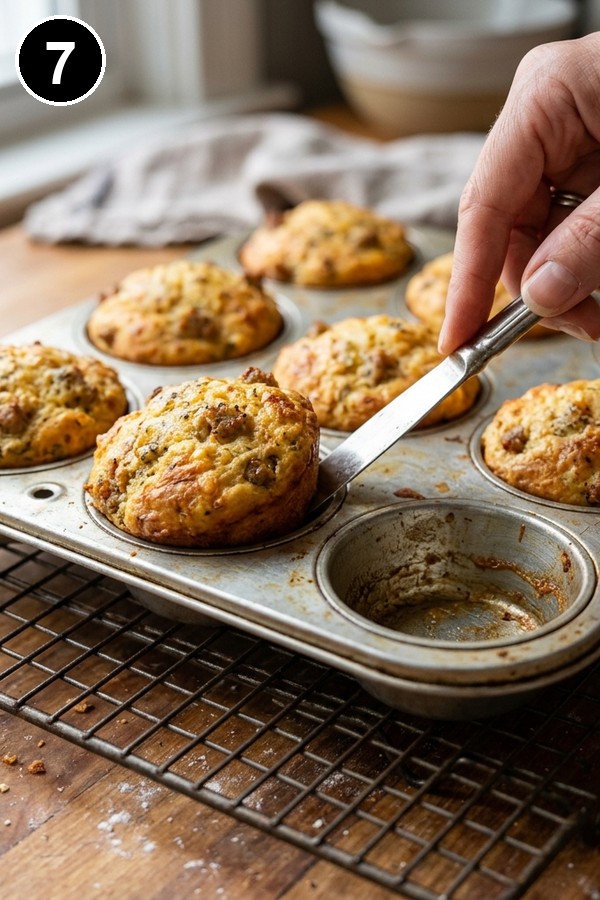
Let the muffins sit in the pan for 5 minutes before you try to remove them. After 5 minutes, run a butter knife gently around the edge of each muffin and lift them out. If you used a silicone pan, they’ll pop right out with just a gentle push from below. Serve them warm.
A Few Tiny Secrets for Perfect Easy Sausage Muffins Every Time
Never over-mix the batter. Indeed, this is the only real way to ruin these. The second the flour disappears into the wet ingredients, stop. Lumps are good. Smooth batter means you’ve gone too far.
Before folding in the sausage, let it cool. Five minutes on a plate is all you need. Otherwise, hot sausage can partially scramble the eggs in the batter and throw off the whole texture.
If you have one, a silicone muffin pan is a game-saver here. Metal pans — even non-stick ones — can cause sticking, especially with cheese that bubbles over the edges. Plus, a silicone pan releases cleanly every time, no knife needed.
Also, don’t worry if a little cheese spills on top of the filled cups before baking. In fact, that forms your crispy, golden cheese crust — it’s not a mistake, it’s the best part.
Finally, drain the sausage well after browning. Too much fat left in the pan makes the batter greasy and heavy. A paper towel on the draining plate absorbs what the colander misses.
For another high-protein breakfast with a similar no-fuss prep approach, our High-Protein Cottage Cheese Egg Bake is worth bookmarking alongside this one.
Customizing Your Sausage Muffins
Keto Sausage Muffins (Low-Carb)
Replace the Bisquick or all-purpose flour with 2 cups of blanched almond flour. Add ½ tsp xanthan gum to help with binding. As a result, carb count drops to roughly 3 to 4g net carbs per muffin versus 13g in the original.
Gluten-Free Sausage Muffins
Alternatively, use GF Bisquick or a 1:1 gluten-free all-purpose flour blend (like Bob’s Red Mill). Make sure your sausage is certified gluten-free too.
High-Protein Version
For extra protein, add one extra egg and stir in ½ cup of full-fat cottage cheese into the batter. The cottage cheese adds about 3 to 4g of protein per muffin without any texture or flavor change you’d notice.
Turkey Sausage Version
Swap pork sausage for turkey sausage. Add 1 extra tablespoon of butter to keep the crumb from drying out. Lean into the garlic powder and consider adding green onion for more depth.
Mini Muffin Tin Version
Fill a 24-cup mini muffin tin halfway and bake at 375°F (190°C) for 10 to 12 minutes. You’ll get about 24 bite-sized pieces from one standard batch.
Meal Prep and Freezer Guide — The Sunday Setup
How to Make Ahead
- Refrigerator: Airtight container, up to 4 days.
- Freezer: Let cool completely. Wrap each individually in foil, then store in a zip-top freezer bag. Good for up to 3 months.
For the ultimate Sunday prep session, add our Hamburger Hashbrown Casserole to the lineup. Both bake at similar temperatures — run them back-to-back and have a full week covered in under an hour.
The 5-Day Breakfast Plan
- Monday: Pull 2 muffins from the freezer the night before and refrigerate overnight.
- Tuesday–Thursday: Grab 2 muffins each morning, microwave on medium power for 45 to 60 seconds.
- Friday: Fresh batch from the fridge — slightly better texture, nice way to end the week.
How to Reheat
From frozen: Microwave on medium power (50%) for 45 to 60 seconds. Medium power matters — high power makes the cheese rubbery. Or wrap in foil and reheat in a 325°F (165°C) oven for 10 to 12 minutes for a crispier exterior.
From the refrigerator: Microwave on high for 20 to 30 seconds.
What to Serve With Easy Sausage Muffins
These muffins hold their own completely, though they pair effortlessly with a few good morning companions.
Drinks: Strong black coffee, fresh-squeezed orange juice, or hot tea.
Savory Brunch Ideas:
- Easy Bacon, Egg and Hashbrown Casserole — a natural pairing for a big weekend brunch spread
- Scrambled eggs or a simple fried egg on the side
- Sliced avocado with a pinch of flaky salt
Light and Fresh: Fresh berries, melon, or Greek yogurt with honey.
Nutrition Info
Estimates based on 1 muffin (of 12, Bisquick version with standard pork sausage and cheddar).
| Per Muffin | |
|---|---|
| Calories | ~195 kcal |
| Carbohydrates | ~13g |
| Fat | ~12g |
| Protein | ~9g |
| Sugar | ~2g |
| Fiber | ~0.5g |
| Sodium | ~410mg |
Common Questions and Easy Fixes
1. Can I make sausage muffins without Bisquick?
Yes — use 2 cups all-purpose flour, 1 tablespoon baking powder, and ½ teaspoon salt, then add 3 tablespoons melted butter to the wet ingredients.
2. Can sausage muffins be frozen?
Absolutely — up to 3 months. Therefore, wrap each one individually in foil, store in a freezer bag, and reheat from frozen in the microwave on medium power for 45 to 60 seconds.
3. How long do sausage muffins last in the fridge?
Generally, up to 4 days in an airtight container — after that, the texture starts to dry out noticeably.
4. Can I use turkey sausage instead of pork?
Definitely. Add an extra tablespoon of melted butter to compensate for the lower fat content, and season more assertively since turkey sausage has a milder flavor.
5. Why are my sausage muffins dense and heavy?
Almost always, it comes down to over-mixing. Stop stirring the moment the dry ingredients disappear — lumps are intentional and bake out fine. Also check that your baking powder is fresh.
6. Can I make these in a mini muffin tin?
Sure — fill a 24-cup mini tin halfway and bake at 375°F for 10 to 12 minutes. In that case, you’ll get about 24 bite-sized pieces from one batch.
The Bottom Line
Overall, these easy sausage muffins are one of those recipes that earn their place permanently in your rotation. Make them once and you’ll understand why. Indeed, they’re cheesy, savory, portable, and genuinely freezer-friendly — which means breakfast on Tuesday through Friday basically takes care of itself.
More Recipes You’ll Love
🔥 Don’t Miss: Easy Bacon, Egg and Hashbrown Casserole – The ultimate make-ahead brunch bake
🔥 Don’t Miss: High-Protein Cottage Cheese Egg Bake – Protein-packed, meal-prep-perfect breakfast
🔥 Don’t Miss: Hamburger Hashbrown Casserole – The perfect Sunday batch-cooking companion

Easy Sausage Muffins
Ingredients
Method
- Heat oven to 375F (190C). Grease a 12-cup muffin tin generously with cooking spray, or use a silicone muffin pan - silicone releases cleanly without spray.

- Cook sausage in a large skillet over medium-high heat, breaking into small crumbles, until fully browned with no pink remaining - about 6 to 8 minutes. Drain excess fat and let cool for 5 minutes.
- In a large bowl, whisk together Bisquick (or flour + baking powder + salt), milk, and eggs until just combined. Stop the moment it comes together - a few lumps are fine. Do NOT over-mix.
- Add the cooled sausage and shredded cheddar to the batter. Fold gently with a rubber spatula - 8 to 10 sweeping strokes only. The batter should still look rough and lumpy.
- Divide batter evenly among the 12 muffin cups, filling each about 3/4 full. An ice cream scoop works perfectly for even portions.
- Bake for 13 to 16 minutes, until the tops are golden-brown and a toothpick inserted in the center comes out clean. Check at 13 minutes.
- Let muffins cool in the pan for 5 minutes. Run a butter knife gently around each muffin to release, then lift out. Serve warm.