Tasty French Dip Sliders are the perfect quick comfort food when you want something warm, cheesy, and satisfying without spending hours in the kitchen. There’s something about sliders that just works—the pull-apart softness, the savory beef, and that rich au jus dipping sauce that brings everything together. They’re easy, fast, and feel like a treat every single time.
Why You’ll Love These Sliders
Let’s be honest. Some recipes promise comfort but deliver… meh. This isn’t one of them.
- Ready in about 30 minutes from start to finish
- Uses simple, easy-to-find ingredients (nothing obscure)
- Bakes in one dish—less cleanup, always a win
- Perfect for feeding a group or saving leftovers
- That au jus dip? It turns a good slider into something unforgettable
You know what? They’re also surprisingly flexible. Swap the cheese, change the protein, adjust the sauce—it still works.
Ingredients

You won’t need a long grocery list here. That’s part of the appeal.
Main Ingredients
- 12 slider buns (Hawaiian rolls are ideal for a soft, slightly sweet base)
- 12–16 oz deli roast beef (thinly sliced)
- 6–8 slices provolone or Swiss cheese
Butter Topping (The Flavor Maker)
- 4 tablespoons butter, melted
- 1 tablespoon Dijon mustard
- 1 teaspoon onion powder
- 1 teaspoon garlic powder
- Optional: poppy seeds for texture
Au Jus Sauce
- 2 cups beef broth
- 1 tablespoon Worcestershire sauce
- Optional: black pepper, garlic powder
Here’s the thing—nothing here is complicated. But when combined? It tastes like something far more involved.
Step-by-Step Instructions
Step 1: Prep the Rolls
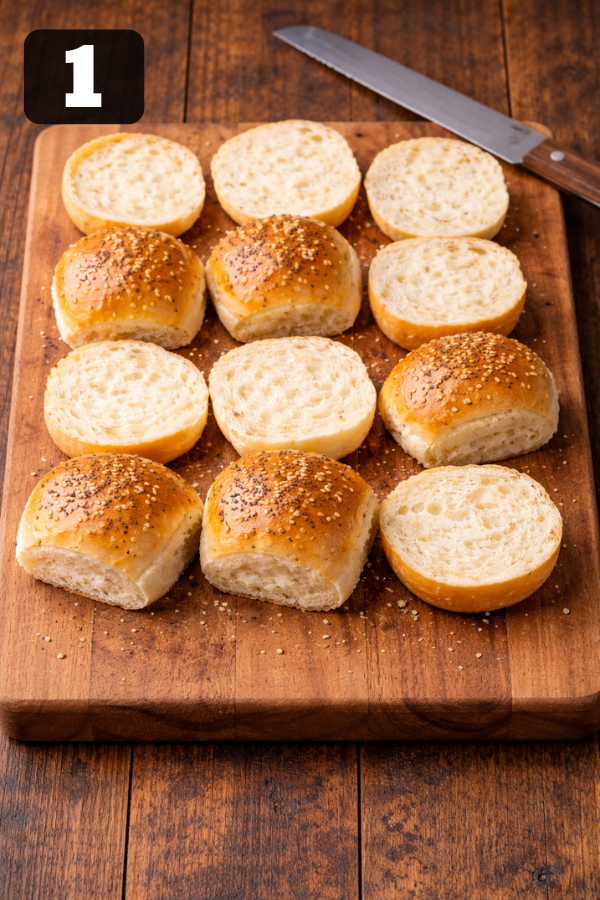
Slice the slider buns horizontally as one sheet. Keep them connected—it makes assembly easier and gives that classic pull-apart feel.
Step 2: Build the Layers
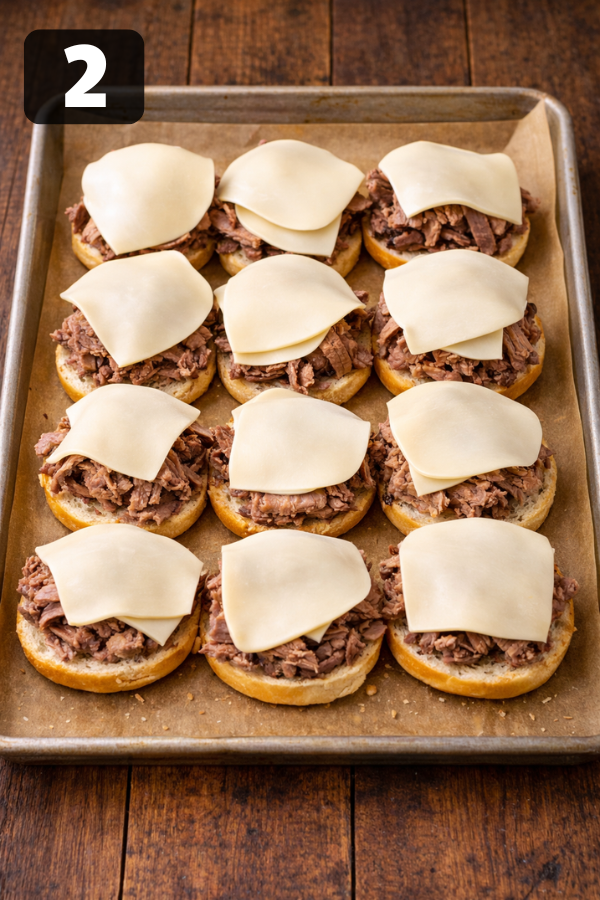
Place the bottom half into a baking dish. Add the roast beef evenly, then layer the cheese on top.
Tip: Slightly fold the beef slices instead of laying them flat. It creates better texture.
Step 3: Add the Top Layer
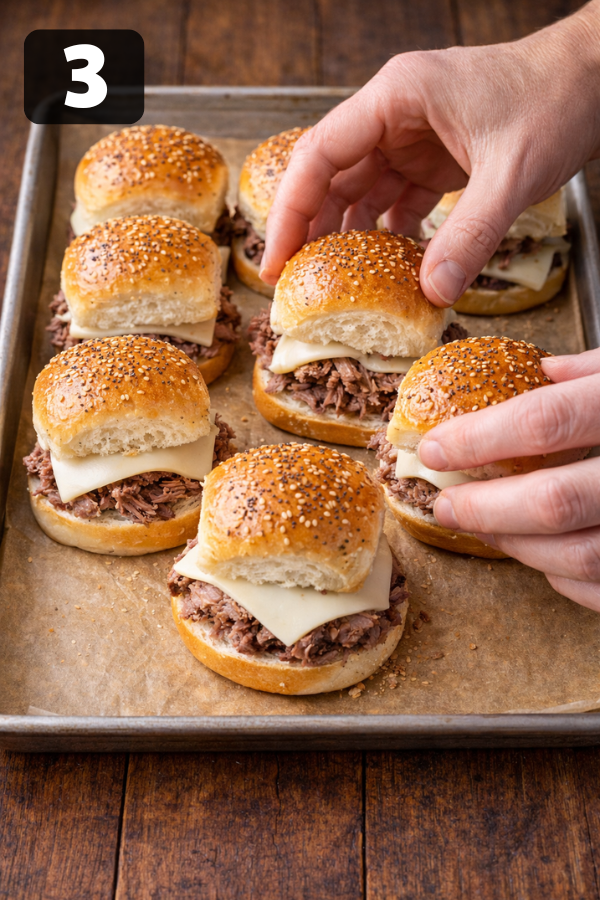
Place the top buns back on. Press gently—just enough to settle everything.
Step 4: Pour the Butter Mixture
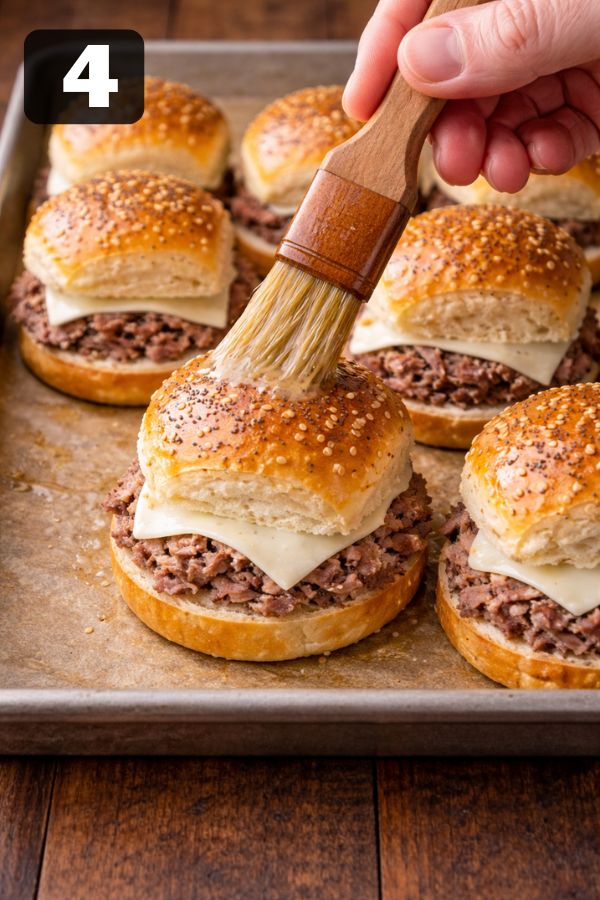
Mix the melted butter with mustard and spices. Brush or pour it evenly over the buns.
Let it sit for about 5 minutes. This step matters—it allows the bread to soak up all that flavor.
Step 5: Bake
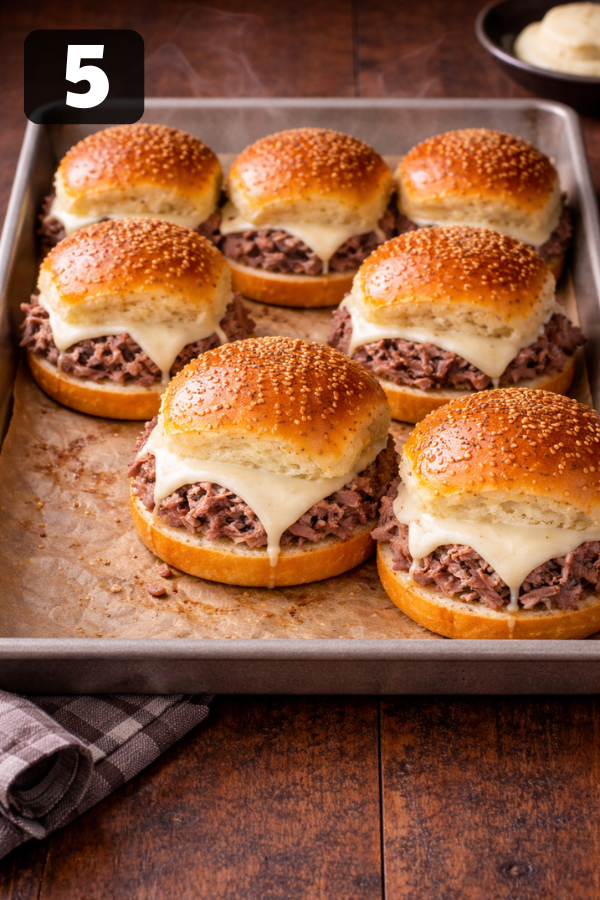
- Cover with foil and bake at 350°F for 15 minutes
- Remove foil and bake another 5 minutes until golden
You’re looking for melted cheese and lightly crisp tops.
Let’s Talk About That Au Jus
Honestly, the sliders are great on their own—but the dipping sauce? That’s what takes them over the top.
Quick Version
Heat beef broth with Worcestershire sauce for about 5 minutes.
Upgraded Version
Add:
- Garlic powder
- Onion powder
- A pinch of black pepper
If you’ve ever dipped a sandwich into something warm and savory, you already know—it changes everything.
Pro Tips That Make a Real Difference
A few small tweaks can take this from good to “why is this so good?”
- Don’t skip covering with foil at first—it keeps everything juicy
- Use fresh cheese instead of pre-shredded for better melting
- Avoid overbaking (dry sliders are disappointing, let’s be honest)
If you want to go a step further:
- Add caramelized onions for depth
- Spread a little horseradish sauce for a kick
Storage & Leftovers
These sliders store surprisingly well.
- Fridge: Up to 3–4 days in an airtight container
- Reheat: Oven at 300°F for 10–12 minutes
- Avoid microwave if possible—it softens the bread too much
You can also freeze them before baking. Just add extra time when cooking.
What to Serve With Them
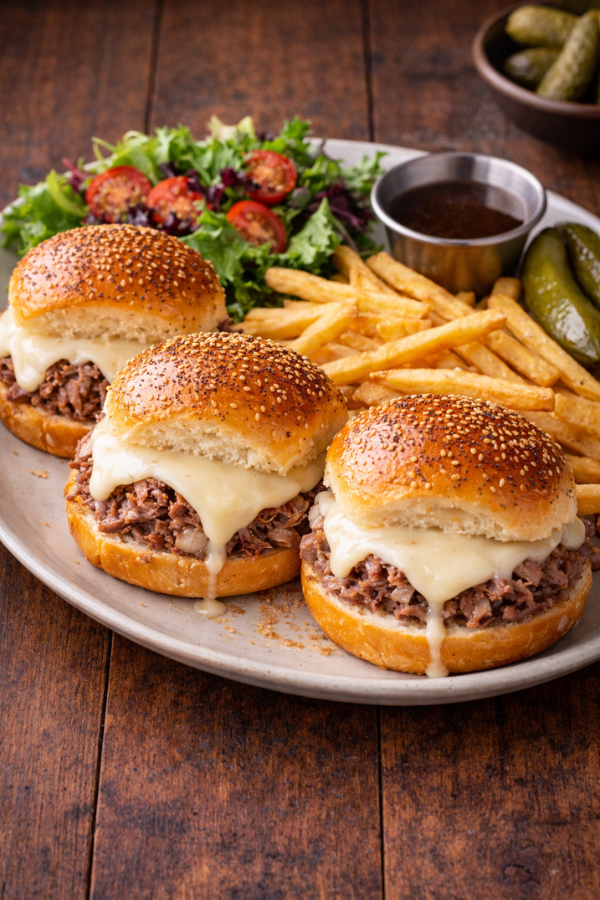
These sliders are rich, so pairing matters.
Easy Sides
- Fries or sweet potato fries
- Coleslaw
- Pickles
Lighter Options
- Green salad
- Roasted vegetables
Drinks
- Iced tea
- Sparkling lemonade
- Light beer
Honestly, even just chips on the side work fine. No judgment here.
FAQs
1. Can I make these ahead of time?
Yes. Assemble them up to 24 hours in advance, store in the fridge, and bake when ready.
2. What cheese works best?
Provolone is the classic choice, but Swiss adds more flavor. Mozzarella melts beautifully but is milder.
3. Can I use another protein?
Absolutely—turkey, chicken, or even mushrooms for a vegetarian version.
4. Are they spicy?
Not at all. But you can add heat with jalapeños or spicy mustard.
Nutrition Info
- Calories: 300–400 per 2 sliders
- Protein: ~20g
- Carbs: ~25g
- Fat: ~15–20g
Not exactly light—but definitely satisfying.
Final Thoughts
You know those meals that feel like more effort than they actually are? This is one of them.
These Tasty French Dip Sliders are simple, yes—but they don’t taste simple. They’re warm, rich, and just a little indulgent. Perfect for busy nights when you still want something that feels homemade.
And honestly? Once you make them, they’ll probably become part of your regular rotation.
Don’t Miss: BBQ Chicken Sliders

Ingredients
Method
- Step 1: Prep the RollsSlice the slider buns horizontally as one sheet. Keep them connected—it makes assembly easier and gives that classic pull-apart feel.

- Step 2: Build the LayersPlace the bottom half into a baking dish. Add the roast beef evenly, then layer the cheese on top.Tip: Slightly fold the beef slices instead of laying them flat. It creates better texture.
- Step 3: Add the Top LayerPlace the top buns back on. Press gently—just enough to settle everything.
- Step 4: Pour the Butter MixtureMix the melted butter with mustard and spices. Brush or pour it evenly over the buns.Let it sit for about 5 minutes. This step matters—it allows the bread to soak up all that flavor.
- Step 5: BakeCover with foil and bake at 350°F for 15 minutesRemove foil and bake another 5 minutes until goldenYou’re looking for melted cheese and lightly crisp tops.


