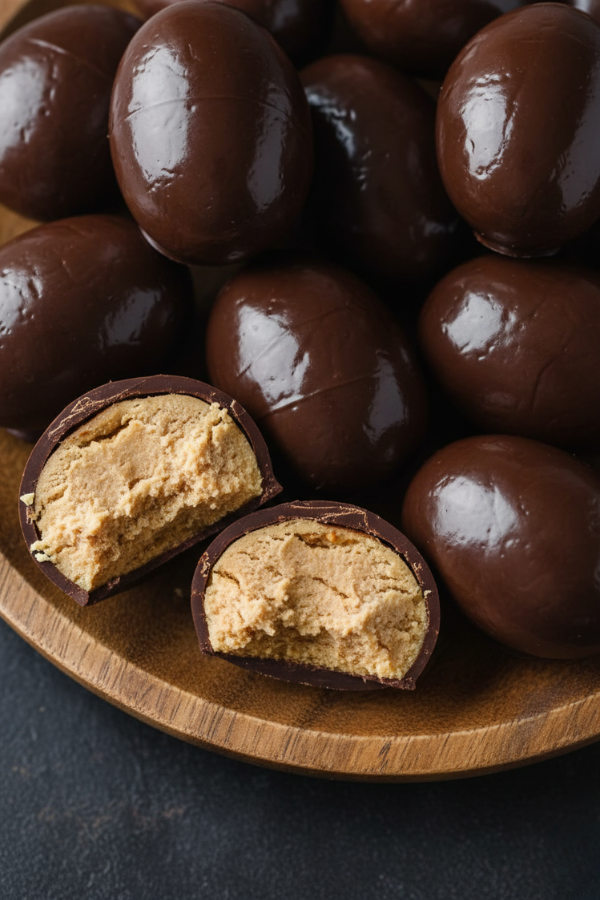
These Peanut Butter Easter Eggs are a quick, no-bake holiday treat that combines creamy peanut butter filling with a smooth chocolate coating. Perfect for Easter baskets or make-ahead desserts, they’re easy to customize, beginner-friendly, and deliver that irresistible sweet–salty balance everyone loves—without the hassle of baking.
So… What Makes These So Irresistible?
There’s something nostalgic about peanut butter and chocolate together—it just works. These Easter eggs take that classic combo and give it a homemade twist. The center is smooth and slightly dense, almost like a softer version of a candy shop favorite. The outer chocolate layer adds just enough snap to make each bite satisfying.
Honestly, they’re a bit like homemade Reese’s—but better. Less sugary, more balanced, and you can tweak them however you like.
Why You’ll Love This Recipe
- Ready in about 1 hour total (including chilling time)
- No baking required—zero oven stress
- Uses simple pantry ingredients
- Easy enough for beginners, fun enough for kids
- Perfect for make-ahead desserts or Easter baskets
And here’s the thing—once you make these once, you’ll probably keep making them long after Easter.
Ingredients You’ll Need
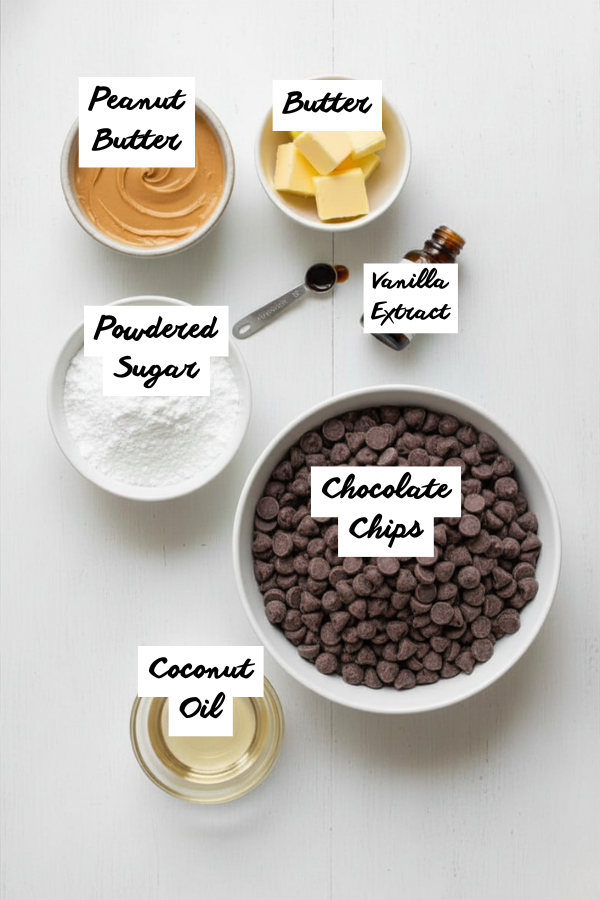
For the Peanut Butter Filling
- 1 cup creamy peanut butter (smooth texture works best)
- 4 tbsp unsalted butter, softened
- 2–3 cups powdered sugar
- 1 tsp vanilla extract
Tip: If your peanut butter is natural and oily, you may need a bit more powdered sugar to firm things up.
For the Chocolate Coating
- 1½–2 cups semi-sweet chocolate chips
- 1–2 tbsp coconut oil (for smooth melting)
Optional Add-Ins (If You Want to Get Creative)
- Crushed graham crackers → adds texture
- Sea salt flakes → balances sweetness
- Rice cereal → light crunch
- Dark chocolate → less sweet, more depth
Step-by-Step Instructions
Step 1 – Make the Filling
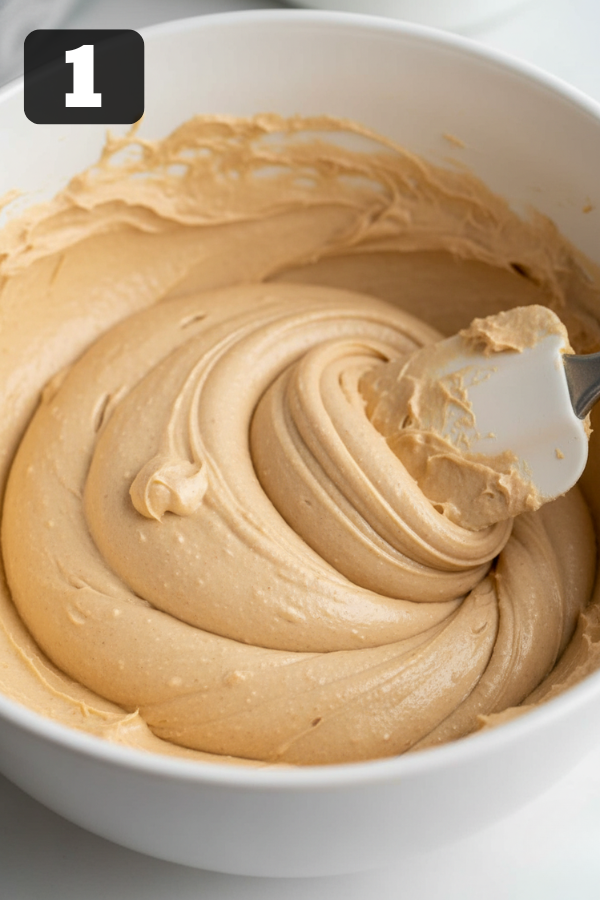
Mix peanut butter and butter until smooth and creamy.
Gradually add powdered sugar until the mixture becomes soft but holds shape.
You’re aiming for a dough-like consistency—not sticky, not crumbly.
Step 2 – Shape the Eggs
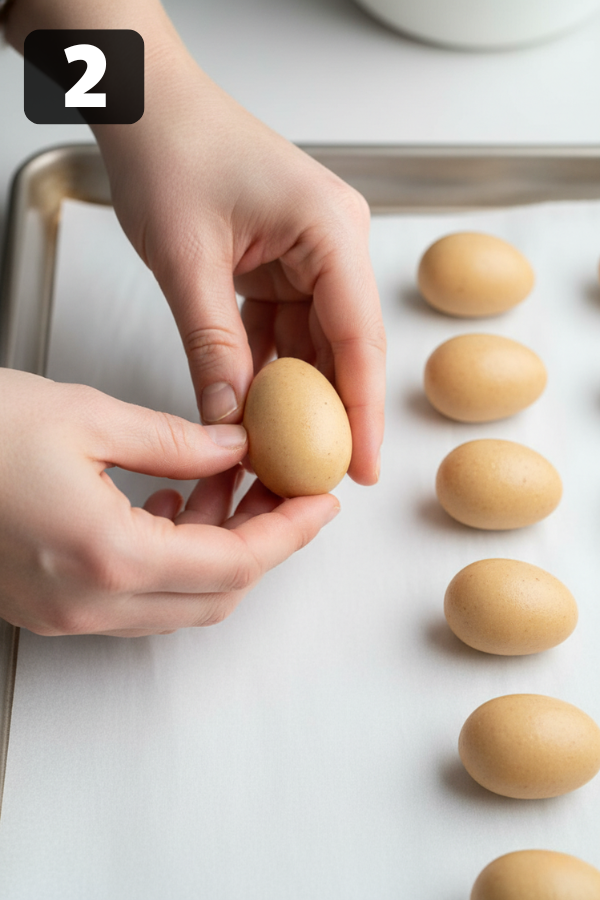
Scoop about 1–2 tablespoons of mixture and shape into small egg forms.
Slightly imperfect shapes are totally fine—it’s homemade, after all.
Step 3 – Chill (Don’t Skip This)
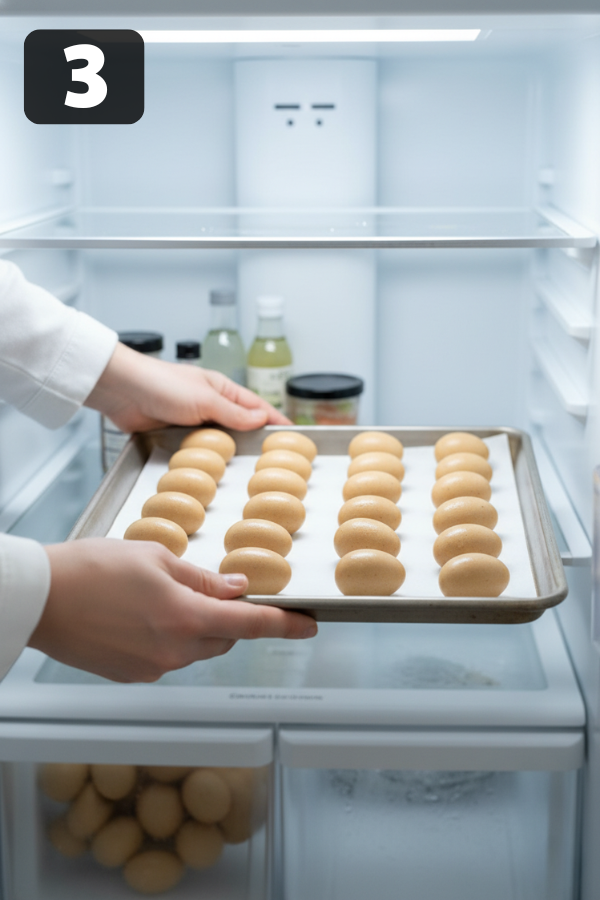
Place eggs on a lined tray and refrigerate for 30–60 minutes.
This step is what keeps them from falling apart later.
Step 4 – Melt the Chocolate
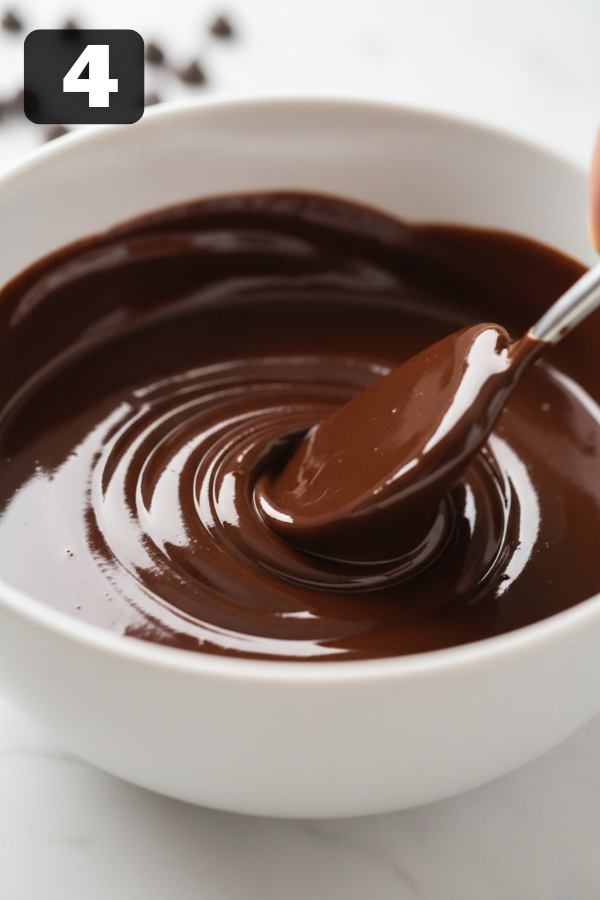
Melt chocolate in 30-second intervals, stirring between each round.
Add coconut oil for a smoother, shinier finish.
Step 5 – Dip & Coat
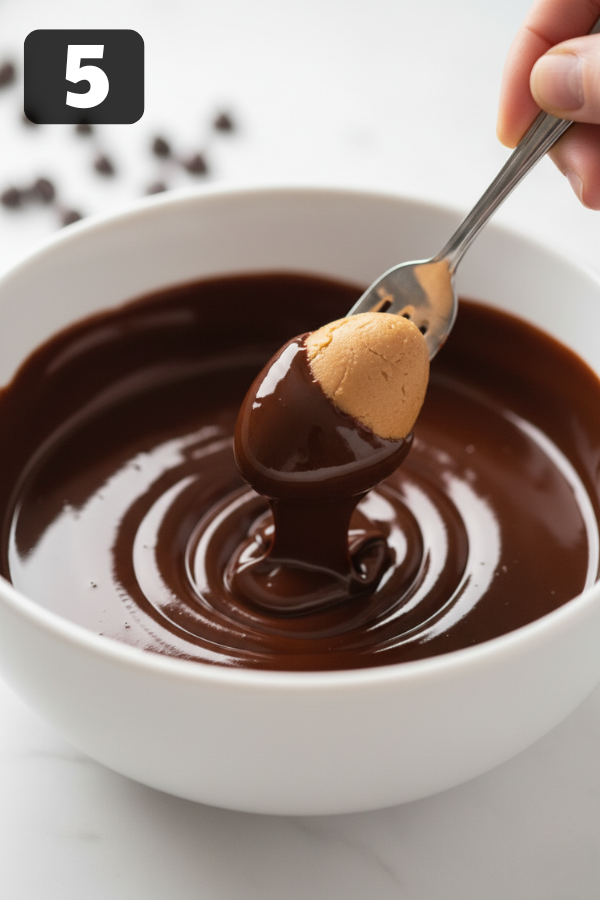
Use a fork to dip each egg into melted chocolate.
Let excess drip off before placing back on the tray.
Step 6 – Final Chill

Refrigerate again for 15–20 minutes until chocolate sets.
And that’s it. Simple, right?
Tips That Make a Big Difference
- Chill before dipping → cleaner coating
- Add a pinch of salt → enhances flavor
- Don’t overheat chocolate → prevents grainy texture
- Use a fork for dipping → more control
If you’ve ever had chocolate seize up on you, you know how frustrating that can be. Keep the heat low and steady—it’s worth it.
Storage & Make-Ahead Notes
- Fridge: up to 2 weeks in airtight container
- Freezer: up to 2–3 months
- Best served: slightly chilled or room temp
These are great for prepping ahead of time—especially during busy holiday weeks.
What to Serve With These
- Coffee → cuts the sweetness nicely
- Cold milk → classic pairing
- Fresh berries → adds contrast
Or honestly… just eat them straight from the fridge. No judgment.
FAQs
1. Can I make these ahead of time?
Yes, and they actually taste better after a day in the fridge.
2. Can I use crunchy peanut butter?
You can—but the texture will be less smooth and more crumbly.
3. Can I make them vegan?
Yes. Use plant-based butter and dairy-free chocolate.
4. Why is my filling too soft?
It likely needs more powdered sugar. Add gradually until firm.
5. Why is my chocolate cracking?
Temperature shock—let the eggs sit briefly before dipping.
Common Issues (And Easy Fixes)
- Filling too sticky → add more powdered sugar
- Eggs losing shape → chill longer
- Chocolate too thick → add coconut oil
- Uneven coating → tap fork gently after dipping
Nutrition Info
- Calories: 180–220
- Fat: 12–15g
- Carbs: 15–18g
- Protein: 4–5g
Final Thoughts
These Peanut Butter Easter Eggs are one of those recipes that feel almost too simple—but somehow always impress. They’re quick, flexible, and honestly kind of addictive. You make a batch thinking it’ll last a week… and suddenly they’re gone in two days.
So maybe double the recipe. Just in case.
Don’t Miss: Chocolate Peanut Butter Ritz Cookies (Easy & Delicious)
Don’t Miss: Frozen Greek Yogurt Peanut Butter Bites (Easy & Delicious)
Ingredients
Method
- Step 1 – Make the FillingMix peanut butter and butter until smooth and creamy. Gradually add powdered sugar until the mixture becomes soft but holds shape.You’re aiming for a dough-like consistency—not sticky, not crumbly.

- Step 2 – Shape the EggsScoop about 1–2 tablespoons of mixture and shape into small egg forms.Slightly imperfect shapes are totally fine—it’s homemade, after all.
- Step 3 – Chill (Don’t Skip This)Place eggs on a lined tray and refrigerate for 30–60 minutes.This step is what keeps them from falling apart later.
- Step 4 – Melt the ChocolateMelt chocolate in 30-second intervals, stirring between each round.Add coconut oil for a smoother, shinier finish.
- Step 5 – Dip & CoatUse a fork to dip each egg into melted chocolate. Let excess drip off before placing back on the tray.
- Step 6 – Final ChillRefrigerate again for 15–20 minutes until chocolate sets.And that’s it. Simple, right?


